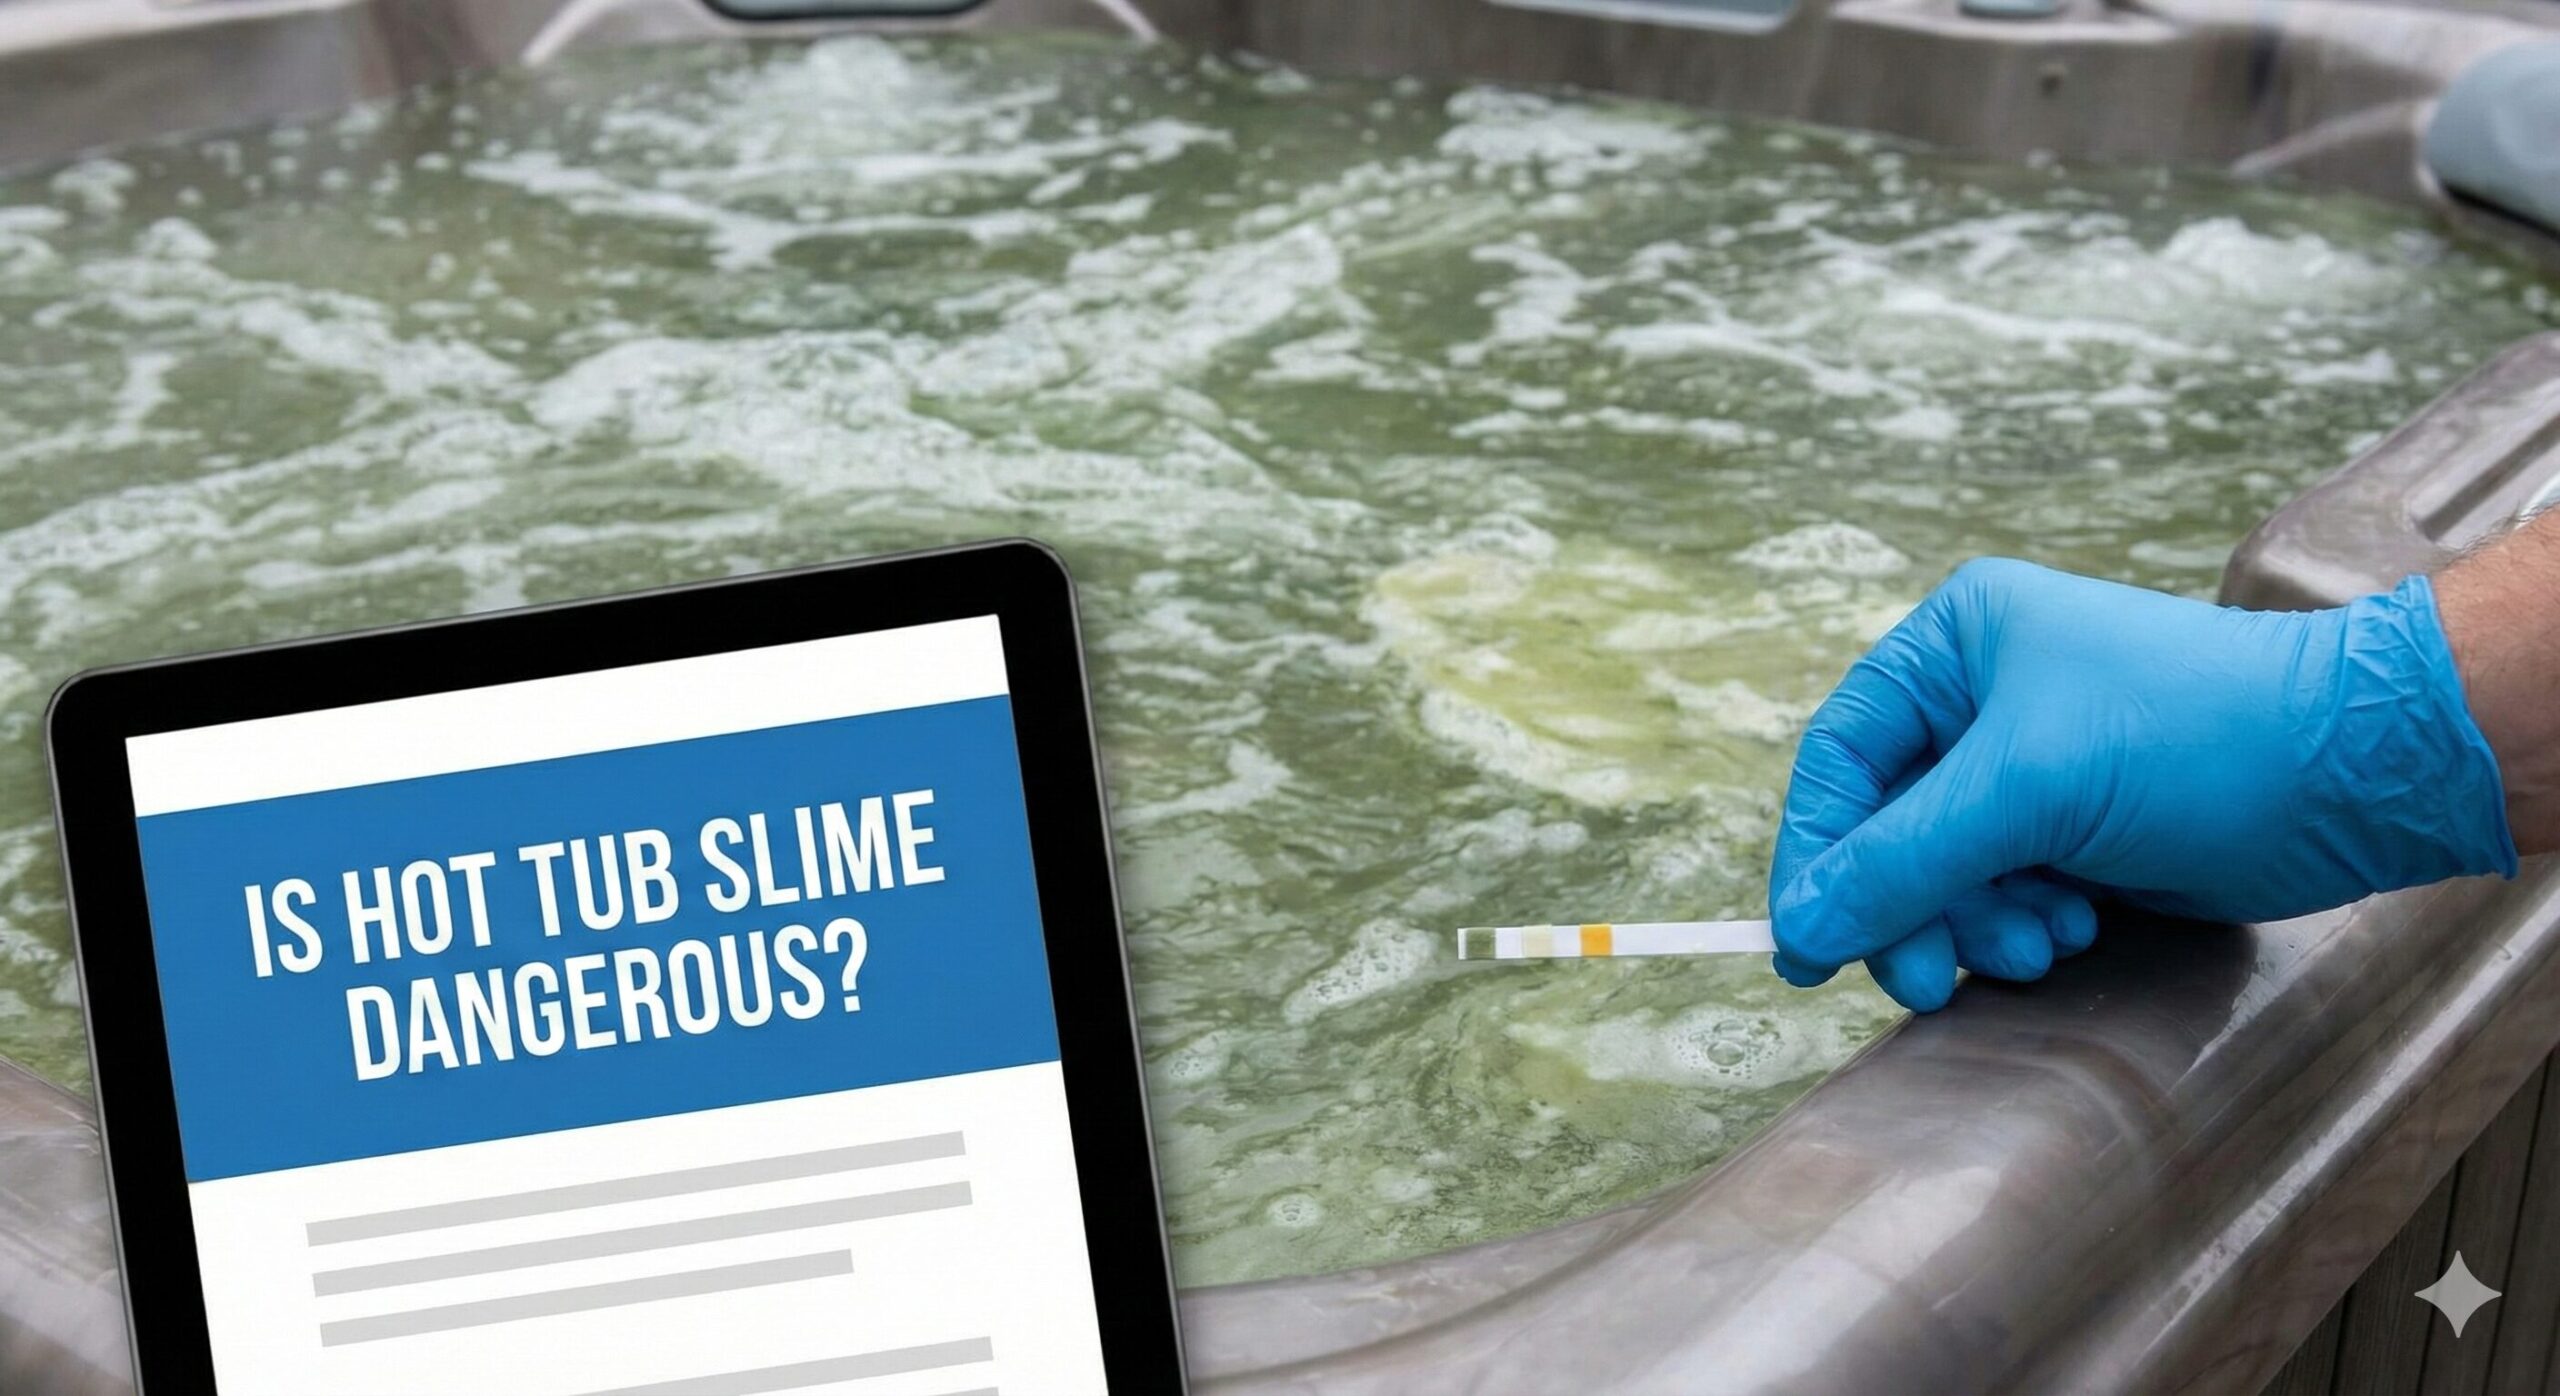
Is Hot Tub Slime Dangerous? The Truth About Biofilm
You reach out to touch the side of your hot tub, and instead of smooth acrylic or vinyl, you feel it: a slick, slimy coating. Maybe it’s pinkish, maybe it’s green, or maybe it’s invisible but feels like mucus.
This “hot tub slime” is a common problem, but many owners dismiss it as just dirty water. The reality is much more serious. That slime is a fortress for bacteria that your chlorine can’t kill easily.
In this guide, we will uncover exactly what that slime is, the specific health risks it poses, and the heavy-duty cleaning method required to destroy it. We’ll also go far beyond the basics — covering the microbiology of how these colonies form, the exact spots inside your plumbing where they hide, how to compare different line-flush products, how water chemistry either starves or feeds bacteria, how to build a seasonal maintenance calendar that keeps the problem from ever coming back, and how the true cost of ignoring slime compares to the cost of a few dollars of prevention each month.
Owning a hot tub is supposed to be relaxing. It should be the highlight of your evening, not a health gamble. Unfortunately, thousands of spa owners unknowingly soak in water that looks clear on a test strip but is teeming with bacteria clinging to the inside of the plumbing where no test strip can reach. Understanding the difference between “clean-looking” water and “actually clean” water is the single biggest shift in mindset that separates spa owners who fight recurring problems from those who never think about slime again.
What Is That Slime? (It’s Alive!)
That slime is technically called biofilm. It isn’t just dirt; it is a living colony of bacteria, fungi, and other microorganisms that have bonded together.
When free-floating bacteria land on a surface (like your hot tub pipes or walls), they secrete a sticky, protective slime layer. This layer acts like a shield. Standard chlorine or bromine might kill the bacteria on the surface of the slime, but the bacteria underneath stay safe and continue to multiply.
To understand the science behind this “bacterial bunker,” read our deep dive on what is biofilm in hot tubs.
What makes biofilm uniquely stubborn compared to ordinary dirt or algae is the matrix it builds around itself. Microbiologists call this matrix the EPS layer, short for extracellular polymeric substance. Picture a apartment building made of sugars, proteins, and DNA fragments that the bacteria themselves secrete. Individual cells move into this structure, and once inside, they behave completely differently than they would floating freely in water. They become more tolerant of heat, more tolerant of chemical sanitizers, and far more resistant to being physically flushed away. This is why a slime problem that seems to disappear after a quick wipe-down almost always returns within days — you removed the visible surface, but the architecture underneath was left completely intact.
It also helps to understand that biofilm is not one single type of organism. It is closer to a small ecosystem. Bacteria are usually the primary builders, but yeasts, molds, algae spores, and even microscopic debris from skin, hair, and cosmetic products get trapped inside the matrix as it grows. Over time, this turns a thin, barely visible film into a thick, rubbery coating that can peel off in sheets once it’s finally dislodged.
Types of Hot Tub Slime and Gunk (And What Each One Means)
Not all hot tub grime looks or behaves the same way. Learning to recognize what you’re looking at helps you choose the right response instead of guessing.
Clear or Colorless Slime
This is the most common type and the easiest to miss because it doesn’t change the color of your water. It usually shows up as a slick, almost oily feeling on the shell, seats, and around the jets. It is typically an early-stage bacterial biofilm that hasn’t yet trapped enough debris to develop color.
Pink or Reddish Slime
Despite the name, pink slime in a hot tub is rarely algae. It’s most often a bacterial colony that feeds on soap residue, body oils, and lotion film left behind by bathers. It tends to cluster around the waterline, headrests, and pillow inserts where skin contact is highest.
Black or Dark Green Slime
Darker biofilm is usually older and more established, often mixed with mold spores or algae that have taken hold inside jets or return lines. This variety is more likely to be found deep in plumbing rather than on visible surfaces, which is exactly why it’s so often missed until a line flush forces it out.
White, Tissue-Paper-Like Flakes
Often called “white water mold,” this is a fungal biofilm that tends to appear after a hot tub has sat uncovered, unused, or under-sanitized for an extended stretch. It looks like soggy bits of tissue floating loose in the water rather than clinging to a surface.
Brown or Rust-Colored Buildup
This is sometimes biofilm mixed with metal staining from a heater element or fill water high in iron or manganese. Brown gunk deserves a water test in addition to a flush, since metals in the fill water can mimic the appearance of organic slime.
How Biofilm Actually Forms, Step by Step
Understanding the life cycle of biofilm makes it much easier to understand why prevention has to happen continuously rather than occasionally.
Stage 1: Initial Attachment
Free-floating bacteria that enter the water from skin, hair, swimwear, or even the air settle onto a surface. In a hot tub, ideal attachment points include jet faces, the inside of return lines, filter pleats, and any spot with reduced water flow.
Stage 2: Irreversible Attachment
Within hours, the bacteria stop drifting and lock themselves onto the surface using small hair-like structures. At this point, simply increasing water flow or adding a small dose of sanitizer is no longer enough to dislodge them.
Stage 3: Colony Growth and EPS Production
The attached bacteria begin secreting the slimy EPS matrix discussed earlier. This is where the “shield” is built, and it’s also where the colony starts recruiting other microorganisms to join the growing structure.
Stage 4: Maturation
A mature biofilm colony develops channels that allow water and nutrients to flow through it like tiny veins, feeding the bacteria deep inside while keeping them protected from sanitizer exposure at the surface.
Stage 5: Dispersion
Eventually, chunks of the mature colony break away and drift into the visible water, which is exactly the moment most owners finally notice a problem — cloudy water, floating debris, or a slimy film on the shell. By this stage, the colony has usually already spread to multiple points throughout the plumbing.
The entire cycle, from a single bacterium landing on a jet face to a fully mature, self-sustaining colony, can take as little as a few days in warm, low-sanitizer water. That is faster than most people check their filters, which is exactly why biofilm control has to be proactive rather than reactive.
Is Hot Tub Slime Dangerous?
Yes. Biofilm is not just a cosmetic issue; it is a health hazard. Because the slime protects bacteria from sanitizer, dangerous pathogens can thrive inside your plumbing even if your test strips show “safe” chlorine levels.
Common Risks Include:
- Pseudomonas Aeruginosa: The bacteria responsible for “Hot Tub Rash” (folliculitis). It causes itchy, red bumps that can turn into painful abscesses.
- Legionella: The bacteria that causes Legionnaires’ disease, a severe form of pneumonia that is transmitted by inhaling contaminated steam.
- Cloudy Water: As chunks of biofilm break off, they enter the water, leading to persistent haziness. Learn more about the negative effects of dirty hot tubs.
Case reports in dermatology literature have found that a substantial majority of hot tubs tested at a given moment carried detectable Pseudomonas aeruginosa, which is one reason hot tub rash outbreaks so often affect several bathers who shared the same tub on the same day rather than just one unlucky person. The bacteria thrive specifically because warm water, constant moisture against the skin, and swimwear that traps water against the body create nearly perfect conditions for the infection to take hold within one to two days of exposure.
Public health guidance on Legionella control also points directly at biofilm as a core risk factor. Health agencies that study Legionella outbreaks in hot tubs have identified sediment and biofilm, along with water temperature, water age, and disinfectant residual, as key factors that drive Legionella growth. Hot tubs are considered particularly favorable environments because they maintain water temperatures within the range Legionella prefers, roughly 77 to 113 degrees Fahrenheit, while also generating aerosols and accelerating the breakdown of disinfectant. In plain terms: the same warmth that makes a soak relaxing is the same warmth that helps Legionella multiply once it establishes itself inside a biofilm colony.
Beyond Skin and Lungs: Other Reported Issues
While folliculitis and Legionnaires’ disease get the most attention, biofilm-related bacteria have also been associated with ear infections (sometimes called “hot tub ear” or swimmer’s ear), mild gastrointestinal upset from accidentally swallowing contaminated water, eye irritation, and in rare cases, urinary tract infections tied to bacteria like E. coli or Pseudomonas present in poorly maintained water.
Who Is Most at Risk From Hot Tub Biofilm?
Biofilm-related illness can affect anyone, but certain groups face a meaningfully higher risk of complications, which is worth knowing before you decide whether “it’s probably fine” is an acceptable answer.
- Young children: Thinner skin and a still-developing immune system can make folliculitis and other skin reactions more likely and more uncomfortable.
- Older adults: Respiratory illnesses like Legionnaires’ disease disproportionately affect people over 50, especially those with existing lung conditions.
- People with diabetes: Case literature on hot tub folliculitis has repeatedly flagged diabetes as a factor that increases susceptibility to Pseudomonas skin infections, likely related to changes in skin barrier function and circulation.
- Immunocompromised individuals: Anyone undergoing chemotherapy, living with HIV, or taking immunosuppressive medication faces a higher risk of both skin and respiratory infections from opportunistic bacteria.
- Pregnant individuals: While the main hot tub concern in pregnancy is usually water temperature, added bacterial exposure is an additional reason to be cautious about entering an under-maintained spa.
- People with open cuts, eczema, or recent tattoos: Broken or compromised skin barriers give bacteria an easier point of entry.
None of this means these groups can never enjoy a hot tub. It means the margin for error on maintenance shrinks considerably, and a visible slime problem is a much stronger signal to stay out of the water until it’s resolved.
Where Biofilm Actually Hides in Your Spa
One of the biggest misconceptions owners have is that if the shell and water look clean, the tub is clean. In reality, the visible parts of a hot tub represent a small fraction of the total surface area bacteria can colonize.
Jets and Jet Bodies
The internal channels of jets have low flow zones and tiny crevices around moving parts, both of which are ideal biofilm real estate. This is usually the first place a line-flush product will visibly dislodge foam and debris.
Return Lines and Plumbing Runs
Every foot of pipe between the pump, heater, and jets is a potential surface for colonization, and most of it is completely invisible without disassembling the tub.
The Heater Element
Heat doesn’t kill established biofilm the way many people assume. In fact, the constant warmth near a heater element can make that area more hospitable to certain heat-tolerant bacteria rather than less.
Filter Housing and Pleats
Filters are designed to trap debris, which means they are also one of the most nutrient-rich environments in the entire system. A filter that looks “just a little dirty” can be carrying a significant bacterial load.
Under the Cover and Cushions
Moisture trapped under a spa cover, especially around foam cushions and the underside vinyl, creates a dark, damp environment where mold and biofilm can develop even when the water itself is well maintained.
Air Blower Lines (If Equipped)
Tubs with air-injection jets pull in outside air, but the tubing itself can develop condensation and biofilm over time, especially if the tub sits in a humid environment.
Because so much of this surface area is hidden, relying on a visual inspection alone will almost always underestimate the size of the problem. This is the entire reason line-flush chemistry exists: it’s designed to travel through the plumbing itself and force hidden colonies to detach where you can finally see, and remove, them.
Why Chlorine and Bromine Alone Can’t Solve This
It’s a natural assumption: if chlorine kills bacteria, then more chlorine should kill biofilm. Unfortunately, the chemistry doesn’t work that way once a colony has matured.
Sanitizers like chlorine and bromine are extremely effective against free-floating, planktonic bacteria — the kind swimming loose in your water. But once bacteria have organized into a biofilm colony and built their protective EPS matrix, that matrix physically and chemically blocks much of the sanitizer from ever reaching the cells underneath. Studies on biofilm across many industries (from hospital plumbing to industrial water systems) consistently find that bacteria embedded in mature biofilm can tolerate dramatically higher sanitizer concentrations than the same bacteria would tolerate floating freely in water.
There’s also a practical dosing problem. To have any chance of penetrating a mature biofilm layer with chlorine alone, you would need concentrations far beyond what’s safe or comfortable for a tub anyone is going to sit in. That’s why the accepted approach isn’t “more chlorine” — it’s using a surfactant-based line-flush product first to physically break down and loosen the EPS matrix, so the individual bacteria are exposed and vulnerable, and then following up with a proper shock dose to finish the job.

Standard shock won’t cut it. You need a dedicated line flush product to scrub the plumbing pipes from the inside out.
Check Price on AmazonHow to Kill the Slime (The Only Way)
Wiping the sides of the tub is useless because 90% of the biofilm is hiding inside your plumbing lines. To get rid of it, you must perform a “System Flush.”
Step 1: Use a Line Flush Product
Before draining your tub, add a specialized plumbing cleaner (like Oh Yuk or Ahh-Some). Run the jets on high for 30–60 minutes. You will likely see disgusting brown or green foam rising from the water—that is the biofilm being stripped from the pipes.
Step 2: Drain and Wipe
Drain the nasty water completely. While empty, wipe down every inch of the shell with a solution of white vinegar and water or a specialized spa cleaner.
Step 3: Replace Filters
Biofilm loves to hide in filter pleats. If your filters are old, throw them away. If they are new, soak them in a chemical filter cleaner overnight. Never rinse them with just water; it won’t kill the bacteria.
Step 4: Refill and Shock
Refill with fresh water and immediately “shock” the tub with a high dose of chlorine (10–20 ppm) to kill any remaining free-floating bacteria. Unsure about the dosage? Check our guide on how often to shock a hot tub.
Step 5: Purge the Jets One More Time
After refilling, run every jet, air blower, and water feature at full power for at least ten minutes before your first soak. This forces any last trapped air pockets and loosened debris out of dead zones in the plumbing and gives you one more chance to catch a straggling colony before anyone gets in the water.
Step 6: Test Before You Soak
Once everything has circulated, test your water one final time. You’re looking for sanitizer levels within the manufacturer’s recommended range, balanced pH (usually 7.2–7.8), and clear, non-hazy water. If anything looks off, give the system another hour of circulation before anyone gets in.
A full system flush like this is typically recommended every time you drain and refill your spa, which for most households works out to roughly every three to four months depending on bather load, tub size, and how well the water is chemically maintained in between drains.
Comparing Line Flush Products: What to Look For
Not every “spa cleaner” on the shelf is designed to do the same job. Some are marketed as general cleaners but are really just fragrance additives, while true line-flush products are formulated specifically to break down biofilm inside plumbing. Here’s a general framework for comparing options.
| Feature to Check | Why It Matters |
|---|---|
| Labeled as a “line flush” or “plumbing cleaner” | Confirms the product is designed to circulate through pipes and jets, not just sit on the water’s surface. |
| Non-foaming or low-foam formula | Excess foam can overwhelm filters and make draining messier without adding cleaning power. |
| Recommended circulation time | Products that call for 30–60+ minutes of active jet circulation typically indicate a formula built to reach deep into plumbing runs. |
| Compatibility with your shell material | Acrylic, vinyl, and inflatable materials can react differently to strong solvents — always check the label against your tub type. |
| Whether it’s safe to use with your filter type | Some formulas recommend removing filters before flushing, others don’t; using the wrong sequence can shorten filter life. |
| Frequency guidance printed on the label | A reputable line-flush product will tell you how often to use it relative to your drain-and-refill schedule, not just “use anytime.” |
When comparing two products side by side, resist the urge to choose based on scent or foam volume alone — a highly foaming product isn’t necessarily working harder, it may simply contain more foaming surfactant, which you’ll then need to deal with during drainage. Look instead at how clearly the label explains its intended contact time and its compatibility with your specific spa material.
Filter Care: The Most Overlooked Biofilm Hotspot
If there’s one component owners consistently under-maintain, it’s the filter cartridge. Filters are engineered to trap the very organic material — oils, lotions, skin cells, hair — that feeds biofilm, which makes them one of the richest bacterial environments in the entire spa.
How Often Should You Rinse Filters?
A quick hose rinse every one to two weeks removes loose surface debris, but rinsing alone does not remove the oils and bacteria embedded deep in the pleats. That requires a chemical filter cleaner soak, generally recommended every four to six weeks depending on bather load.
How to Deep Clean a Filter
Remove the cartridge, rinse loose debris with a hose, then submerge it fully in a filter-cleaning solution for the time specified on the product label, usually somewhere between a couple of hours and overnight. After soaking, rinse thoroughly from the top down between each pleat until the water runs clear, then allow it to air dry completely before reinstalling.
When to Replace Instead of Clean
Filters are consumable parts, not permanent fixtures. If pleats appear collapsed, discolored beyond what rinsing fixes, or if the filter has been in service for more than one to two full seasons, replacement is usually more cost-effective than continuing to clean a filter that’s already saturated with biofilm at a structural level.
Rotating Filters
Many spa owners keep two filter sets and rotate them — one in the tub while the other soaks and dries completely. A fully dried filter is much less hospitable to bacterial regrowth than one that goes straight from a wet soak back into wet spa water, so this simple rotation habit meaningfully reduces the workload biofilm has to overcome.
Cover and Cushion Care: The Hidden Mold Zone
Spa covers get far less attention than the water itself, yet the underside of a cover — especially the foam core and any zippered vinyl bag surrounding it — is a near-perfect breeding ground for mold and biofilm. Warm, damp, dark, and rarely inspected: that’s the exact combination microorganisms prefer.
Signs Your Cover Needs Attention
- A musty smell when you lift the cover, even if the water itself smells fine.
- Visible dark spotting on the underside vinyl.
- A cover that feels noticeably heavier than it used to, which often indicates the foam core has absorbed water and is retaining moisture.
Cleaning Routine
Wipe the underside of the cover with a mild vinyl cleaner or diluted vinegar solution every time you drain the tub, and let it air out fully in the sun for a few hours whenever weather allows — UV exposure helps knock back mold spores that a wipe-down alone might miss.
Cushion and Pillow Care
Removable headrest pillows and cushions should be cleaned separately with a non-abrasive vinyl cleaner on a similar schedule, since they sit directly against skin, hair products, and sweat — exactly the nutrient sources biofilm feeds on.
Water Chemistry Basics: Starving Biofilm Before It Starts
Sanitizer alone can’t do all the work. Balanced water chemistry creates conditions where sanitizer performs at its best and where bacteria have a much harder time gaining a foothold in the first place.
pH (Target: roughly 7.2–7.8)
When pH drifts too high, chlorine and bromine become dramatically less effective at killing bacteria even at the same measured concentration. When pH drifts too low, sanitizer burns off faster and can irritate skin and eyes, encouraging bathers to under-sanitize out of discomfort.
Total Alkalinity (Target: roughly 80–120 ppm)
Alkalinity acts as a buffer that keeps pH from swinging wildly after every top-off, every soak, or every dose of chemical. Unstable alkalinity means unstable pH, which means inconsistent sanitizer performance — exactly the kind of gap biofilm exploits.
Calcium Hardness
Water that’s too soft can become corrosive to plumbing and heater components, while water that’s too hard contributes to scale buildup, which itself can create rough surfaces that are easier for bacteria to grab onto. A mid-range hardness level protects both your equipment and your water clarity.
Sanitizer Residual
This is the actual “working” level of chlorine or bromine available at any given moment. A residual that regularly bounces down to zero between test checks — even briefly — gives bacteria an open window to attach and begin building a colony.
Choosing a Sanitizer System That Fights Biofilm Better
Not all sanitizer systems offer the same level of protection against biofilm formation. Here’s a general comparison of the most common approaches.
| System | Biofilm Resistance Notes |
|---|---|
| Traditional Chlorine | Fast-acting and affordable, but residual can dip quickly under heavy bather load, opening windows for attachment. |
| Bromine | More stable at higher temperatures than chlorine, often preferred for tubs run warmer, though it still can’t penetrate mature biofilm alone. |
| Mineral Cartridge Systems | Can reduce the amount of chlorine needed day-to-day, but still require a separate sanitizer and are not a standalone biofilm solution. |
| Ozone (O3) Generators | Effective at oxidizing organic material and reducing bather-waste load, which indirectly starves biofilm of nutrients, but ozone dissipates quickly and still needs a residual sanitizer as backup. |
| UV-C Systems | Neutralizes microorganisms as water passes through the unit, which helps reduce the free-floating bacterial population, but has no effect on colonies already attached to surfaces outside the UV chamber. |
| Saltwater Chlorine Generators | Produces a steady, consistent chlorine residual with less manual dosing, which can reduce the “gaps” in sanitizer coverage that give biofilm its opening. |
The takeaway isn’t that one system is a magic bullet — every one of them still benefits from periodic line flushing and good water chemistry habits. The advantage of systems like ozone, UV, or saltwater generation is mainly about reducing the day-to-day gaps and organic load that let biofilm establish itself in the first place.
A Seasonal Maintenance Calendar
Biofilm control works best as a routine, not a one-time emergency fix. Here’s a general seasonal framework many spa owners find useful to adapt to their own usage patterns.
Weekly
- Test and adjust sanitizer, pH, and alkalinity.
- Rinse filters with a hose if visibly dirty.
- Wipe the visible waterline for oils and residue before they can anchor a colony.
Monthly
- Deep-soak filters in a chemical cleaner.
- Wipe down the underside of the cover and inspect for musty odor or spotting.
- Check calcium hardness and adjust if needed.
Every Three to Four Months
- Perform a full line flush before draining.
- Drain, deep clean the shell, and refill.
- Replace filters if they show signs of wear.
Seasonal Opening (Spring/Summer Use)
If a tub has sat unused or under-covered over a cold season, treat the first fill of the new season as a mandatory full flush, regardless of how the water looks, since stagnant conditions are exactly when white water mold and dormant biofilm tend to flourish.
Seasonal Closing (Winterizing)
If you’re closing a tub for an extended period, a thorough flush and complete dry-out of plumbing lines before shutdown prevents biofilm from having months of undisturbed, moist darkness to keep building in your absence.
Prevention: Keep the Slime Away
Once you have purged your system, keep it clean with these habits:
- Shower Before Soaking: Lotions, makeup, and sweat provide the “food” that bacteria eat.
- Maintain Sanitizer Levels: Never let your chlorine or bromine drop to zero. Biofilm can begin to form in hours without sanitizer.
- Flush Regularly: Use a line flush product every time you drain and refill (every 3–4 months). This is a core part of inflatable hot tub maintenance.
Additional Daily and Weekly Habits That Add Up
- Keep the cover on between uses: This limits airborne debris and evaporation, both of which affect sanitizer stability.
- Avoid overloading the tub with bathers: Every additional person adds oils, sweat, and organic waste, all of which increase the sanitizer demand and the food supply available to bacteria.
- Don’t rely on smell alone: A strong chemical odor is often a sign of chloramines (used-up sanitizer reacting with waste), not too much sanitizer. It usually means the water needs a shock treatment, not less chlorine.
- Run jets briefly every day, even without bathers: Stagnant water in low-flow zones is exactly where early attachment happens fastest.
DIY and Natural Cleaning Methods: What Actually Helps
Many owners look for gentler, more natural alternatives to commercial line-flush chemicals, especially for routine surface cleaning between full flushes. Here’s what’s realistic to expect from common home remedies.
White Vinegar Solutions
A diluted white vinegar and water mix is genuinely useful for wiping down the empty shell, jet faces, and cover underside between drains. It helps dissolve mineral scale and mild residue, but it is not a substitute for a true line-flush product when it comes to reaching biofilm deep inside plumbing.
Baking Soda
Useful primarily for gently raising alkalinity and as a mild non-abrasive scrub for stubborn spots on the shell, but it has no meaningful antibacterial effect on established biofilm.
Enzyme-Based Spa Products
Enzyme treatments work by breaking down organic waste like oils and lotions before they can feed a growing biofilm colony. These are a genuinely useful preventive addition to a weekly routine, though they work best alongside — not instead of — a proper sanitizer program.
What Doesn’t Work
Simply running extra-hot water, adding extra fragrance-based “spa cleaners” that aren’t formulated as true line flushes, or scrubbing only the visible shell surfaces will not meaningfully address a plumbing-based biofilm colony. These approaches address symptoms, not the underlying structure.
Professional Cleaning vs. DIY: Which Makes Sense?
Most residential hot tub owners can manage biofilm control entirely on their own with a consistent routine, a quality line-flush product, and regular water testing. That said, professional service has its place.
When DIY Is Usually Enough
- You’re comfortable testing and balancing water chemistry regularly.
- The tub is used by a household rather than rotating groups of guests.
- You’re willing to commit to a drain-and-flush schedule every three to four months.
When Professional Help Makes Sense
- You’ve performed a full flush and drain but slime, odor, or cloudiness returns within days, suggesting a deeper equipment issue like a failing heater seal or a hard-to-reach plumbing loop.
- You manage a tub with high or rotating bather loads, such as a rental property or shared amenity, where consistent testing may not always happen.
- You want a baseline water and equipment inspection to catch scale buildup, worn gaskets, or plumbing dead-legs that a home routine can’t diagnose.
A professional visit isn’t an admission of failure — think of it the same way you’d think of an HVAC tune-up. It’s a periodic check that confirms your DIY routine is actually reaching every part of the system it needs to.
Troubleshooting Cloudy Water: Is It Biofilm, or Something Else?
Cloudy water is one of the most common spa complaints, and biofilm is only one possible cause. Narrowing down the actual source saves time and prevents you from over-treating the water with the wrong chemical.
| What You Notice | Likely Cause |
|---|---|
| Slimy film on surfaces plus haze that returns quickly after treatment | Active biofilm shedding into the water — needs a full line flush. |
| Fine, milky haze with no slimy feel, worse after heavy bather use | Organic bather waste overwhelming sanitizer — often resolved with a shock treatment and filter cleaning. |
| Cloudiness with a metallic tint or discoloration | Metals in fill water (iron, manganese, copper) reacting with sanitizer — a metal sequestrant and source water test can help. |
| Cloudiness with visible white flakes | White water mold, a fungal biofilm variant, usually following a period of low sanitizer or extended non-use. |
| Persistent haze despite balanced chemistry | Filter that’s overdue for cleaning or replacement, restricting proper filtration. |
When in doubt, address the filter and perform a line flush first — both are foundational steps that resolve or rule out the majority of cloudy water complaints.
The Real Cost of Ignoring Biofilm
It’s easy to put off a line flush “until next weekend.” But neglect compounds in ways that are more expensive, in both time and money, than staying ahead of the problem.
Equipment Costs
Biofilm and the scale that often accompanies poor chemistry can accelerate wear on pumps, heaters, and jet seals. A heater element or circulation pump replacement typically costs far more than years’ worth of routine line-flush products combined.
Water Replacement Costs
A tub that constantly needs emergency draining due to persistent cloudiness or odor burns through far more water, sanitizer, and balancing chemicals over a year than one maintained on a predictable three-to-four-month schedule.
Health-Related Costs
A case of hot tub folliculitis is often self-limited and resolves without treatment within one to two weeks, but more severe reactions, secondary skin infections, or respiratory illness can mean medical visits, prescriptions, and missed work — costs that dwarf the price of a bottle of line-flush cleaner.
Time Costs
Chronic, unresolved biofilm problems tend to demand far more owner attention over time — repeated shocking, repeated filter cleaning, repeated draining — than a tub maintained on a steady preventive schedule from the start.
Inflatable vs. Hard-Side Spas: Does Biofilm Risk Differ?
The underlying biology of biofilm doesn’t change based on the tub type, but the practical maintenance considerations do.
Inflatable and Portable Spas
These typically use simpler, lower-flow pump systems with narrower plumbing runs, which can mean less water movement in certain sections and, in turn, more opportunity for stagnant zones to develop biofilm. Vinyl and PVC materials also respond differently to strong solvents than acrylic shells, so always check line-flush product compatibility with inflatable materials specifically before use.
Hard-Side Acrylic Spas
These generally have more extensive plumbing, more jets, and often additional features like waterfalls or air blowers — all of which multiply the number of potential biofilm attachment points, even though the stronger acrylic shell and typically higher-flow pumps can make flushing more thorough when done correctly.
Regardless of which type you own, the core principles are identical: balanced water chemistry, regular filter care, and a full line flush every time you drain and refill.
Common Myths About Hot Tub Slime, Debunked
Myth: “If the water is clear, it’s clean.”
Clarity only tells you that large particles aren’t suspended in the water at that moment. It says nothing about what’s growing on the inside of a pipe wall, inside a jet body, or under a filter pleat. Some of the most bacteria-heavy tubs on record have had perfectly clear, blue, inviting-looking water right up until the moment a flush revealed otherwise.
Myth: “Hot water kills bacteria, so a hot tub can’t grow anything dangerous.”
Hot tubs typically run between about 100 and 104 degrees Fahrenheit, which is nowhere near hot enough to kill bacteria like Pseudomonas or Legionella. In fact, that exact temperature range sits inside the comfort zone for several of the organisms most associated with spa-related illness. Heat is part of the problem here, not a defense against it.
Myth: “A stronger smell of chlorine means the water is safer.”
A sharp, “chemical” smell is very often a sign of chloramines, the byproduct created when sanitizer reacts with sweat, oils, and other organic waste and becomes chemically exhausted. A properly sanitized tub with fresh, active chlorine or bromine typically has very little smell at all. A strong odor is usually a cue to shock the water, not to assume it’s over-treated.
Myth: “Slime only happens in old or poorly built hot tubs.”
Biofilm doesn’t discriminate by brand, age, or price point. A brand-new tub that’s been sitting on a showroom floor or in a garage for weeks before its first fill can already have dormant bacteria in the plumbing from the manufacturing and testing process. The very first fill of a new spa deserves the same flush-and-shock treatment as an older one.
Myth: “As long as I shock the water occasionally, I don’t need a filter cleaning routine.”
Shock treatments handle bacteria and organic waste suspended in the open water. They do very little for the concentrated organic material trapped inside a filter’s pleats, which is precisely the kind of nutrient-dense environment biofilm prefers. The two routines are complementary, not interchangeable.
Myth: “Draining and refilling with fresh water automatically removes all the slime.”
Draining removes the water, not the colony clinging to the inside of your plumbing. Without an active line flush before or during drainage, a fresh fill simply gives the existing colony a clean, low-sanitizer environment to keep expanding into.
Does Your Fill Water Source Matter? Well Water vs. City Water
The water you use to fill your spa in the first place can influence how quickly problems develop, independent of anything you do afterward.
Well Water Considerations
Well water is more likely to carry higher levels of iron, manganese, or naturally occurring bacteria depending on the source and local geology. Iron and manganese don’t cause biofilm directly, but they can stain surfaces, feed certain bacteria, and make brown or rust-toned buildup more likely. If you fill from a well, a basic mineral test before your first fill each season is a worthwhile habit, and a metal sequestrant product can help prevent staining that might otherwise be mistaken for organic slime.
Municipal (City) Water Considerations
City water usually arrives pre-treated with a small amount of chlorine or chloramine from the utility, which can give a very slight head start on initial sanitation. That said, this residual is far too low to have any lasting effect once the tub is filled, heated, and used, so it should never be treated as a substitute for your own sanitizer program.
Either Way: Start Clean
Regardless of source, filling a spa is a good moment to run a brief line flush cycle even on a brand-new fill, especially if the plumbing has sat empty or partially empty for any length of time beforehand. This clears out any residual organic material left in the lines from the draining process itself.
Indoor vs. Outdoor Placement: Different Risks, Different Habits
Where your hot tub lives changes some of the conditions that influence biofilm growth, even though the underlying chemistry is identical.
Outdoor Spas
Outdoor tubs benefit from natural UV exposure, which has a mild disinfecting effect on exposed surfaces and can help slow mold growth on a cover’s exterior. On the other hand, outdoor tubs are exposed to more airborne organic debris — pollen, leaves, dust, insects — all of which add extra nutrient load to the water and can accelerate sanitizer demand, especially if the cover isn’t kept on consistently between uses.
Indoor Spas
Indoor tubs are shielded from debris and UV degradation of chemicals, which can make water chemistry more stable day-to-day. However, indoor installations often mean less airflow around the tub and cover, which can trap humidity and make the underside of the cover and any surrounding cabinet area more prone to mold if ventilation isn’t addressed. Indoor rooms housing a spa benefit from a dehumidifier or dedicated ventilation to keep ambient moisture from becoming its own biofilm-friendly microclimate outside the tub itself.
Covered Patios and Semi-Enclosed Spaces
Tubs under a roof or gazebo but still outdoors get a middle-ground experience: protection from rain and direct sun degrading chemicals, but often less airflow than a fully open-air setup, which can mean covers stay damper for longer after use.
Signs Your Equipment Is Struggling With a Biofilm Buildup
Beyond visible slime in the water, several equipment symptoms can be early indicators that biofilm and associated scale have built up inside your system.
- Reduced jet pressure across multiple jets at once: Often a sign of restricted flow somewhere upstream, such as a clogged filter or narrowing caused by scale and biofilm buildup inside a pipe run.
- The heater cycling on and off more frequently than normal: Can indicate scale buildup on the heating element itself, which biofilm can contribute to by creating a rougher surface for mineral deposits to cling to.
- A musty or “swampy” smell even with balanced chemistry: Frequently traced back to the cover, cabinet interior, or an air-injection line rather than the water.
- Foam appearing during normal jet operation, not just after adding a flush product: Can indicate a heavier-than-normal organic load, often oils and lotions that haven’t been adequately filtered or oxidized.
- Visible debris re-appearing within a day or two of cleaning: A strong signal that a colony deep in the plumbing wasn’t fully dislodged during the last flush and needs a repeat treatment or a longer circulation time.
None of these signs are emergencies on their own, but together they’re useful early warnings that let you address a developing problem with a routine flush rather than waiting for a full-blown, visibly slimy tub.
Chemical Storage and Safety Tips
Line-flush products, shock treatments, and pH adjusters are effective specifically because they’re reactive chemicals. Handling and storing them properly keeps your maintenance routine safe for you and anyone else in the household.
- Never mix chemicals directly with each other: Always add one product to water, let it fully dissolve or circulate, and test before introducing a different product.
- Store chlorine and bromine products separately from acids or metal sequestrants: Some combinations can react and release irritating fumes if stored in close, sealed proximity.
- Keep all spa chemicals in a cool, dry, well-ventilated space out of direct sunlight: Heat and humidity can degrade sanitizer potency and, in some cases, create pressure buildup in sealed containers.
- Always add chemicals to water, not water to chemicals, when a product requires pre-dissolving, to reduce splash-back risk.
- Keep all products out of reach of children and pets, ideally in a locked cabinet, given how similar some granular spa chemicals can look to other household powders.
- Ventilate the area during and after a line flush, since the process is specifically designed to release trapped organic material and can produce noticeable odors as foam and debris surface.
A Real-World Scenario, Walked Through
To pull all of this together, it helps to walk through a realistic example of how a slime problem develops and gets resolved.
The Setup
A family fills their inflatable spa at the start of summer and uses it two to three times a week. They test chlorine levels occasionally but don’t always catch it when the reading drifts toward zero between busy weekends. The cover goes back on after every use, but the underside is never wiped down.
Week Three: The First Sign
The water still looks clear, but one family member notices a faint slick feeling along the seat cushions. At this stage, the issue is still an early-stage biofilm colony, likely limited to a few attachment points rather than the whole system.
Week Five: The Problem Becomes Visible
After a particularly busy weekend with extra guests, the water turns slightly hazy and a faint musty smell appears when the cover is lifted. This is a textbook signal that the organic load has outpaced the sanitizer routine and that a mature colony has likely developed somewhere in the plumbing.
The Fix
The family adds a line-flush product and runs the jets on high for a full hour, watching noticeably discolored foam rise to the surface from the jet lines. They drain the tub completely, wipe down the shell and the underside of the cover with a mild cleaner, deep-soak the filter overnight in a chemical cleaner solution, and refill with fresh water. They immediately shock the fresh fill and let it circulate for an hour before testing again, confirming balanced pH and an adequate sanitizer residual before anyone gets back in.
Going Forward
The family adjusts their routine: testing twice a week instead of “whenever we remember,” wiping the cover underside monthly, and committing to a full flush every three months rather than waiting for visible symptoms. The slime doesn’t return, because the conditions that allowed it to establish itself in the first place — inconsistent sanitizer levels and a neglected cover — have been addressed at the root rather than just treated after the fact.
Bather Load and Maintenance Frequency: Why “It Depends” Is the Honest Answer
One of the most common questions spa owners ask is some version of “how often do I really need to do all this?” The honest answer is that it scales directly with how much organic material enters the water, which is driven primarily by bather load — the number of people using the tub and how long they stay in it.
Light Use (1–2 People, Occasional Soaks)
A tub used lightly by one or two people a few times a week generally introduces a modest, predictable amount of oils, sweat, and skin cells. Under these conditions, a standard three-to-four-month drain-and-flush schedule, paired with weekly testing, is usually more than sufficient to keep biofilm from establishing a serious foothold.
Moderate Use (Regular Family Use, Occasional Guests)
Households that use the tub most days of the week, or that occasionally host three or four bathers at once, place a noticeably higher organic load on the water. In these cases, shortening the interval between full flushes to roughly every two to three months, along with more frequent filter soaking, keeps the sanitizer program from constantly playing catch-up.
Heavy Use (Frequent Parties, Rental Properties, Shared Amenities)
Tubs that regularly see large groups, frequent turnover of different bathers, or near-daily use under a shared living arrangement face the fastest buildup of organic waste and the shortest window before sanitizer demand outpaces supply. These situations often benefit from flushing every four to six weeks, daily rather than weekly testing, and, where practical, a higher-capacity sanitizer delivery system such as an automated feeder to reduce the chance of the residual dropping to zero between checks.
A Simple Mental Model
Every bather who enters the water brings with them a small but real deposit of oils, cosmetics, sweat, and skin cells — all of it food for potential biofilm. The more deposits your water receives between maintenance cycles, the sooner your sanitizer program runs out of capacity to keep pace, and the sooner a colony gets the opening it needs. Matching your maintenance frequency to your actual bather load, rather than a generic calendar reminder, is one of the most effective and most overlooked adjustments an owner can make.
A Few Practical Load-Reducing Habits
- Rinse off before entering: A thirty-second rinse removes a large share of the surface oils and lotion residue that would otherwise end up in the water.
- Avoid entering with heavy makeup, sunscreen, or hair products still on: These substances are particularly rich food sources for biofilm-forming bacteria.
- Limit soak duration for large groups: Shorter, more frequent sessions with several bathers place less cumulative load on the water than one long marathon soak.
- Encourage guests to use the restroom beforehand: This is a simple, commonly recommended step at public and shared facilities that meaningfully reduces one source of organic contamination.
Maintenance Supply Checklist
Keeping the right supplies on hand removes the most common excuse for skipping maintenance: not having what you need within reach when a problem starts. Here’s a general list worth keeping stocked.
- Test strips or a liquid test kit: For checking sanitizer level, pH, and total alkalinity at least twice a week.
- A dedicated line-flush / plumbing cleaner: Kept on hand for every scheduled drain, rather than something you have to remember to order in advance.
- Shock treatment: Either chlorine-based or a non-chlorine oxidizer, depending on your sanitizer system, for regular oxidation of organic waste.
- A pH increaser and decreaser: To make small corrections between full water tests rather than letting pH drift for days.
- A filter cleaning solution: Separate from your line-flush product, specifically formulated for soaking cartridges.
- A spare filter cartridge: So one can soak and dry completely while the other stays in service.
- A mild vinyl or acrylic-safe surface cleaner: For wiping the shell, waterline, and cover underside without damaging the material.
- A soft-bristle cleaning brush or non-abrasive pad: For manually loosening any visible buildup on the shell before a drain.
- A metal sequestrant: Especially useful if you fill from a well or a source known to carry iron or manganese.
- A simple maintenance log: Even a basic notebook or phone note tracking test results and flush dates makes it far easier to notice patterns, like sanitizer consistently dropping after weekend gatherings, before they turn into a full-blown slime problem.
Glossary of Key Terms
| Term | Plain-Language Meaning |
|---|---|
| Biofilm | A living colony of bacteria (and often fungi) protected by a self-secreted slime layer, attached to a surface such as a pipe wall or jet. |
| EPS Matrix | The sticky, protective structure bacteria build around themselves within a biofilm colony, short for “extracellular polymeric substance.” |
| Line Flush | A specialized cleaning product designed to circulate through a spa’s plumbing and break down biofilm before draining. |
| Sanitizer Residual | The amount of “active,” available chlorine or bromine currently working in the water, as opposed to sanitizer that’s already been used up. |
| Chloramines | Byproducts formed when sanitizer reacts with organic waste like sweat and oils; responsible for the strong “chemical” smell often mistaken for too much sanitizer. |
| Total Alkalinity | A measure of water’s ability to resist sudden pH swings; acts as a buffer that keeps sanitizer performance consistent. |
| Folliculitis | An infection of hair follicles, commonly caused by Pseudomonas bacteria in under-sanitized hot tubs, presenting as itchy red bumps. |
| White Water Mold | A fungal form of biofilm that appears as floating white, tissue-paper-like flakes, often following a period of low sanitizer or non-use. |
| Dead Leg (Plumbing) | A section of pipe with little to no water flow, creating an especially favorable environment for biofilm to establish and persist. |
| Water Management Program | A structured maintenance plan, often referenced in public facility guidance, aimed at systematically reducing conditions that allow bacteria like Legionella to grow. |
Frequently Asked Questions
No. Chlorine struggles to penetrate the protective “shell” of biofilm. You might kill the top layer, but the colony underneath will survive. You need a surfactant-based line flush cleaner to break the slime apart first.
Pink slime is usually a bacteria called Methylobacterium. It is not actually slime/algae but a bacterial colony that feeds on soap residue. It is common around the water line and pillows.
Yes. If you see white flakes that look like wet tissue paper floating in the water, that is “white water mold,” a type of fungus/biofilm that is often caused by leaving the tub uncovered or untreated for long periods.
No. Do not enter the water. The presence of visible slime means your sanitizer has failed and bacteria are growing unchecked. You risk skin infections and respiratory issues.
Under warm, low-sanitizer conditions, early attachment can begin within hours, and a self-sustaining colony can mature within just a few days. This is why maintaining a consistent sanitizer residual from day one matters, not just after a problem is already visible.
Yes. Weekly shocking helps control free-floating bacteria and organic waste in the open water, but it does very little against a colony already established and protected inside plumbing. That’s why a periodic line flush is a separate, necessary step rather than something shock treatment replaces.
No system eliminates the need for periodic line flushing. Saltwater generators and mineral cartridges can help stabilize day-to-day sanitizer levels, which reduces the gaps bacteria exploit, but they don’t chemically dissolve an already-established biofilm colony inside the plumbing.
A musty smell with otherwise normal test results often points to the cover or cushions rather than the water itself. Check the underside of the cover and any foam-core cushions for mold or biofilm buildup that a water test simply can’t detect.
After draining, cleaning the shell, refilling, shocking, and circulating, most guidance suggests waiting until sanitizer and pH have both stabilized within the target range on a fresh test, which is typically a matter of hours rather than days.
Final Thoughts: Treat Prevention as Routine, Not a Reaction
Hot tub slime isn’t a one-time nuisance you clean up and forget about. It’s the visible result of an ongoing biological process happening throughout your plumbing, whether or not you can see it on any given day. The good news is that the fix isn’t complicated — it just has to be consistent. A regular testing habit, a filter care routine, attention to the cover and cushions, and a full line flush every time you drain the tub will keep biofilm from ever getting the foothold it needs to become a health concern.
Think of it the same way you’d think of changing the oil in a car. Skipping it once might not cause an immediate problem, but skipping it repeatedly guarantees one eventually. A few extra minutes of maintenance today is a small price compared to the time, expense, and health risk of dealing with an established colony down the road.