How to Convert a Hot Tub to Saltwater: A Step-by-Step DIY Guide
So, you want to join the saltwater revolution. You have heard about the silky smooth water, the lack of “bleach” smell, and the reduced maintenance. But your hot tub didn’t come with a salt system built-in.
The good news? You can convert almost any hot tub to saltwater in about an hour.
You don’t need to cut plumbing pipes or be a chemist. With a “drop-in” salt chlorine generator, you can upgrade your existing spa for a fraction of the cost of buying a new one. In this guide, we will walk you through the prep work, the installation, and the critical maintenance steps — plus everything else you need to decide whether a conversion is right for your tub: real-world costs, salt dosage math, troubleshooting, winterizing, and how salt water actually stacks up against chlorine, bromine, and mineral systems.
Whether you’re weighing the decision, mid-conversion, or already running a salt system and chasing down a specific problem, use the table of contents to jump straight to the section that’s most relevant to where you are right now. Every section is written to stand on its own, so there’s no need to read the whole guide top to bottom if you’re only looking for one answer.
Myth Busting: What Actually Is a Salt Hot Tub?
Before we start, let’s clear up the biggest misconception: Saltwater hot tubs ARE chlorine hot tubs.
You aren’t bathing in ocean water. You are adding a small amount of salt (Sodium Chloride) to the water. A device called a chlorinator uses electrolysis to zap the salt molecules, splitting them apart and creating pure chlorine gas. This chlorine kills bacteria just like the granules you buy in a bucket, but it’s generated constantly and consistently.
This is exactly why some owners are surprised, months later, when a test strip still shows a chlorine reading. The salt itself isn’t the sanitizer — it’s simply the raw material the generator recycles over and over. Once the chlorine that’s produced does its job neutralizing bacteria and organic waste, it reverts back into a chloride ion, and the cell converts it into chlorine again on the next cycle. That’s the whole trick: instead of you dumping in a fresh dose of chemical every few days, the tub manufactures its own supply automatically, in small, steady amounts, for as long as the salt and the cell both keep working.
Pros & Cons of a Saltwater Hot Tub
A salt conversion sounds like a clear upgrade on paper, and for most owners it is — but it isn’t free of trade-offs. Before you buy a kit, it helps to see the full picture side by side.
The Pros
- Softer-feeling water. Because chlorine is produced in small, continuous doses rather than shocked in all at once, the water tends to feel silkier on skin and hair.
- Less “chemical” smell. The sharp, eye-watering odor many people associate with hot tubs is usually caused by chloramines — the byproduct of chlorine reacting with sweat, oils, and lotions, not the chlorine itself. Because a salt system maintains a steady low-level chlorine residual, chloramines have less opportunity to build up between water changes.
- More consistent sanitation. Manual dosing creates spikes and dips — high right after you add granules, low right before your next dose. A salt cell trickles chlorine in continuously, which is gentler on skin and more reliable at keeping bacteria in check.
- Less manual dosing. You’ll still test the water and add salt occasionally, but you’re not measuring and pouring chemicals multiple times a week.
- Salt is inexpensive. A large bag of pool-grade salt is cheap compared to the ongoing cost of granular or liquid chlorine over a season.
The Cons
- Higher upfront cost. A drop-in kit runs anywhere from roughly $150 to $400, compared to a few dollars for a bucket of chlorine granules.
- The salt cell wears out. Like a lightbulb, the electrode plates degrade with use and typically need replacing every one to three years, at a cost of $100–$300.
- Corrosion risk if neglected. Elevated salt levels, unbalanced pH, or splashed water left to dry on metal fittings can accelerate corrosion on jets, heaters, and other hardware.
- Not “chemical-free.” You’ll still need to shock the water periodically, balance pH and alkalinity, and occasionally add extra sanitizer during heavy use.
- Not every tub qualifies. Older spas with exposed, uncoated metal heater elements and most wooden hot tubs are poor (or unsafe) candidates for a salt conversion.
- Possible warranty implications. Some manufacturers view aftermarket salt systems as a modification that can affect coverage on the heater or shell. It’s worth checking before you install one.
Who Benefits Most From Converting
Not every owner will notice a dramatic difference after switching, so it helps to think about where you personally fall. If you soak several times a week, have young children who spend a lot of time in the water, or find that your skin feels tight and dry after a typical chlorine soak, you’re a strong candidate for a conversion — the steadier chlorine curve tends to be most noticeable to frequent users. On the other hand, if you only use your spa occasionally, already drain and refill often, and don’t mind the smell of traditional chemicals, the upfront cost and added cell-maintenance routine may not be worth it for you. There’s no wrong answer here; it’s really a question of how much you value convenience and water feel versus a lower initial price tag.
Weighing the Trade-Off in Practice
A useful way to frame the decision is to picture a full year of ownership rather than just the installation day. In month one, you’ll notice the upfront cost and the slightly steeper learning curve of dialing in output and salinity. By month three or four, most owners report the routine becomes second nature — a quick salinity check, an occasional top-up, and far less time spent measuring chlorine granules. By year two or three, the main cost event is replacing the cell, which resets the clock on that “steeper learning curve” feeling for a week or two before things settle back into routine. Viewed across that whole arc, most owners find the trade-off worthwhile, but it’s fair to go in expecting a bit of a learning curve rather than a completely “set it and forget it” experience.
How Salt Systems Actually Work
The magic behind a salt water system is a process called electrolysis. It sounds technical, but the concept is simple once you break it down.
Table salt — sodium chloride — dissolves in water into two charged particles: sodium ions and chloride ions. The salt cell contains metal plates, usually coated in a durable material like titanium with a mixed-metal-oxide coating. When your hot tub’s pump circulates water past these plates, the control box sends a low-voltage electrical current through them. That current strips electrons from the chloride ions in a reaction that ultimately produces hypochlorous acid and hypochlorite ions — the same active sanitizing compounds found in a bag of chlorine shock.
Once that chlorine has neutralized bacteria, algae spores, and organic contaminants in the water, it reverts back into a harmless chloride ion, ready to be recycled by the cell on its next pass. This closed loop is why a salt system can run for days or weeks with minimal manual chlorine dosing: it’s not creating chlorine out of nothing, it’s continuously repurposing the same salt.
Why the Timing Matters
Most control boxes let you set a run schedule — for example, a few hours on, a few hours off, repeating throughout the day. Because the cell needs water flowing past it to work, it’s synced with your circulation pump. During periods of heavy use — parties, guests, extended soaks — the natural chlorine demand goes up faster than a modest cell can keep pace with, which is why manufacturers recommend keeping some granular shock on hand as a backup, even with a fully functioning salt system.
Why Salt Systems Feel Different in a Hot Tub vs. a Pool
If you’ve researched saltwater pools before, you might expect the hot tub experience to be identical, but the smaller water volume and higher temperature actually change the equation. A backyard pool might hold 15,000–20,000 gallons, giving a large buffer of water to absorb fluctuations in chlorine output. A hot tub typically holds a few hundred gallons, so changes in salinity, temperature, or cell output show up in test results much faster — for better or worse. The higher operating temperature of a spa also speeds up the electrolysis reaction somewhat, but it likewise speeds up chlorine off-gassing and gives bacteria and organics a more favorable environment to grow if sanitizer levels dip. That’s part of why hot tub owners are advised to test more frequently than a typical pool owner and to treat the recommended salinity range as a real ceiling rather than a loose guideline.
The Role of the Control Board
The control box isn’t just a timer — on most modern units it also monitors water flow, cell temperature, and sometimes water temperature, shutting the cell off automatically if flow stops (for example, if a filter is badly clogged) to protect the plates from damage. This is worth knowing because a “no chlorine output” complaint is sometimes actually the safety cutoff doing its job correctly in response to a separate problem, like a dirty filter restricting flow, rather than a fault with the cell itself.
Is Your Hot Tub Compatible? (Read This First!)
Most modern hot tubs use titanium or coated heater elements which are salt-safe. If you have an older model (10+ years), check with the manufacturer. You also need to be careful with inflatable tubs; always check the manual for your specific model.
In practical terms, nearly any hot tub can technically be converted, because a salt system simply produces the same chlorine or bromine your tub already uses — it isn’t introducing some exotic new chemical. The real question is whether your tub’s internal hardware can tolerate a slightly salty environment over the long run without excess wear. A few things worth checking before you buy a kit:
- Heater material: Titanium and Incoloy-sheathed heaters generally hold up well. Bare stainless steel is more vulnerable, especially if salinity or pH drifts out of range.
- Age of the tub: Spas older than roughly a decade may have internal seals, gaskets, or plumbing fittings that weren’t engineered with salt exposure in mind.
- Shell and cabinet hardware: Metal jet trim rings, screws, and fasteners near the waterline can develop surface rust if splashed water is left to dry on them repeatedly.
- Manufacturer guidance: Some brands explicitly approve aftermarket salt systems; others warn against them. A quick call or email to support can save you a costly mistake.
If you’re at all unsure, it’s worth having a technician inspect your heater and plumbing before committing to a conversion — particularly if your tub is out of warranty and you’d be paying out of pocket for any heater replacement caused by corrosion.
Inflatable Hot Tubs: A Special Case
Inflatable spas deserve their own callout because their internal components differ quite a bit from hard-shell tubs. Many inflatable models use compact, all-in-one pump-and-heater units with plastic housings and small-gauge internal wiring that wasn’t necessarily engineered with a continuous salt environment in mind. Some manufacturers explicitly permit low-level salt systems designed for their specific product line; others advise against any salt system entirely. Because replacement pump/heater units for inflatable tubs can be expensive relative to the cost of the tub itself, it’s worth confirming compatibility directly with the manufacturer rather than assuming a generic drop-in kit rated for “up to 2,000 gallons” is automatically safe for your specific inflatable model.
Signs Your Tub May Not Be a Good Candidate
- Visible rust or corrosion already present on jet fittings, screws, or the heater housing.
- A tub more than 10–12 years old with unknown or undocumented heater material.
- A wood-shell or wood-fired spa (see the dedicated section below).
- An inflatable spa whose manual doesn’t specifically address salt system compatibility.
- A tub already showing plumbing leaks or failing seals, since a conversion adds a new stressor to a system that’s already struggling.
Types of Salt Systems: Drop-In vs. In-Line, Chlorine vs. Bromine
Not all salt chlorine generators are built the same way, and picking the right category matters as much as picking a brand.
Drop-In vs. In-Line Systems
There are two basic constructions on the market:
- Drop-in generators are the simplest option for a DIY conversion. The control box plugs into a standard GFCI outlet, and the electrode cell simply hangs in the water — no plumbing modification required. This is the style most homeowners choose because installation takes under an hour and nothing needs to be cut or glued into your existing pipework.
- In-line generators are plumbed directly into the circulation line, usually after the filter and before the heater. Water passes through the cell inside a dedicated housing rather than the cell simply sitting in the tub. In-line systems tend to be more efficient and often last longer, but installation is more involved and may require basic plumbing skills or a technician.
Chlorine Generators vs. Bromine Generators
Most salt systems on the market generate chlorine, but a smaller category of “bromine generators” exists as well, and the salt you buy depends on which type you own.
| Feature | Chlorine Generator | Bromine Generator |
|---|---|---|
| Typical upfront cost | Lower | Higher |
| Salt type required | Standard sodium chloride (pool salt) | Sodium bromide, in most cases |
| Odor | Mild chlorine scent, especially if chloramines build up | Generally milder odor |
| Wood hot tub compatible | No — chlorine degrades wood over time | Yes, typically preferred for wood spas |
| Availability | Widely available | Less common, fewer brands |
If you’re not sure which to choose, a hybrid system that lets you run either salt type is a reasonable hedge — it lets you experiment with chlorine first, since it’s cheaper and more widely stocked, while leaving the bromine option open later.
Capacity Ratings Matter More Than Brand Name
Every generator on the market is rated for a maximum gallon capacity, and this number matters far more than which brand you choose. A cell rated for “up to 2,000 gallons” is being asked to do relatively light work in a 350-gallon hot tub, which typically means longer cell life and more headroom in the output settings. Conversely, buying an undersized unit for a large swim-spa-style tub means the cell runs closer to its maximum duty cycle constantly, which tends to shorten its lifespan and can leave you chasing chlorine demand during heavy use. When comparing options, it’s worth intentionally over-sizing slightly relative to your actual water volume rather than buying the cheapest unit that technically qualifies.
Plug-In vs. Hardwired Control Boxes
Most drop-in kits marketed for DIY installation use a standard plug that connects to a nearby GFCI-protected outlet, which is what makes them approachable for a weekend project. Some higher-end or in-line systems, however, are designed to be hardwired directly into the spa pack’s electrical system, which typically requires an electrician or a technician familiar with spa wiring. If you’re not comfortable working anywhere near a spa’s electrical panel, sticking with a plug-in drop-in unit is the more approachable route, even if a hardwired in-line system might offer marginally better long-term performance.

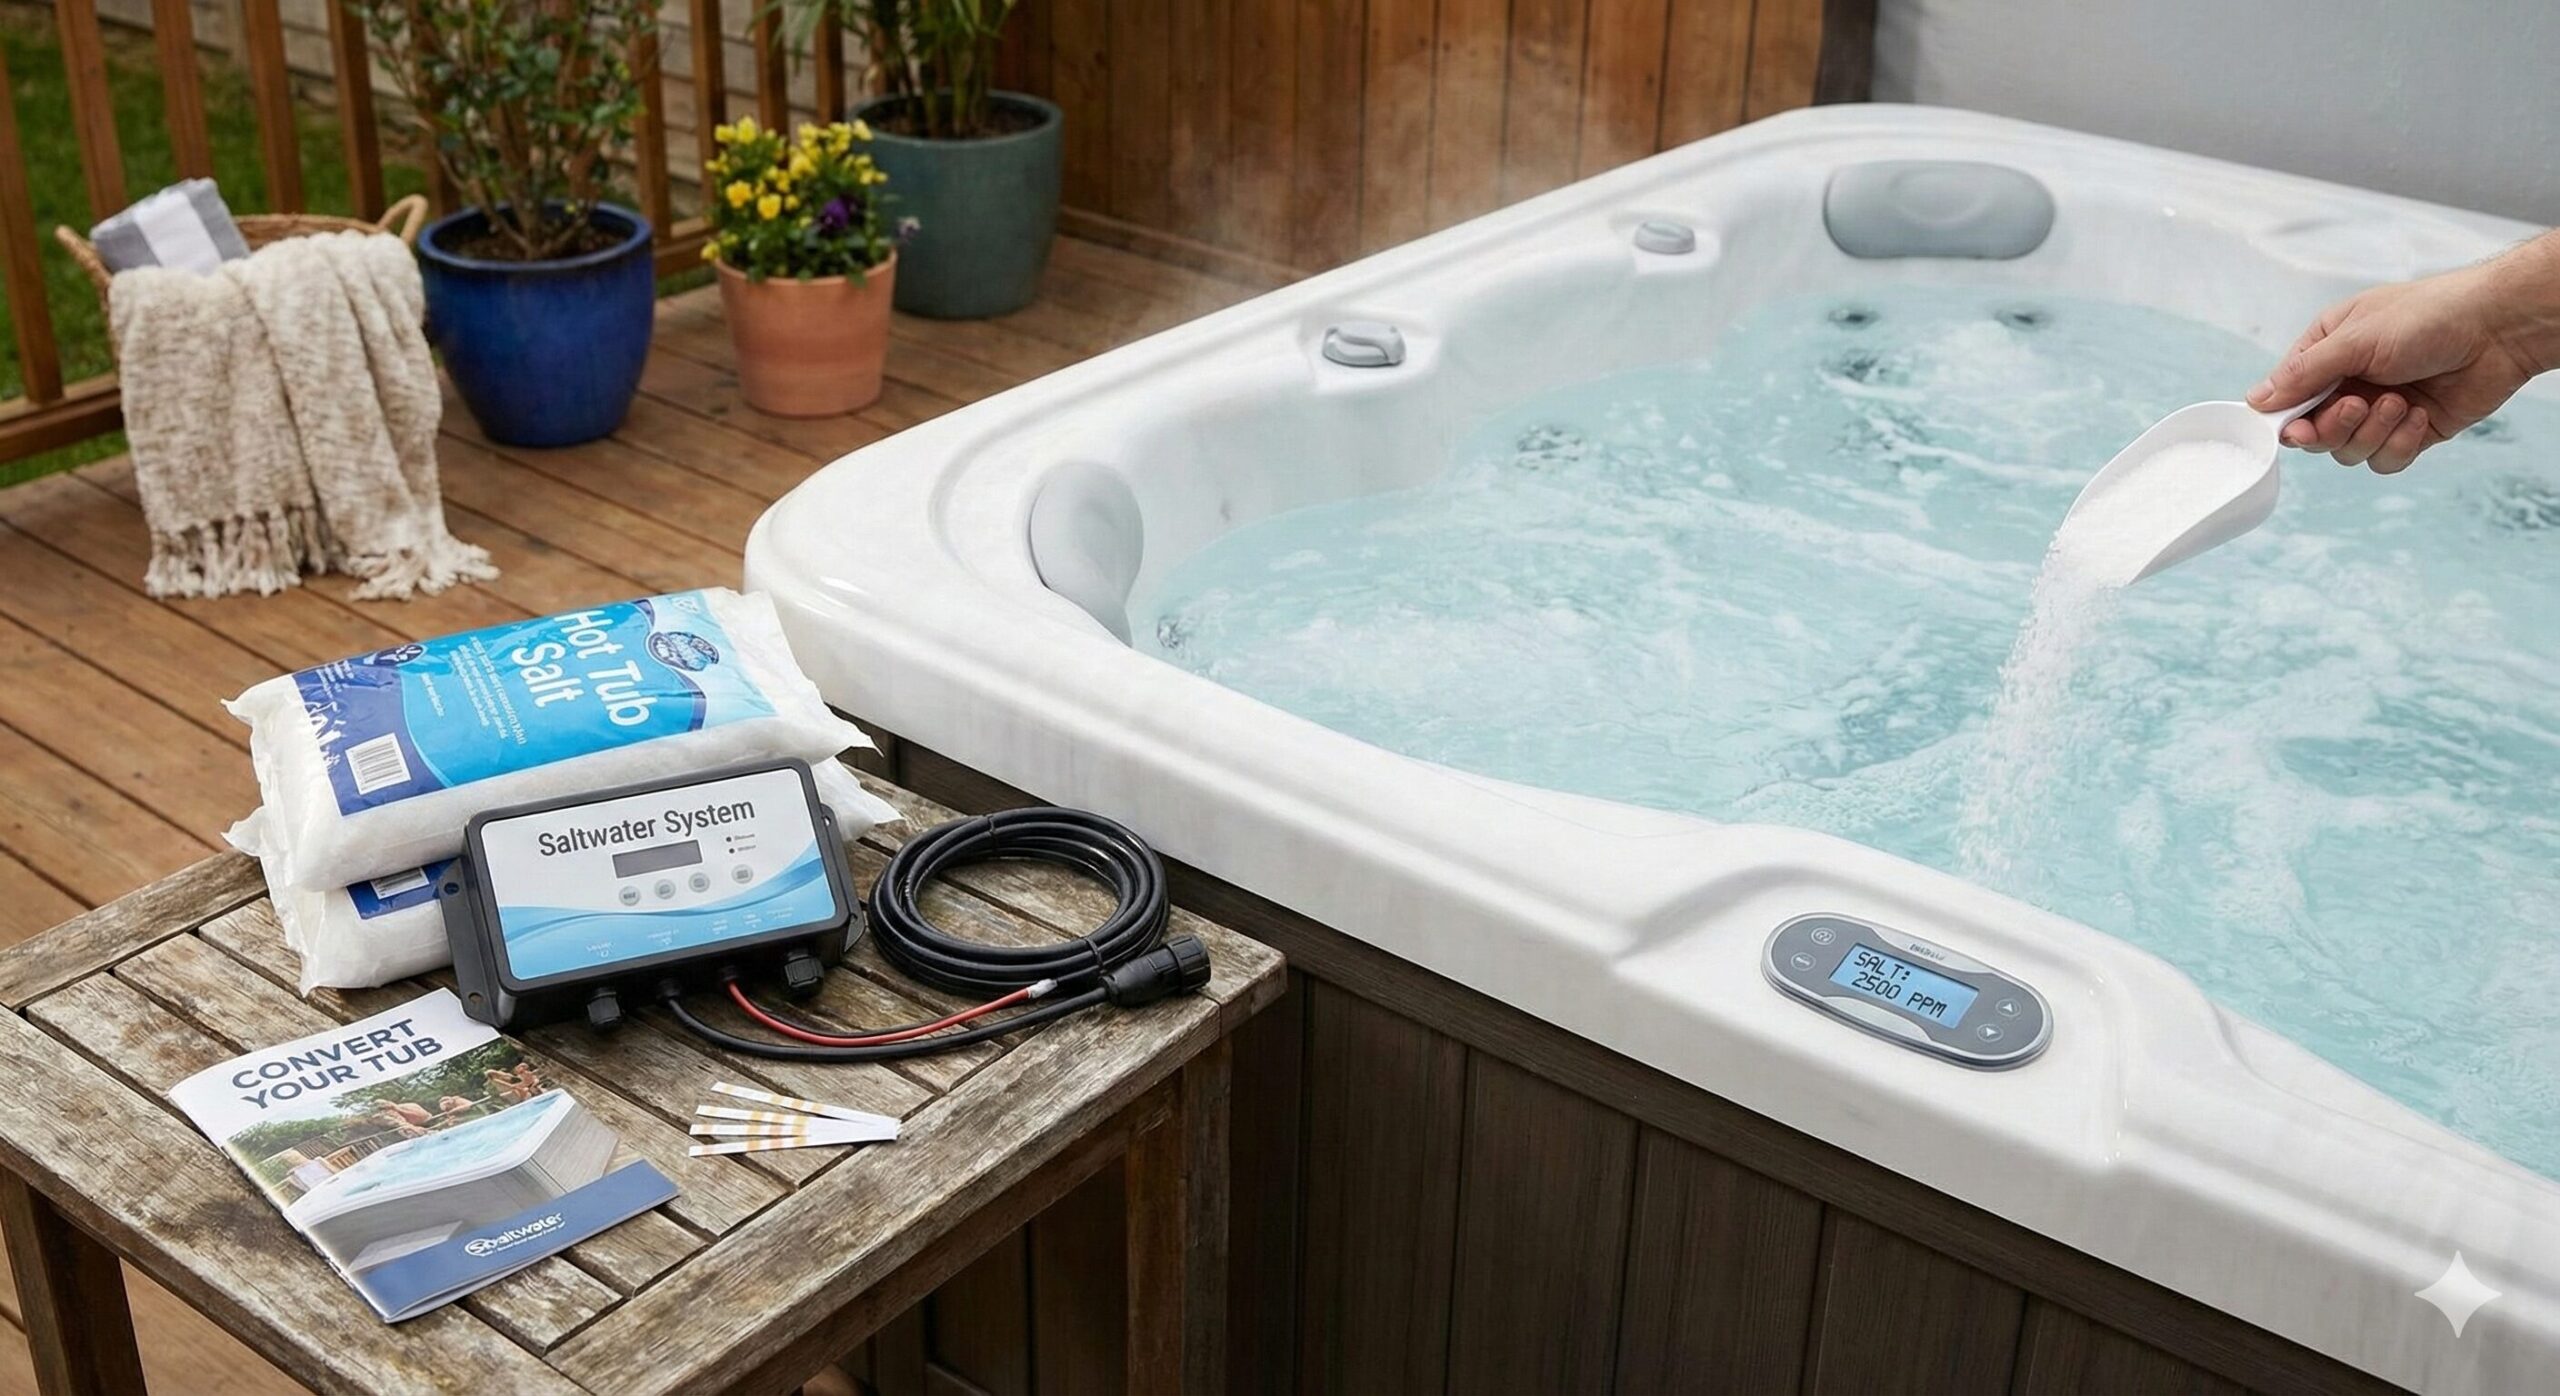
This is a “drop-in” system. No plumbing required. Just plug it into a standard outlet, drop the electrode in the water, and it starts making chlorine.
Check Price on AmazonHow Much Does It Actually Cost to Convert?
Cost is usually the deciding factor for DIYers weighing a conversion, so let’s break down the real numbers rather than a vague “it’s cheaper” claim.
Upfront Costs
- Salt chlorine generator kit: roughly $150–$400 for a drop-in unit, depending on brand and capacity.
- Pool-grade salt: a 25–40 lb bag typically costs $10–$20 and is usually enough for your initial fill, with smaller top-ups afterward.
- Salt test strips or a digital meter: $10–$40, since standard chlorine/pH strips won’t measure salinity.
- Line flush product and fresh filter (if needed): $15–$40, for the deep-clean step before conversion.
All told, most owners spend somewhere between $175 and $450 to get up and running, which is a modest investment compared with buying a new spa outright.
Ongoing Costs
- Salt top-ups: a few dollars every few months, since you’re only replacing what’s lost through draining, splash-out, and filter backwash — not dosing fresh salt every week.
- Occasional shock treatment: still needed periodically, especially after heavy use, at a similar cost to what a traditional chlorine tub owner spends.
- Cell replacement: the single biggest recurring cost. Salt cells degrade with use, much like a lightbulb, and typically need replacing every 1–3 years at $100–$300 depending on the model.
A Rough Three-Year Cost Comparison
Numbers vary widely by brand, tub size, and local water chemistry, but a rough side-by-side over a three-year ownership window looks something like this: a traditional chlorine owner might spend a modest amount repeatedly on granules, shock, and test strips with no major one-time expenses. A salt system owner spends more upfront on the kit and salt, saves on chemical purchases in year one, then absorbs a mid-sized expense in year two or three when the cell needs replacing. Averaged across the full three years, the totals tend to land within a similar ballpark of each other — which is why cost alone usually isn’t the deciding factor. The decision more often comes down to whether you’d rather pay a bit more, less often, in exchange for softer water and less frequent manual dosing.
Hidden Costs to Budget For
- Extra test strips: you’ll be running two testing regimens — sanitizer/pH and salinity — rather than one.
- Descaling solution: periodic cell cleaning requires a vinegar-based or manufacturer-approved descaler, a small recurring cost.
- Electricity: the cell draws a modest amount of power continuously while running, which is a minor but real addition to your energy bill.
- Potential technician visits: if you opt for an in-line, hardwired system rather than a drop-in unit, factor in installation labor if you’re not doing it yourself.
Step-by-Step Conversion Guide
Step 1: The Deep Clean (Critical)
You cannot simply add salt to old, dirty water. You must start fresh. More importantly, you need to remove any biofilm hiding in your pipes, as salt systems struggle to “catch up” if there is already a bacteria colony.
- Use a line flush product to purge the plumbing.
- Drain the tub completely.
- Clean the filters or buy new ones.
- Learn More: Read our guide on what biofilm is and how to remove it.
Step 2: Refill and Balance
Refill your hot tub with fresh water. Before adding salt, you must balance your Alkalinity (80-120 ppm) and pH (7.4-7.6). If the water isn’t balanced first, the salt generator won’t work efficiently.
Step 3: Add the Salt
You need “Pool Salt” (99.9% pure Sodium Chloride). Do not use table salt or Epsom salt.
- Check your chlorinator’s manual for the target salinity (usually 1500–2500 ppm).
- Pour the salt gradually while the jets are running.
- Allow it to circulate for 20 minutes to dissolve completely.
Step 4: Install the Chlorinator
Mount the control box on the side of your spa (or a nearby wall) near a GFCI outlet. Drop the cell (the electrode part) into the water, ensuring it hangs freely and isn’t sitting directly on the floor where it might get stepped on.
Step 5: Power On and Dial It In
Once everything is installed, turn on the system and start with a conservative output setting rather than the maximum. Hot tubs hold far less water than pools, so it’s easy to over-chlorinate if you dial the generator up too aggressively on day one. Let it run for several hours, then test the water. You’re aiming for a free chlorine reading of roughly 1–3 ppm — adjust the output up or down in small increments and retest after each change until the level holds steady between soaks.
How Much Salt Should You Add?
Getting the salinity right is the difference between a generator that works efficiently and one that struggles to keep up. Most manufacturers specify a target range of roughly 2,000–3,000 ppm, though you should always defer to your specific unit’s manual, since ranges vary by brand.
As a general rule of thumb, most systems need approximately 2 pounds of salt for every 100 gallons of water to reach a working salinity level from scratch — though this varies depending on your tub’s exact volume and the salt concentration your generator is designed around. Here’s a simplified reference for common hot tub sizes:
| Hot Tub Size | Approx. Water Volume | Approx. Starting Salt (at ~2 lb/100 gal) |
|---|---|---|
| 2–3 person | 150–250 gallons | 3–5 lbs |
| 4–6 person | 300–450 gallons | 6–9 lbs |
| 7–8+ person | 450–600+ gallons | 9–12 lbs |
These figures are a starting point, not a substitute for testing. Add salt gradually, run the jets to help it dissolve, wait roughly 20–30 minutes, then test with a dedicated salinity strip or digital meter before adding more. It’s much easier to add a little extra salt than to remove excess once it’s dissolved — the only real fix for over-salting is diluting with fresh water or a partial drain and refill.
What Happens If You Add Too Much Salt?
Over-salting doesn’t create more chlorine — the generator still only produces sanitizer based on its output setting, not the raw amount of salt available. What over-salting does create is unnecessary corrosion risk on metal fittings, a more noticeable salty taste, and in extreme cases, interference with your other water balance readings. If you accidentally add too much, the only real remedies are diluting with fresh water (partially draining and refilling) or waiting it out through natural water loss from splash-out and evaporation while topping up with unsalted water instead of more salt.
What Happens If You Add Too Little?
Under-salting is the more common mistake, and it shows up as a generator that seems to be running but isn’t keeping chlorine levels where they should be. If your salinity reading comes back below the manufacturer’s minimum, add salt in small increments — a pound or two at a time in a typical residential spa — retesting after each addition and giving it time to fully dissolve and circulate before adding more.
Sample Dosage Walkthrough
To put the math in context, imagine a 400-gallon, 6-person spa with a target salinity of 2,500 ppm starting from freshly filled, unsalted water. Using the rough guideline of roughly 2 lbs of salt per 100 gallons to raise salinity into the working range, that tub would need somewhere in the neighborhood of 8 lbs of salt as a starting dose, added gradually with the jets running. After 20–30 minutes of circulation, a salinity test would confirm whether you’ve landed in range or need a small top-up. From that point forward, ongoing additions are much smaller — typically just replacing what’s lost to draining, splash-out, and filter backwashing, rather than repeating a full dose.
Saltwater Maintenance Differences
Just because you have a salt system doesn’t mean you can ignore the tub. The maintenance is different, not non-existent.
1. Testing Salinity: Standard strips won’t tell you salt levels. You need specific salt test strips or a digital meter. Check our list of best digital hot tub water testers.
2. Boost Mode: After a party or heavy use, the salt system might not generate chlorine fast enough. You may still need to add a small amount of granular shock. See how often to shock a hot tub.
3. Cleaning the Cell: Every few months, calcium scale will build up on the salt cell plates. You will need to soak the cell in vinegar or a mild acid solution to clean it, or it will stop producing chlorine.
4. Filter Care: Salt systems don’t reduce your filtration workload. Rinse filters every 2–4 weeks and do a deep chemical soak every couple of months, since a clogged filter restricts the flow past the salt cell and reduces chlorine output.
5. Draining and Refilling Schedule: Salt doesn’t evaporate, but total dissolved solids (TDS) still build up over time from body oils, lotions, and dissolved minerals. Most owners still drain and refill every 3–4 months, just as they would with a traditional chlorine tub, then re-add salt to the fresh water.
6. Logging Your Readings: Because salt systems respond more slowly to adjustments than dumping in a dose of granular chlorine, keeping a simple log of your salinity, chlorine, and pH readings over a few weeks helps you spot trends before they become problems — for example, a slow downward drift in chlorine output that signals it’s time to clean or replace the cell, rather than waiting until the water turns cloudy to notice something’s wrong.
7. Seasonal Adjustments: Warmer months typically mean more bathers, more sunscreen and lotion residue, and faster chlorine demand, while colder months usually mean lighter use but slower electrolysis. Expect to nudge your output setting up slightly during your peak-use season and back down during quieter stretches, rather than leaving it at a single fixed setting year-round.
A Simple Weekly Routine
- Once or twice a week: test free chlorine and pH; adjust as needed.
- Every 1–2 weeks: test salinity to confirm it’s still within range.
- Every 2–4 weeks: rinse filters.
- Every 1–3 months: inspect and, if needed, descale the salt cell.
- Every 3–4 months: drain, deep clean, and refill, then rebalance and re-add salt.
Troubleshooting Common Salt System Problems
Even a correctly installed system runs into hiccups occasionally. Here’s how to diagnose the most common issues.
Cloudy Water
Cloudiness usually points to one of three causes: insufficient chlorine output, an overloaded filter, or unbalanced water chemistry. Start by testing free chlorine and pH — if chlorine is low, increase the generator’s output setting or add a small dose of shock to catch up. If chemistry checks out, pull the filter and give it a deep clean, since a saturated filter can’t keep pace with bather load even when the sanitizer level is correct.
Low or No Chlorine Output
If your test strips consistently show near-zero chlorine despite the generator running, check these in order:
- Salinity: Too little salt in the water starves the cell of raw material. Retest and add salt gradually if levels are below the manufacturer’s minimum.
- Scale buildup on the cell: Calcium deposits insulate the plates and block the electrical reaction. Soak the cell in a manufacturer-approved acid solution (often diluted vinegar or a specific descaling product) until the buildup dissolves.
- Water temperature: Very cold water slows electrolysis. This is less of an issue in a heated spa, but worth ruling out if the tub has been sitting unheated.
- Cell age: If the cell is more than a couple of years old and cleaning doesn’t help, it may simply be worn out and due for replacement.
Error Codes or Warning Lights
Most drop-in units use a simple LED indicator system — a flashing or colored light usually signals low salinity, a cell fault, or a flow problem. Because indicator schemes vary by brand, always keep the printed manual (or a photo of it) handy, since a code that means “low salt” on one system might mean “check flow” on another.
Skin Irritation Despite “Gentler” Water
If skin irritation persists after switching to salt, the culprit is often unbalanced pH or alkalinity rather than the chlorine itself — salt systems don’t fix underlying water balance problems on their own. Re-test and adjust pH (7.4–7.6) and alkalinity (80–120 ppm) before assuming the salt system is at fault.
A Strong Chlorine Smell Even With a Salt System
It seems counterintuitive, but a strong chemical smell from a saltwater tub is usually a sign of too little active chlorine relative to accumulated organic waste, not too much. That “pool smell” is caused by chloramines — compounds formed when chlorine binds to ammonia from sweat, urine, or personal care products, rather than the chlorine itself. If odor becomes noticeable, shock the water to break down the chloramines and burn off the excess, then let the salt system resume its normal maintenance role afterward.
Foam or Bubbles on the Water Surface
Foaming spas are a maintenance issue independent of sanitizer type, usually traced back to residue from lotions, soaps, or low-quality defoamer products building up in the water. It’s not caused by the salt system itself, though a well-balanced salt tub can make foam more noticeable simply because the water is otherwise clearer. A partial drain, a foam-specific spa treatment, and reminding bathers to rinse off before soaking generally resolves it.
Rapid Cell Wear
If your cell needs replacing well before the one-to-three-year range manufacturers typically quote, look at three variables: consistently high salinity (running above the recommended range accelerates plate wear), high calcium hardness in your fill water (which speeds up scale formation), or running the output setting at or near maximum continuously rather than dialing it back during lower-demand periods. Addressing any of these can meaningfully extend cell life.
Wood Hot Tubs and Salt Systems
Traditional cedar and other wood-shell spas behave differently from acrylic or fiberglass tubs. Chlorine, over time, can dry out and degrade the wood fibers, leading to premature cracking and reduced lifespan of the shell. For this reason, owners of wood hot tubs who want the convenience of a salt system generally look at bromine generators instead, since bromine is considered gentler on wood surfaces.
If you own a wood-shell spa, check with the manufacturer or a wood hot tub specialist before installing any salt system, and lean toward a bromine-based unit if you decide to move forward.
Why Wood Reacts Differently Than Acrylic or Fiberglass
Acrylic and fiberglass shells are sealed, non-porous surfaces that don’t absorb water or chemicals the way untreated or lightly sealed wood does. Wood is naturally porous, and repeated exposure to chlorinated water can gradually dry out and break down the wood’s natural oils and fibers over months and years of use, contributing to cracking, splitting, or accelerated weathering of the shell. Bromine is generally considered a gentler alternative in this specific context, which is part of why traditional wood-fired hot tub communities have historically favored bromine or even simpler, lower-chemical sanitizing approaches over chlorine-heavy routines.
Alternatives for Wood Tub Owners
If a bromine generator isn’t available or practical for your setup, some wood hot tub owners opt to skip electrolysis-based systems entirely and stick with manual bromine tablets in a floater, or explore mineral-based sanitizing approaches with reduced overall chemical demand. Whatever route you choose, the priority for a wood-shell tub is minimizing prolonged, concentrated chlorine exposure to the wood itself.
Winterizing a Salt System
If you live somewhere with harsh winters and plan to drain your hot tub for the season, your salt cell needs a bit of extra attention before storage.
- Remove and clean the cell before winterizing. Soak it in a descaling solution to clear any mineral buildup accumulated over the season, then rinse thoroughly.
- Dry it fully before storing to prevent corrosion on any exposed contacts or fittings.
- Store the control box indoors in a dry location, away from temperature extremes, if it’s a plug-in unit that isn’t hard-wired to the spa pack.
- Inspect cables and connectors for any salt residue or corrosion before you pack the unit away, and address it now rather than discovering a problem next spring.
If you keep your tub running through winter instead of draining it, the main adjustment is simply keeping an eye on salinity and output slightly more often, since colder ambient conditions can affect how efficiently the cell produces chlorine.
Spring Start-Up After Winter Storage
When you bring the tub back online for the season, treat it much like a fresh conversion rather than assuming last year’s salt level carried over correctly. Refill, rebalance pH and alkalinity, reinstall the (cleaned and inspected) cell, and re-test salinity before assuming the system is ready to run on autopilot. It’s also a good moment to inspect the cell plates closely for any pitting, discoloration, or physical damage that might have gone unnoticed during the off-season, since catching a failing cell in spring is far less disruptive than discovering it mid-summer during peak use.
Salt vs. Chlorine vs. Bromine vs. Mineral Systems
A salt system isn’t the only alternative to manually dosing chlorine. Here’s how the major sanitizing approaches compare.
| System | How It Sanitizes | Upfront Cost | Ongoing Effort | Best For |
|---|---|---|---|---|
| Traditional Chlorine | Manual granules or tablets added directly to water | Lowest | Highest — frequent testing and dosing | Budget-conscious owners, simple setups |
| Traditional Bromine | Bromine tablets in a floater or feeder | Low | Moderate | Owners sensitive to chlorine smell, wood tubs |
| Salt (Chlorine Generator) | Electrolysis converts dissolved salt into chlorine automatically | Moderate–High | Lower day-to-day, periodic cell care | Owners wanting softer water and less manual dosing |
| Mineral / Ozone Systems | Mineral cartridges plus ozone or UV, with reduced chlorine as backup | Moderate | Low chlorine dosing, but cartridge replacement needed | Owners wanting to minimize chlorine use further |
Many owners land on salt as the sweet spot: less manual dosing than traditional chlorine or bromine, without the added cartridge-replacement routine of a full mineral/ozone setup.
A Closer Look at Mineral and Ozone Systems
Mineral cartridge systems work by slowly releasing metal ions — often silver and copper compounds — into the water, which have some natural antimicrobial properties and allow you to run lower chlorine or bromine levels than you otherwise would. Ozone systems inject ozone gas or use UV light to oxidize contaminants, again reducing (but not eliminating) the need for traditional sanitizer. Both approaches typically still require some baseline chlorine or bromine, just at reduced levels compared with a tub running on manual dosing alone. They tend to appeal to owners who want to minimize chemical exposure as much as possible and are willing to accept a moderate cartridge-replacement routine (often every few months) in exchange.
Can You Combine Systems?
Some owners run a salt chlorine generator alongside a mineral cartridge for extra assurance, since the mineral ions provide a small supplementary layer of protection between generator cycles. This isn’t necessary for most tubs, but it’s a reasonable option for anyone who wants extra peace of mind during high-use periods, like a rental property or a tub used by a large family.
Common Mistakes to Avoid
- Skipping the deep clean. Converting without purging biofilm from the plumbing sets your new system up to fight an uphill battle from day one.
- Using the wrong salt. Table salt contains anti-caking additives and iodine that can cloud water or stain surfaces. Epsom salt (magnesium sulfate) isn’t compatible with chlorine generators at all and can damage the cell. Always use pool-grade sodium chloride formulated for spas.
- Over-salting “just to be safe.” More salt doesn’t mean more chlorine — it means faster corrosion risk and possibly a stronger salty taste. Stick to the manufacturer’s specified range.
- Ignoring pH and alkalinity. A salt system doesn’t replace basic water balancing. Skipping this step is one of the most common reasons owners report “the salt system doesn’t work.”
- Cranking the output to maximum immediately. Start conservative and adjust up gradually based on test results, rather than assuming higher output is always better.
- Forgetting the cell needs cleaning. Scale buildup is often mistaken for a broken unit when it’s really just routine maintenance that’s overdue.
- Not checking compatibility first. Installing a salt system on an older tub with an exposed stainless steel heater can lead to a costly repair down the road.
- Letting splashed salt water dry on metal surfaces. A quick rinse of jet trim, handrails, and cabinet hardware after use goes a long way toward preventing surface corrosion over time.
- Assuming “salt system installed” means “maintenance-free forever.” The cell, the filter, and the water chemistry all still need periodic attention; the system automates chlorine production, not the entire maintenance routine.
- Buying an undersized generator to save money. A unit rated below your tub’s actual water volume will run harder and wear out faster trying to keep up.
- Waiting too long to address a warning light. Most indicator lights are early warnings, not emergencies — addressing a low-salinity or cell-fault alert promptly is much easier than dealing with cloudy water or a burned-out cell later.
A Quick Pre-Conversion Checklist
Before you start, it helps to run through a short checklist rather than diving straight into installation:
- Confirmed your tub’s heater material and general salt-compatibility with the manufacturer.
- Checked whether the conversion affects your existing warranty.
- Chosen a generator rated appropriately for your tub’s actual water volume.
- Purchased pool-grade sodium chloride (or sodium bromide, if applicable) — not table salt or Epsom salt.
- Picked up dedicated salinity test strips or a digital meter.
- Scheduled enough time for the full process: draining, deep cleaning, refilling, balancing, and dissolving the initial salt dose.
Will a Conversion Void Your Warranty?
This is one of the most overlooked questions before a DIY conversion. Because a salt system introduces sodium chloride into water that touches your heater, pumps, and plumbing, some manufacturers treat an aftermarket conversion as a modification that can affect coverage — particularly on the heater element.
Before installing a kit on a tub that’s still under warranty, it’s worth taking a few minutes to:
- Check your owner’s manual or manufacturer’s website for any language about aftermarket sanitizing systems.
- Contact customer support directly and ask specifically whether a drop-in salt chlorine generator affects your coverage.
- Get any confirmation in writing (an email reply is fine) in case you need to reference it later.
If your tub is out of warranty already, this is a non-issue — but it’s a cheap five-minute check that can save a much more expensive conversation later if something goes wrong with the heater.
Buying Guide: What to Look for in a Salt System
Not all conversion kits are created equal. Here’s what actually matters when comparing options.
- Tub capacity rating: Every generator is rated for a maximum gallon capacity. Buying a unit rated below your tub’s volume means it will struggle to keep up with chlorine demand.
- Drop-in vs. in-line: Decide upfront whether you want the simpler, no-plumbing drop-in style or a more permanent in-line install.
- Adjustable output: Look for a control box that lets you fine-tune chlorine production rather than a fixed on/off setting, since this makes dialing in the right level far easier.
- Cell material and warranty: Titanium plates with a mixed-metal-oxide coating tend to last longer than cheaper alternatives. Check how long the cell itself is warrantied — this is often the first part to wear out.
- GFCI-rated plug and housing: Since the unit sits in or near water, confirm it’s designed for wet-location use and pairs with a GFCI-protected outlet.
- Availability of replacement cells: Before buying, check that replacement cells for the specific model are easy to find — some off-brand units become difficult to source parts for after a year or two.
- Compatible salt type: Confirm whether the unit uses standard sodium chloride, sodium bromide, or can run either, based on which sanitizer you ultimately want.
- Ease of cell removal: Since you’ll periodically pull the cell out for cleaning or winterizing, a design that lets you do this quickly without tools is a meaningful quality-of-life feature.
- Customer support and documentation: A brand with clear manuals, responsive support, and readily available troubleshooting guides will save you time if you run into an issue down the road.
Reading Between the Lines on Product Listings
Marketing copy for these kits tends to emphasize how quick and effortless installation is, which is generally true for the physical mounting step, but says little about the ongoing dial-in period. When comparing listings, look past the headline claims and check for specifics: the exact gallon capacity rating, the salinity range the unit is designed around, what materials the cell plates are made from, and what the manufacturer’s stated cell lifespan and warranty actually are. Vague claims like “durable” or “long-lasting” without a specific warranty period are worth treating with some skepticism.
New vs. Refurbished or Off-Brand Units
Budget and off-brand units can work perfectly well, but the biggest practical risk isn’t build quality on day one — it’s parts availability two or three years down the line when the cell needs replacing. Before buying a lesser-known brand purely to save money upfront, do a quick search to confirm replacement cells are still being sold for that specific model, so you’re not stuck buying an entirely new control box just because the original cell is discontinued.
Health and Skin Benefits — What’s Realistic to Expect
A lot of the appeal around saltwater hot tubs centers on how the water feels, and there’s a reasonable physical explanation for it: because chlorine is produced steadily rather than dosed in large intermittent amounts, chloramine buildup tends to be lower, which is typically what causes the red eyes, dry skin, and strong odor people associate with over-chlorinated water.
Some owners with eczema, psoriasis, or generally sensitive skin report noticeably less irritation after switching, and mineral-rich water has a long folk history in bathing and spa culture more broadly. That said, it’s worth keeping expectations grounded: a hot tub salt system produces chlorinated water at a much lower salinity than genuine mineral spa treatments, and any specific health claims about treating skin conditions or respiratory issues should be discussed with a doctor or dermatologist rather than taken as guaranteed outcomes from a hardware upgrade. If you have a diagnosed skin condition, it’s worth testing cautiously and tracking your own results rather than assuming the switch alone will resolve symptoms.
Eyes and Sensitive Skin
Red, stinging eyes after a soak are usually a chloramine problem rather than a chlorine problem — the same imbalance discussed in the maintenance and troubleshooting sections above. Because a well-run salt system tends to keep chloramine buildup lower than sporadic manual dosing, many owners notice this particular irritation improves noticeably after conversion, provided the water is otherwise kept in proper balance.
Setting Realistic Expectations
It’s worth being direct about this: a saltwater hot tub is still a chlorinated hot tub, not a mineral spa treatment or a therapeutic device. The improvements most owners notice are real but incremental — softer-feeling water, less odor, fewer harsh chemical spikes — rather than a dramatic health transformation. If you’re converting specifically hoping to manage a medical skin or respiratory condition, treat the switch as a comfort upgrade you’re trying out, and loop in your doctor or dermatologist if you’re tracking it as part of a broader treatment plan.
Is a Saltwater Conversion More Eco-Friendly?
Salt systems produce chlorine on demand rather than requiring manufactured, packaged, and shipped chemical products delivered in plastic buckets on a recurring basis. Over a season, that can mean less plastic packaging waste and less chemical transport compared with regularly restocking granular or liquid chlorine.
That said, it’s not a zero-impact swap. Salt cells consume a small amount of electricity to run the electrolysis process, replacement cells are a manufactured product with their own environmental footprint, and you’ll still periodically drain and refill the tub just as you would with any sanitizing method. The environmental case for salt conversion is real but modest — think “somewhat lower footprint,” not “eco-neutral.”
Water Usage Considerations
Draining frequency doesn’t change dramatically with a salt system — most owners still empty and refill every three to four months regardless of sanitizing method, since total dissolved solids build up from bather load rather than from the sanitizer itself. If minimizing water usage is a priority, that’s more a function of how you manage drain schedules and bather hygiene (like rinsing off before entering) than which sanitizing system you choose.
Disposal of Old Chemicals and Cells
If you’re switching away from a stockpile of traditional chlorine or bromine products, check local guidelines for disposing of pool and spa chemicals responsibly rather than pouring them down a drain or discarding them with regular household trash. Worn-out salt cells, likewise, often contain recyclable metal components — some manufacturers and local recycling programs accept old cells rather than sending them to a landfill, so it’s worth a quick check before you toss one.
Frequently Asked Questions
Barely. A hot tub usually requires around 2,000 ppm of salt. For comparison, the ocean is 35,000 ppm. It tastes more like a teardrop than sea water.
No. Epsom salt is Magnesium Sulfate. Salt chlorinators require Sodium Chloride. Putting magnesium in the generator can damage the plates and will not produce chlorine.
Day-to-day, yes, because salt is very cheap. However, the salt cell (the part in the water) acts like a lightbulb and burns out every 1-3 years. Replacement cells cost $150-$300, so the long-term cost is similar to traditional chlorine. For general cost tips, check our inflatable hot tub maintenance guide.
It can if you are careless. High salt levels or splashing salt water on metal components (like pumps or heater housings) without rinsing can lead to rust. Keep your water balanced to minimize corrosion risk.
Most can, since a salt system just generates the same chlorine your tub already uses. The exceptions are older spas with exposed stainless steel heaters and most wood-shell hot tubs, both of which are more vulnerable to salt-related wear. When in doubt, check with your manufacturer before installing a kit.
A drop-in kit typically takes under an hour to physically install, though the full conversion process — draining, deep cleaning, refilling, balancing, and dissolving the initial salt dose — is closer to a half-day project once you include wait times.
Yes, occasionally. A salt system handles routine, day-to-day sanitizing, but heavy bather loads or organic buildup can outpace what the generator produces on its own. Most owners still shock periodically, especially after parties or extended guest use.
Most drop-in systems are designed for roughly 2,000–3,000 ppm, but this varies by manufacturer. Always check your specific unit’s manual rather than relying on a generic number, and test with a dedicated salinity strip or meter rather than guessing.
Yes. Removing a drop-in system is as simple as unplugging the control box and taking the cell out of the water. You’ll want to drain and refill the tub with fresh, unsalted water afterward if you plan to go back to manual dosing full-time.
Check salinity first — a low salt level is the most common cause. After that, inspect the cell for scale buildup, confirm the control box output isn’t set too low, and make sure water is actually circulating past the cell. See our troubleshooting section above for a full walkthrough.
For most first-time DIYers, a drop-in system is the more approachable choice since it requires no plumbing modifications — just a GFCI outlet and a place to hang the cell. In-line systems can offer slightly more consistent performance but typically require plumbing work or professional installation.
Most manufacturers estimate one to three years of typical use, though this depends heavily on how often you soak, how well you keep salinity within range, and your local water hardness. Running salinity too high or letting scale build up unchecked tends to shorten a cell’s working life.
A drop-in kit is designed for DIY installation and typically takes under an hour to physically set up. An in-line, hardwired system is more involved and often benefits from a technician’s help, especially if it requires modifying existing plumbing or working near the spa’s electrical panel.
It can, depending on the manufacturer. Some brands treat an aftermarket salt system as a modification that may affect heater coverage specifically. Check your owner’s manual or contact the manufacturer directly before installing a kit on a tub that’s still under warranty.