10 Inflatable Hot Tub in Garage Ideas: The Ultimate Indoor Oasis
Why Put an Inflatable Hot Tub in the Garage?
Winter is coming, or perhaps you just value your privacy. Whatever the reason, moving your relaxation station indoors is a brilliant move. An inflatable hot tub in the garage offers the perfect compromise between an expensive permanent indoor spa and an outdoor tub exposed to the elements.
However, you can’t just throw a tub next to the lawnmower and call it a day. To truly create a sanctuary, you need to think about aesthetics, flooring, and atmosphere. We have curated 10 incredible design themes to inspire your conversion.
The garage is one of the most underutilized spaces in most homes. While it serves its purpose for parking vehicles and storing seasonal decorations, the square footage sitting behind that overhead door represents enormous untapped potential. Converting even a portion of your garage into a hot tub retreat gives you year-round access to hydrotherapy without the $15,000 to $40,000 price tag of a permanent built-in spa installation.
An inflatable hot tub is the ideal choice for a garage conversion for several important reasons. First, these portable spas weigh between 50 and 100 pounds when empty, meaning you can move them in and out without professional help. Second, they inflate and deflate in roughly 15 to 20 minutes, so you can reclaim your garage space for vehicle parking whenever you need to. Third, the price point of most inflatable models ranges from $300 to $800, making this an accessible project for virtually any budget.
But the real magic happens when you stop thinking of your garage as a storage room and start treating it as an extension of your living space. With the right preparation, lighting, and design touches, a garage hot tub setup can rival the ambiance of a luxury spa. Whether you want a rustic cabin vibe, a sleek minimalist retreat, or a full-blown party zone, the concrete walls and high ceilings of your garage provide the perfect blank canvas.
Before we dive into the 10 design ideas, there are several critical preparation steps you need to address. Skipping these fundamentals is the number one reason garage hot tub projects fail. The good news is that most of these prep tasks are one-time investments that will serve you for years. Let’s make sure your garage spa is built on a solid foundation.
According to industry data, the average homeowner spends about $500 to $1,200 on a complete garage hot tub setup including the tub, floor protection, ventilation, and basic décor. Compare that to $8,000+ for a permanent hot tub installation, and the value proposition becomes clear.
Critical Prep Work Before You Fill the Tub
Garages are generally not designed for high humidity. Before filling your tub, ensure you have proper ventilation (exhaust fans or dehumidifiers) to prevent mold. Also, check your floor’s structural integrity if it’s not concrete.
For a complete guide on getting started, make sure to read our step-by-step tutorial on inflatable hot tub setup to ensure you don’t miss any critical connections.
The preparation phase breaks down into five key areas: flooring, insulation, electrical, ventilation, and moisture management. Each one plays a vital role in ensuring your garage hot tub experience is safe, comfortable, and long-lasting. Let’s walk through each one so you know exactly what to expect before that first fill.
Planning your layout is the first step. Measure your garage interior carefully and account for the tub’s inflated dimensions, plus at least 24 inches of clearance on all sides for access and airflow. A standard two-car garage measures approximately 20 feet by 20 feet, which gives you plenty of room for a 6- to 8-person inflatable tub while still leaving space for storage shelving or a small seating area. If you have a single-car garage, a 2- to 4-person model will fit comfortably with room to move around it.
Consider the placement of your garage door relative to the tub. Positioning the tub away from the overhead door tracks prevents condensation drip issues and keeps the tub out of the direct cold-air path when the door opens. The back corner opposite the garage door is typically the best location, as it provides maximum insulation from exterior walls and keeps the tub in the warmest zone of the space.
Floor Preparation and Protection for Your Garage Hot Tub
The garage floor is the foundation of your entire setup, and getting it right is non-negotiable. A standard concrete garage slab is strong enough to support the weight of a filled inflatable hot tub, which can exceed 2,000 pounds for a 4-person model. However, raw concrete presents several problems that you need to address before placing your tub.
Why Raw Concrete Isn’t Enough
Unsealed concrete is porous and absorbs moisture. When water splashes out of the tub during use, or when condensation forms on the exterior walls of the tub, that moisture seeps into the concrete and creates problems. Over time, absorbed moisture can lead to efflorescence (white mineral deposits on the surface), crack spalling in freeze-thaw climates, and an ideal breeding environment for mold and mildew underneath the tub.
Concrete is also hard and unforgiving on your feet. Stepping out of a warm hot tub onto cold, rough concrete is the fastest way to ruin the spa experience. And from a purely aesthetic standpoint, a bare concrete floor screams “garage” rather than “retreat.”
Floor Protection Options
There are several excellent options for protecting your garage floor and improving comfort. Each one has trade-offs in cost, durability, and aesthetics, so choose based on your priorities and how permanent you want the setup to be.
Epoxy Floor Coating: A high-gloss epoxy coating seals the concrete permanently and creates a waterproof, easy-to-clean surface. It comes in a variety of colors and can include decorative flake additives for a professional look. Application requires thorough concrete preparation including acid etching or diamond grinding, and the coating needs 24 to 72 hours to cure. The cost ranges from $2 to $5 per square foot for a DIY application. This is the most permanent solution and provides excellent moisture protection for the concrete beneath.
Interlocking Foam Tiles: These are the quickest and most affordable option. The same EVA foam tiles used in playrooms or home gyms provide cushioning, insulation from the cold floor, and basic moisture resistance. They click together easily and can be removed and stored when you need the garage space back. Prices typically range from $15 to $30 per pack covering 24 square feet. The downside is that they are not completely waterproof at the seams, so standing water can still seep through to the concrete over time.
Hot Tub Mats and Pads: Purpose-built hot tub pads are made from recycled rubber or dense foam specifically designed to handle the weight and moisture of a spa. They provide excellent cushioning, vibration dampening, and moisture barrier protection. A quality hot tub pad costs between $50 and $150 depending on size and thickness. For detailed reviews, check out our guide to the best hot tub pads on the market.
Outdoor Carpet or Marine-Grade Rugs: If you want a softer, more residential look, outdoor carpet or marine-grade rugs can cover the entire floor area. These materials are designed to resist moisture and mildew, and they provide a warm, inviting surface underfoot. Choose a style that complements your overall design theme. Just be aware that water can pool underneath if the carpet doesn’t dry properly, so lift and dry it periodically.
Rubber Roll Flooring: Available in rolls similar to carpet, rubber flooring provides excellent grip, cushioning, and waterproofing. It is commonly used in commercial gyms and workshops, and it handles heavy traffic and moisture exceptionally well. It is more expensive than foam tiles at $3 to $8 per square foot, but it lasts significantly longer and provides superior protection.
Whatever flooring you choose, make sure it is level. Use a long level or a laser level to check the garage floor for slopes. Most garage floors slope toward the door for drainage, which means your hot tub will sit slightly off-level. Use shims or a leveled platform to correct this before inflating the tub. An off-level hot tub puts uneven stress on the liner and can cause premature wear or even leaking.
Dealing with Garage Floor Drains
If your garage has a floor drain, you are in luck. Position the tub so that any overflow or splashing naturally flows toward the drain. You may want to create a slight channel or use a rubber threshold strip to direct water flow. However, do not connect the hot tub’s drain hose directly to the floor drain, as backflow and sewer gas issues can arise. Always drain the tub using a hose routed to an appropriate exterior outlet or utility sink.
If your garage does not have a floor drain, you will need to be more vigilant about splash management. Consider placing a raised threshold or rubber dam around the tub area to contain any overflow. Keep towels or a wet-dry vacuum handy for immediate cleanup after each use. This is also a good reason to invest in a quality tub cover, which we will discuss in the accessories section.
Insulation and Heat Retention for Garage Hot Tubs
One of the biggest challenges of running an inflatable hot tub in a garage is heat loss. Unlike a permanent spa with thick insulated shells and locked-in heat, inflatable tubs rely on the surrounding air temperature to help maintain water temperature. A cold garage means your tub’s heater works overtime, driving up electricity costs and potentially struggling to reach the target temperature.
Understanding heat transfer is key to solving this problem. Heat escapes from your hot tub through three pathways: evaporation from the water surface, conduction through the tub walls and floor, and convection as cold air circulates over the water. A well-insulated garage addresses all three pathways, while targeted insulation measures can provide additional protection even in an uninsulated space.
Garage Wall and Ceiling Insulation
If your garage walls are unfinished, adding insulation is one of the most impactful upgrades you can make. Fiberglass batt insulation is the most common and affordable option, typically costing $0.50 to $1.50 per square foot. For a standard two-car garage, insulating all four walls and the ceiling might cost $500 to $1,500 in materials if you do the work yourself.
Rigid foam board insulation is another excellent choice, especially for garages where you want a cleaner finished look. Panels can be cut to fit between studs and then covered with drywall or paneling for a polished appearance. Rigid foam provides a higher R-value per inch than fiberglass, which matters in garages with limited wall depth.
For a quick and temporary solution, hang thermal blankets or moving blankets on the walls surrounding the tub area. These won’t provide the insulation value of proper building materials, but they do reduce cold drafts and create a warmer microclimate around the tub. Heavy curtains hung from ceiling-mounted rods serve a similar purpose while also adding to the aesthetic of your spa theme.
The Tub Cover Is Your Best Friend
Every inflatable hot tub comes with a cover, and using it is the single most important thing you can do to retain heat. When the tub is not in use, keep the cover locked in place. This prevents evaporation, which is responsible for up to 70% of heat loss in an uncovered hot tub. A good cover also keeps dust, debris, and garage contaminants out of the water, reducing your chemical usage and maintenance burden.
If your included cover feels thin or flimsy, consider upgrading to a premium insulated cover. Aftermarket covers with thicker foam cores and vapor barriers can reduce heat loss by an additional 20 to 30 percent. The investment pays for itself quickly through lower electricity bills and faster heat-up times.
Floor Insulation
The garage floor is a major source of conductive heat loss. Cold concrete directly beneath the tub acts as a heat sink, pulling warmth from the water through the tub’s floor. Placing insulation between the tub and the concrete is essential. A foil-backed foam board or a thick rubber mat with insulation properties creates a thermal break that significantly reduces floor heat loss.
Some hot tub owners build a simple wooden platform with rigid foam insulation sandwiched between the plywood layers. This elevated platform raises the tub 4 to 6 inches off the floor, creating an air gap that adds insulation value and improves comfort when entering and exiting the tub. Just make sure the platform is rated for the total weight of the filled tub and its occupants.
A well-insulated garage with a quality tub cover can reduce your hot tub’s energy consumption by 30 to 50 percent compared to the same tub in an uninsulated space. For a typical inflatable hot tub that uses 1.5 to 2.5 kilowatts, this translates to savings of $15 to $40 per month depending on your electricity rates and how often you use the tub.
Keeping the Garage Warm
If you use your hot tub regularly during cold months, heating the garage itself is worth considering. A small electric space heater rated for garage use can maintain the ambient temperature at 60 to 70 degrees Fahrenheit, which dramatically reduces the strain on your hot tub heater. Look for models with tip-over protection and automatic shut-off for safety in a garage environment.
Infrared heaters are particularly effective in garages because they heat objects and people directly rather than trying to warm the air. This means you feel warm even at a lower ambient temperature, and the energy efficiency is superior to convection-based heaters. A quality infrared garage heater costs between $100 and $400 and can cover a two-car garage effectively.
For those with access to natural gas, a vented garage heater is the most powerful and cost-effective heating solution. These units can maintain comfortable temperatures even in severe cold and cost significantly less to operate than electric alternatives. Installation typically requires professional help to run the gas line and venting, but the long-term savings are substantial.
Electrical Planning for Your Garage Hot Tub
Electricity is the lifeblood of your inflatable hot tub, and getting the electrical setup right is critical for both safety and performance. Most inflatable hot tubs are designed as “plug and play” units that run on a standard 120-volt, 15-amp household circuit. This sounds simple enough, but garages often have electrical configurations that require careful attention.
Understanding Your Garage’s Electrical Circuit
Walk out to your garage and look at the breaker panel. Identify which circuits serve the garage outlets and note what else is on those circuits. Common garage loads include the garage door opener (typically 10 to 15 amps during operation), power tool chargers, freezers or refrigerators, and lighting. Adding a hot tub’s continuous 12 to 15 amp draw to an already loaded circuit is a recipe for nuisance tripping.
The ideal scenario is a dedicated 20-amp circuit running to a GFCI-protected outlet near your tub location. A GFCI (Ground Fault Circuit Interrupter) outlet is not just recommended, it is required by the National Electrical Code for any outlet within 6 feet of a water source. If your garage doesn’t have a GFCI outlet near the tub area, have an electrician install one. The cost is typically $150 to $300 for a straightforward installation.
Extension Cords: Proceed with Extreme Caution
Many people wonder if they can use an extension cord to reach their hot tub from a distant outlet. The short answer is: it depends. If you must use an extension cord, it needs to be a heavy-duty, outdoor-rated cord with a gauge of 10 AWG or thicker, rated for at least 20 amps. A standard household extension cord is not sufficient and creates a serious fire and shock hazard.
Keep the extension cord as short as possible. Every additional foot of cord increases resistance and voltage drop, which can cause the hot tub’s heater to underperform or the cord itself to overheat. A 25-foot, 10-gauge cord is generally the maximum recommended length. Never run extension cords under rugs, through walls, or across areas where they can be damaged.
Never modify your hot tub’s power cord or plug. Do not bypass GFCI protection. Do not use a multi-outlet adapter to share the circuit with other high-draw appliances. If you are unsure about any aspect of your garage’s electrical system, consult a licensed electrician before filling the tub. The cost of a professional electrical assessment is negligible compared to the risk of electrical fire or injury.
Dedicated Circuit Installation
If you plan to make the garage hot tub a permanent or semi-permanent fixture, investing in a dedicated circuit is the smartest move. A licensed electrician can run a new 20-amp circuit from your main panel to a GFCI outlet positioned exactly where you need it. This eliminates all concerns about circuit overloads and provides the most reliable power supply for your tub.
The cost of running a new circuit varies based on the distance from your panel to the outlet location, the complexity of routing through walls or ceilings, and local labor rates. Expect to pay between $300 and $800 for most residential installations. While this is an added expense, it provides peace of mind and ensures your hot tub operates at peak performance without interruptions.
Power Consumption and Costs
Inflatable hot tubs typically consume between 1.5 and 2.5 kilowatts during heating and 0.5 to 1.0 kilowatts during filtration cycles. The heater runs continuously until the target temperature is reached, then cycles on and off to maintain it. In a well-insulated garage with the cover on, the heater might cycle for 30 to 60 minutes every few hours. In a cold, uninsulated garage, it could run almost continuously.
To estimate your monthly electricity cost, multiply the tub’s kilowatt rating by the number of hours the heater runs per day, multiply by 30 days, and then multiply by your electricity rate. For example, a 1.5 kW heater running an average of 6 hours per day at $0.13 per kilowatt-hour costs approximately $35 per month. In a warmer climate or with excellent insulation, that cost can drop to $15 to $20 per month.
For more detailed information on operating costs, read our comprehensive guide on do inflatable hot tubs use a lot of electricity. Understanding your energy consumption helps you budget accurately and make informed decisions about insulation improvements.
Ventilation and Humidity Control in the Garage
Managing humidity is arguably the most critical factor in a successful garage hot tub setup. When you heat water to 100 to 104 degrees Fahrenheit, evaporation increases dramatically. In an enclosed garage, this moisture-laden air has nowhere to go. Without proper ventilation and humidity control, you will experience condensation on walls and ceiling, foggy windows, damp surfaces, and eventually mold and mildew growth that can damage your home’s structure and compromise your family’s health.
Understanding the Moisture Problem
A typical 4-person inflatable hot tub loses approximately 1 to 2 gallons of water per day to evaporation when the cover is off during use. In an enclosed two-car garage, this moisture can raise the relative humidity from a normal 30 to 40 percent to over 80 percent in a single session. At humidity levels above 60 percent, condensation begins forming on cool surfaces like walls, windows, and metal tools. Above 70 percent, mold growth becomes a real risk within 24 to 48 hours.
The garage environment makes this problem worse than it would be in a typical indoor room. Garages usually lack the vapor barriers, insulated walls, and HVAC connections that help manage moisture in living spaces. Concrete walls and floors absorb moisture during use and then release it slowly back into the air, keeping humidity elevated long after you drain the tub.
Ventilation Strategies
Exhaust Fans: Installing a bathroom-style exhaust fan rated for at least 50 CFM (cubic feet per minute) is the most effective way to remove moisture-laden air. Position the fan on the wall opposite the garage door to create cross-ventilation. Run the fan during and for at least 30 minutes after each hot tub session. For a two-car garage, consider a 100 CFM fan or two 50 CFM units for adequate air exchange. Installation costs range from $150 to $400 depending on whether you need to duct through the wall or roof.
Ceiling Fans: A ceiling fan helps circulate air and prevents moisture from pooling at the ceiling level. It doesn’t remove moisture from the space, but it promotes evaporation from surfaces and improves the effectiveness of your exhaust fan. Choose a model with a damp-rated motor suitable for garage environments. Running the fan at medium speed during and after hot tub use makes a noticeable difference in perceived humidity.
Cross-Ventilation: If your garage has windows on opposite walls, opening them during hot tub use creates natural cross-ventilation that helps exhaust humid air. Even cracking the garage door 6 to 12 inches allows significant air exchange. The downside is heat loss in cold weather, but if the alternative is mold remediation, a slightly cooler garage is the better choice.
Dehumidifiers: Your Secret Weapon
A dehumidifier is not optional for a garage hot tub setup. It is as essential as the tub itself. While exhaust fans remove humid air, a dehumidifier actively pulls moisture from the air within the garage, maintaining a healthy humidity level even between sessions when the exhaust fan is off.
For a single-car garage with a 2- to 4-person tub, a 30-pint dehumidifier is sufficient. For a two-car garage with a larger tub, step up to a 50-pint model. Look for units with a continuous drain option that routes the collected water through a hose to a floor drain or exterior outlet, so you don’t have to manually empty the collection bucket. Energy Star-rated models consume less electricity and save you money over time.
Position the dehumidifier as close to the tub as possible, with the air intake facing the water surface. This captures moisture at the source before it disperses throughout the garage. Run the dehumidifier continuously during hot tub use and for several hours afterward. Most modern units have a humidistat that automatically cycles the compressor to maintain your target humidity level, typically 45 to 55 percent.
Combine strategies for best results. Run an exhaust fan during your soak, keep a dehumidifier running continuously, and leave the garage door cracked open if weather permits. This three-pronged approach keeps humidity under control even with daily hot tub use. Monitor humidity with an inexpensive hydrometer ($10 to $15) and adjust your ventilation as needed.
Preventing Mold and Mildew
Even with excellent ventilation, mold prevention requires ongoing vigilance. Inspect the garage walls, ceiling, and the area around and beneath the tub regularly for signs of mold growth. Look for dark spots, musty odors, or discoloration on painted surfaces. Early detection makes remediation simple; a spray bottle of white vinegar or a commercial mold remover handles most surface mold quickly.
Keep the area around the tub dry. Wipe down walls and surfaces that get splashed. Don’t leave wet towels or swimsuits draped over the tub or furniture. Ensure the tub cover is in good condition with no tears or gaps that allow moisture to escape when the tub is not in use. Replace the cover if it shows signs of waterlogging, which reduces its insulation value and allows steam to escape.
Consider applying a mold-resistant paint or coating to the garage walls and ceiling. These specialty paints contain antimicrobial agents that inhibit mold growth on the painted surface. While they don’t prevent mold in other areas, they add an extra layer of protection on the most vulnerable surfaces. A gallon of mold-resistant paint costs roughly $30 to $50 and covers about 350 square feet.
For more details on protecting your tub and maintaining optimal conditions, visit our guide on the best inflatable hot tub for winter, which covers cold-weather humidity management in detail.
Privacy and Soundproofing Your Garage Hot Tub
Privacy is one of the top reasons people choose a garage location for their hot tub. Unlike a backyard setup where neighbors might have a direct line of sight from their windows or deck, a garage provides walls and a door that naturally shield you from view. However, there are a few considerations to ensure your privacy is truly complete and that your relaxing spa sessions don’t disturb the rest of the household or your neighbors.
Blocking Visual Privacy
If your garage has windows, they need attention. Frost window film is an inexpensive and attractive solution that allows light in while blocking the view from outside. It applies easily with soapy water and a squeegee, and it can be removed without damaging the glass. For a more upscale look, consider stained glass window film that adds color and pattern while maintaining privacy.
The garage door itself is usually opaque enough when closed, but the small windows at the top of many garage doors can be a weak point. Cover them with frosted film or removable opaque panels. If you typically run the hot tub with the garage door open for ventilation, install a privacy screen or room divider just inside the door opening. These are available in wood, fabric, or bamboo styles that can complement your décor theme.
Sound Considerations
Inflatable hot tubs are relatively quiet, with the pump producing a steady hum similar to a household fan. However, the sound of splashing water, conversation, and music can travel through garage walls, especially if they are uninsulated. If you use your hot tub late at night, sound management is considerate to family members sleeping in bedrooms adjacent to the garage.
Adding insulation to shared walls naturally dampens sound transmission. Heavy curtains hung on the interior walls absorb sound effectively and add to the spa ambiance. A thick area rug or rubber flooring absorbs foot traffic noise and reduces echo within the garage, making the space feel more intimate and less industrial.
If you play music through a speaker system, invest in a quality waterproof Bluetooth speaker that delivers clear sound at moderate volume rather than a large system that needs to be cranked up. Position the speaker near the tub so you can enjoy music at a comfortable level without needing to blast it. Many modern speakers offer multi-room connectivity, so you can sync music from inside the house to your garage spa for a seamless experience.
Creating Intimacy with Room Dividers
Room dividers are an underutilized tool in garage spa design. A tall, attractive divider placed between the hot tub area and the storage or parking area of the garage immediately transforms the feel of the space. It creates a dedicated “room within a room” that feels private and intentional rather than like a tub sitting in a garage.
Bamboo screens evoke a natural, spa-like atmosphere. Fabric dividers on rolling frames can be pushed aside when you need garage access and rolled back into place for spa time. Even a simple tension rod with floor-to-ceiling curtains creates a soft boundary that changes the entire character of the space. Choose water-resistant fabrics like outdoor curtain panels that can handle the humidity without developing mildew.
10 Garage Hot Tub Ideas to Inspire You
Now that you understand the critical preparation work, let’s explore the fun part: design themes. Each of these ideas works with the unique characteristics of a garage space, turning limitations into assets. Choose the theme that resonates with your personal style, or combine elements from several to create something uniquely yours.

Cover those cold concrete walls with pallet wood or faux-log siding. Add some warm string lights and a faux fur rug (placed safely away from the splash zone) to create a cozy “Aspen Lodge” vibe right in your suburb. This is arguably the best setup for those chilly months—see our guide on the best inflatable hot tub for winter to match this theme.
To enhance the cabin atmosphere, consider adding a small electric fireplace or a wall-mounted infrared heater styled to look like a traditional hearth. Wooden shelving units holding mason jar candles and vintage lanterns complete the look without requiring any permanent modifications to the garage structure. Pine-scented diffusers or cedar essential oil in a diffuser near the tub adds an aromatic dimension that makes the space feel authentically like a mountain retreat. You can find affordable reclaimed wood panels at salvage yards or home improvement stores, and they attach to garage walls with construction adhesive and a few screws.
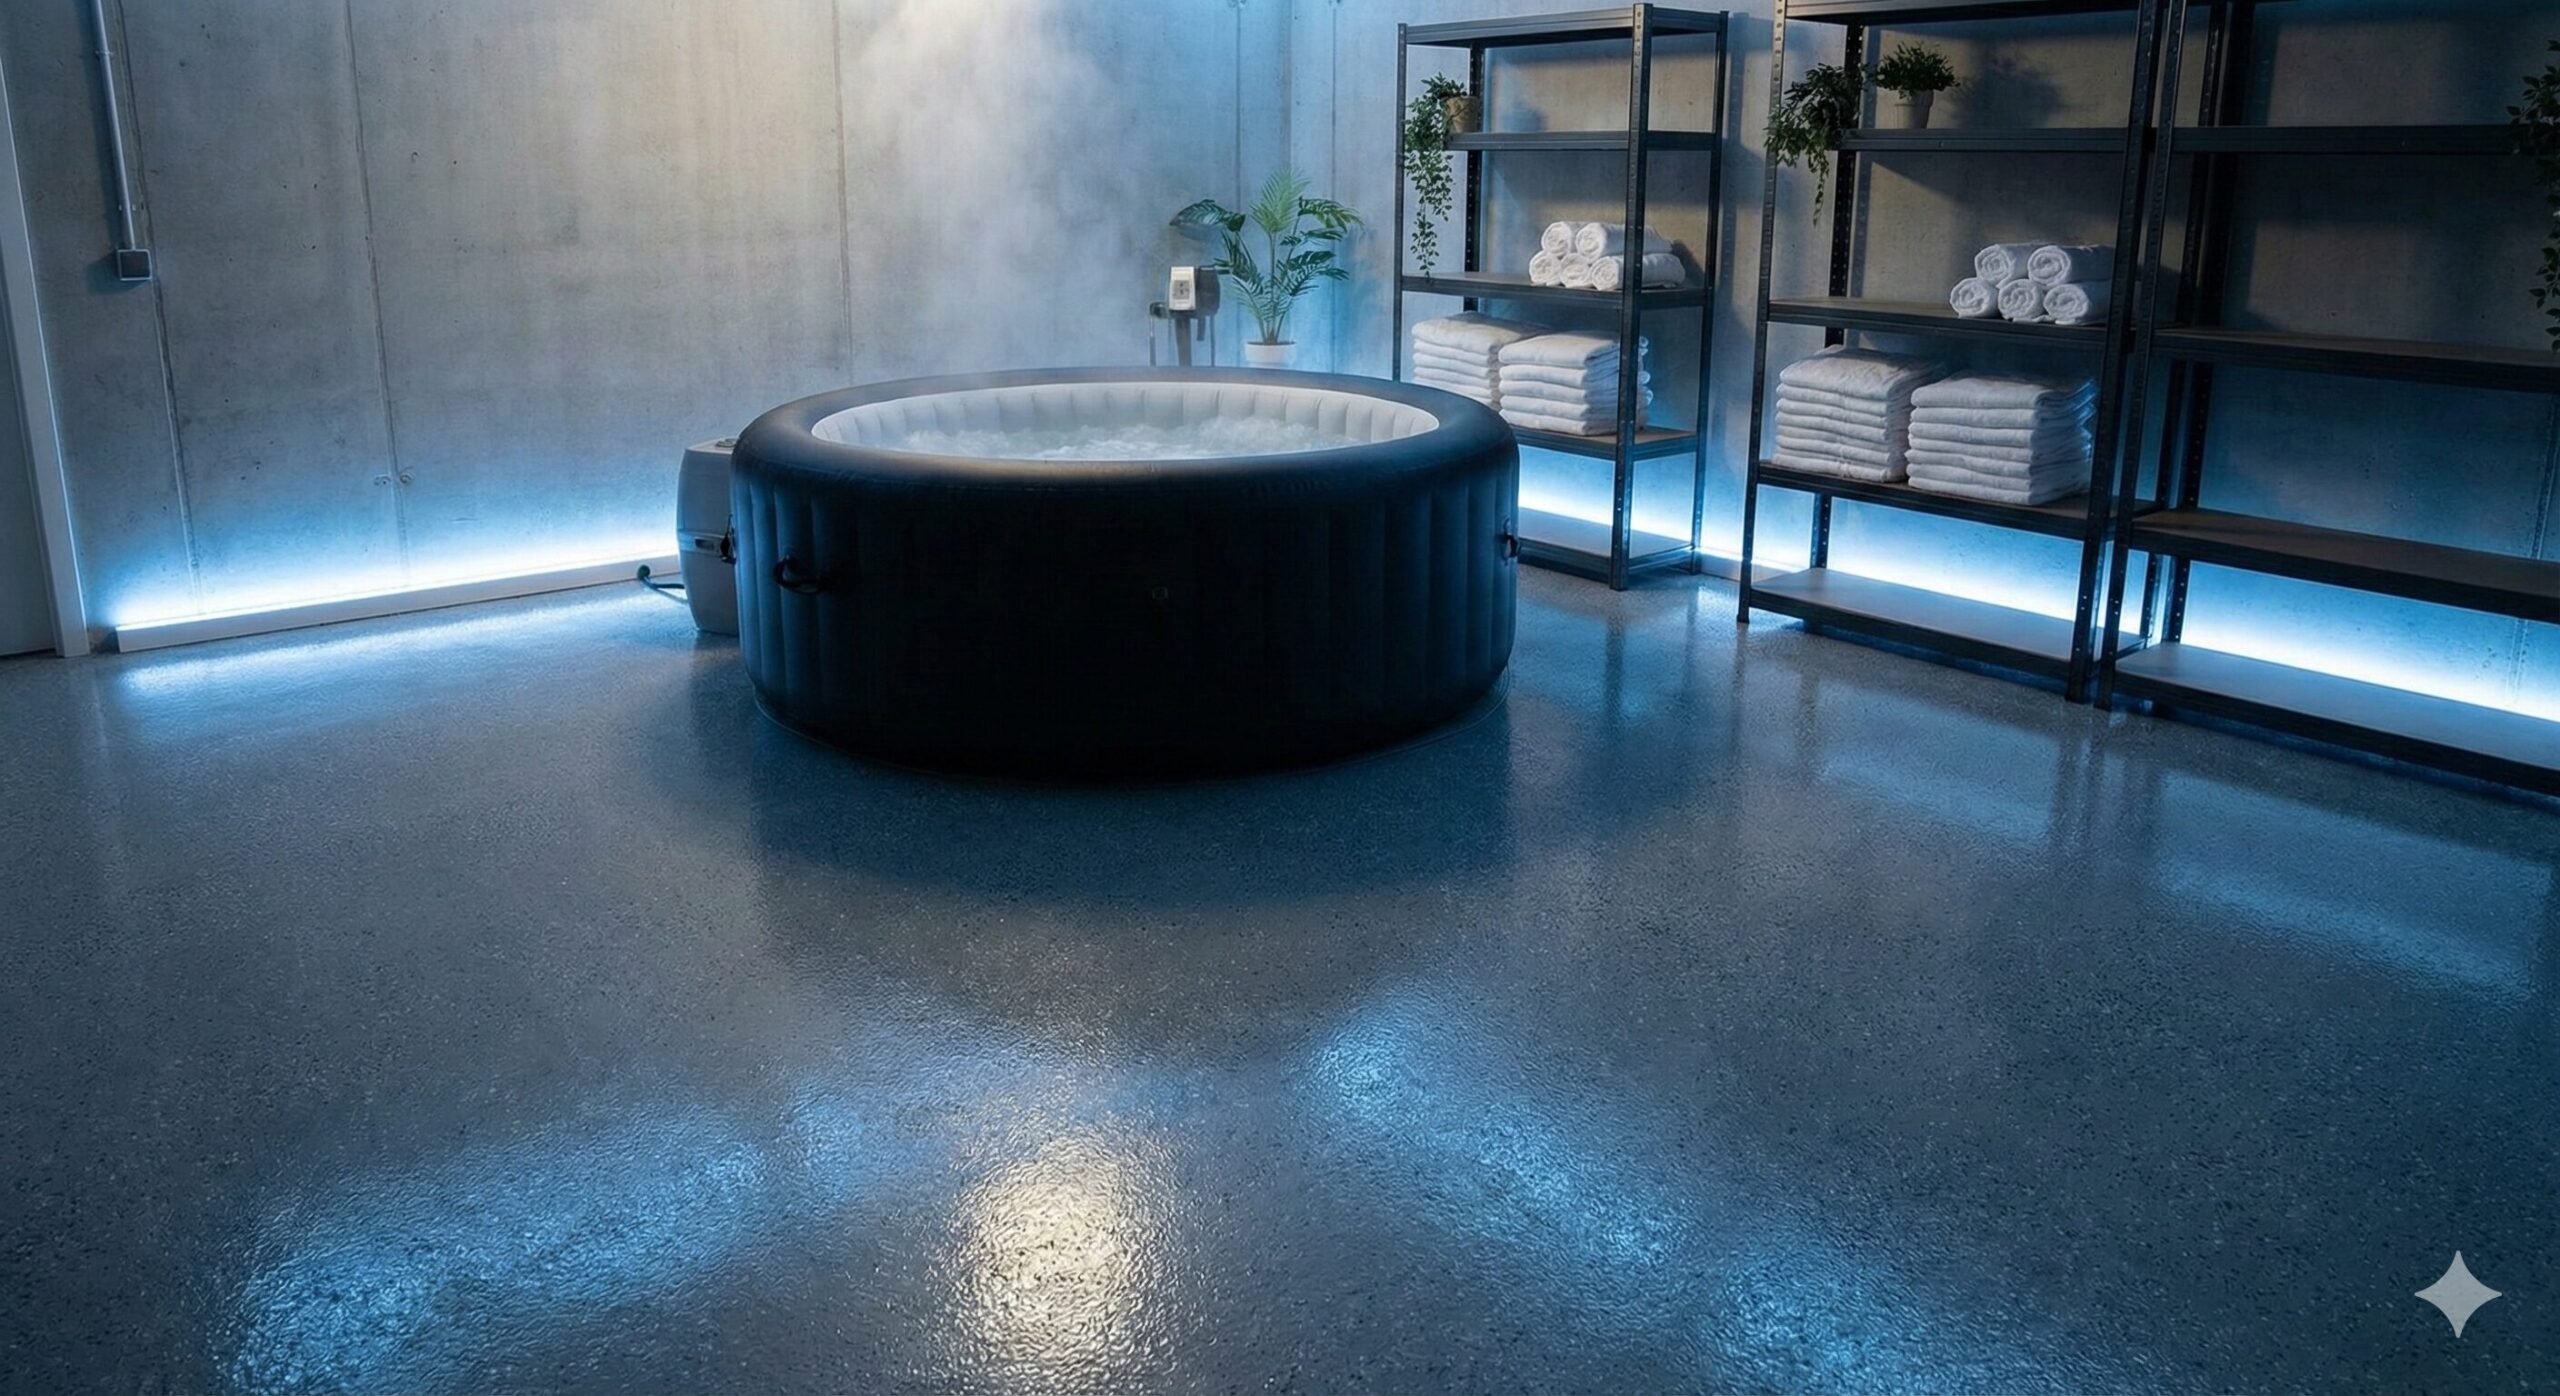
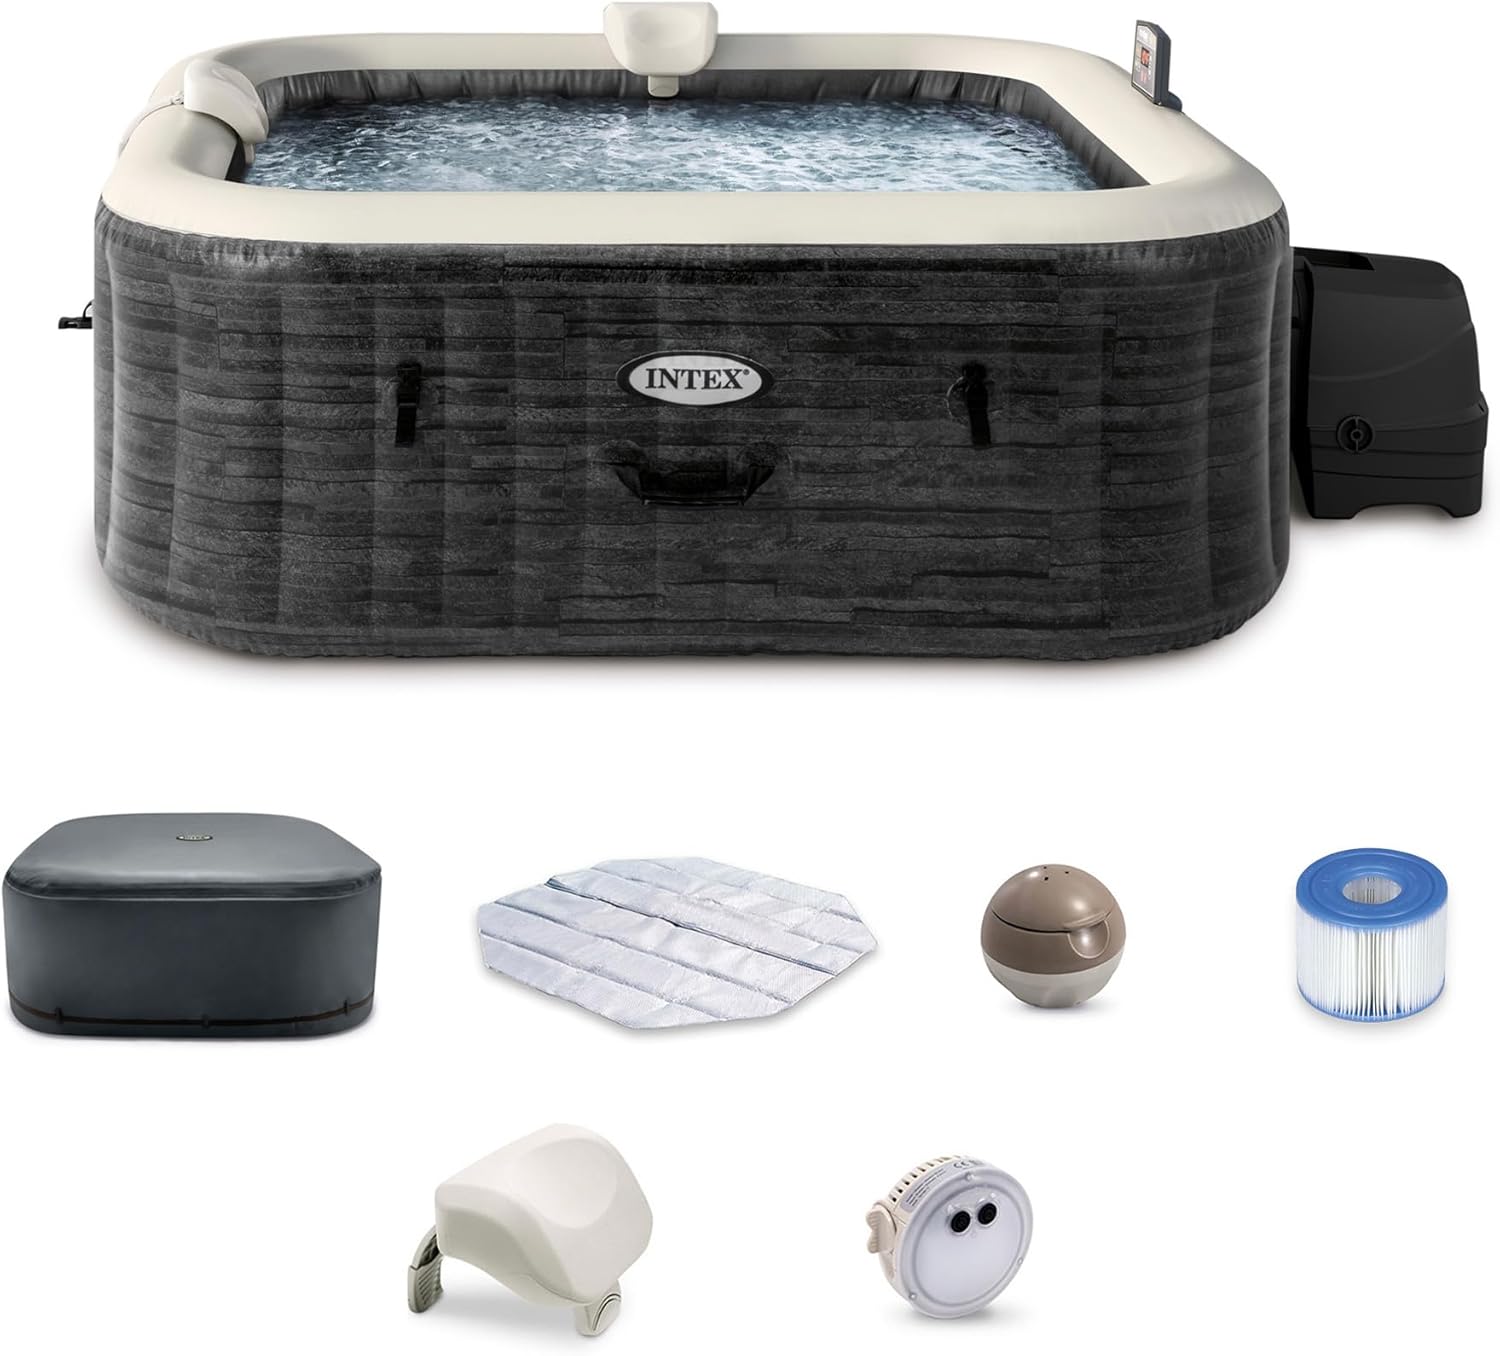
Embrace the garage aesthetic rather than hiding it. Seal the concrete floor with a high-gloss epoxy, use metal shelving for towel storage, and install cool-toned LED strip lighting. A grey or black Intex PureSpa looks incredibly sleek in this environment.
The beauty of the industrial minimalist approach is that it works with the garage’s natural elements instead of against them. Exposed ceiling beams, visible ductwork, and concrete walls become design features rather than eyesores. Add a few potted snake plants or ZZ plants, which thrive in low light and tolerate the garage environment beautifully. Metal stools and a small industrial cart for holding drinks and towels complete the look. The color palette stays neutral with blacks, greys, and metallics, creating a sophisticated urban spa aesthetic that looks like it belongs in a converted warehouse loft.
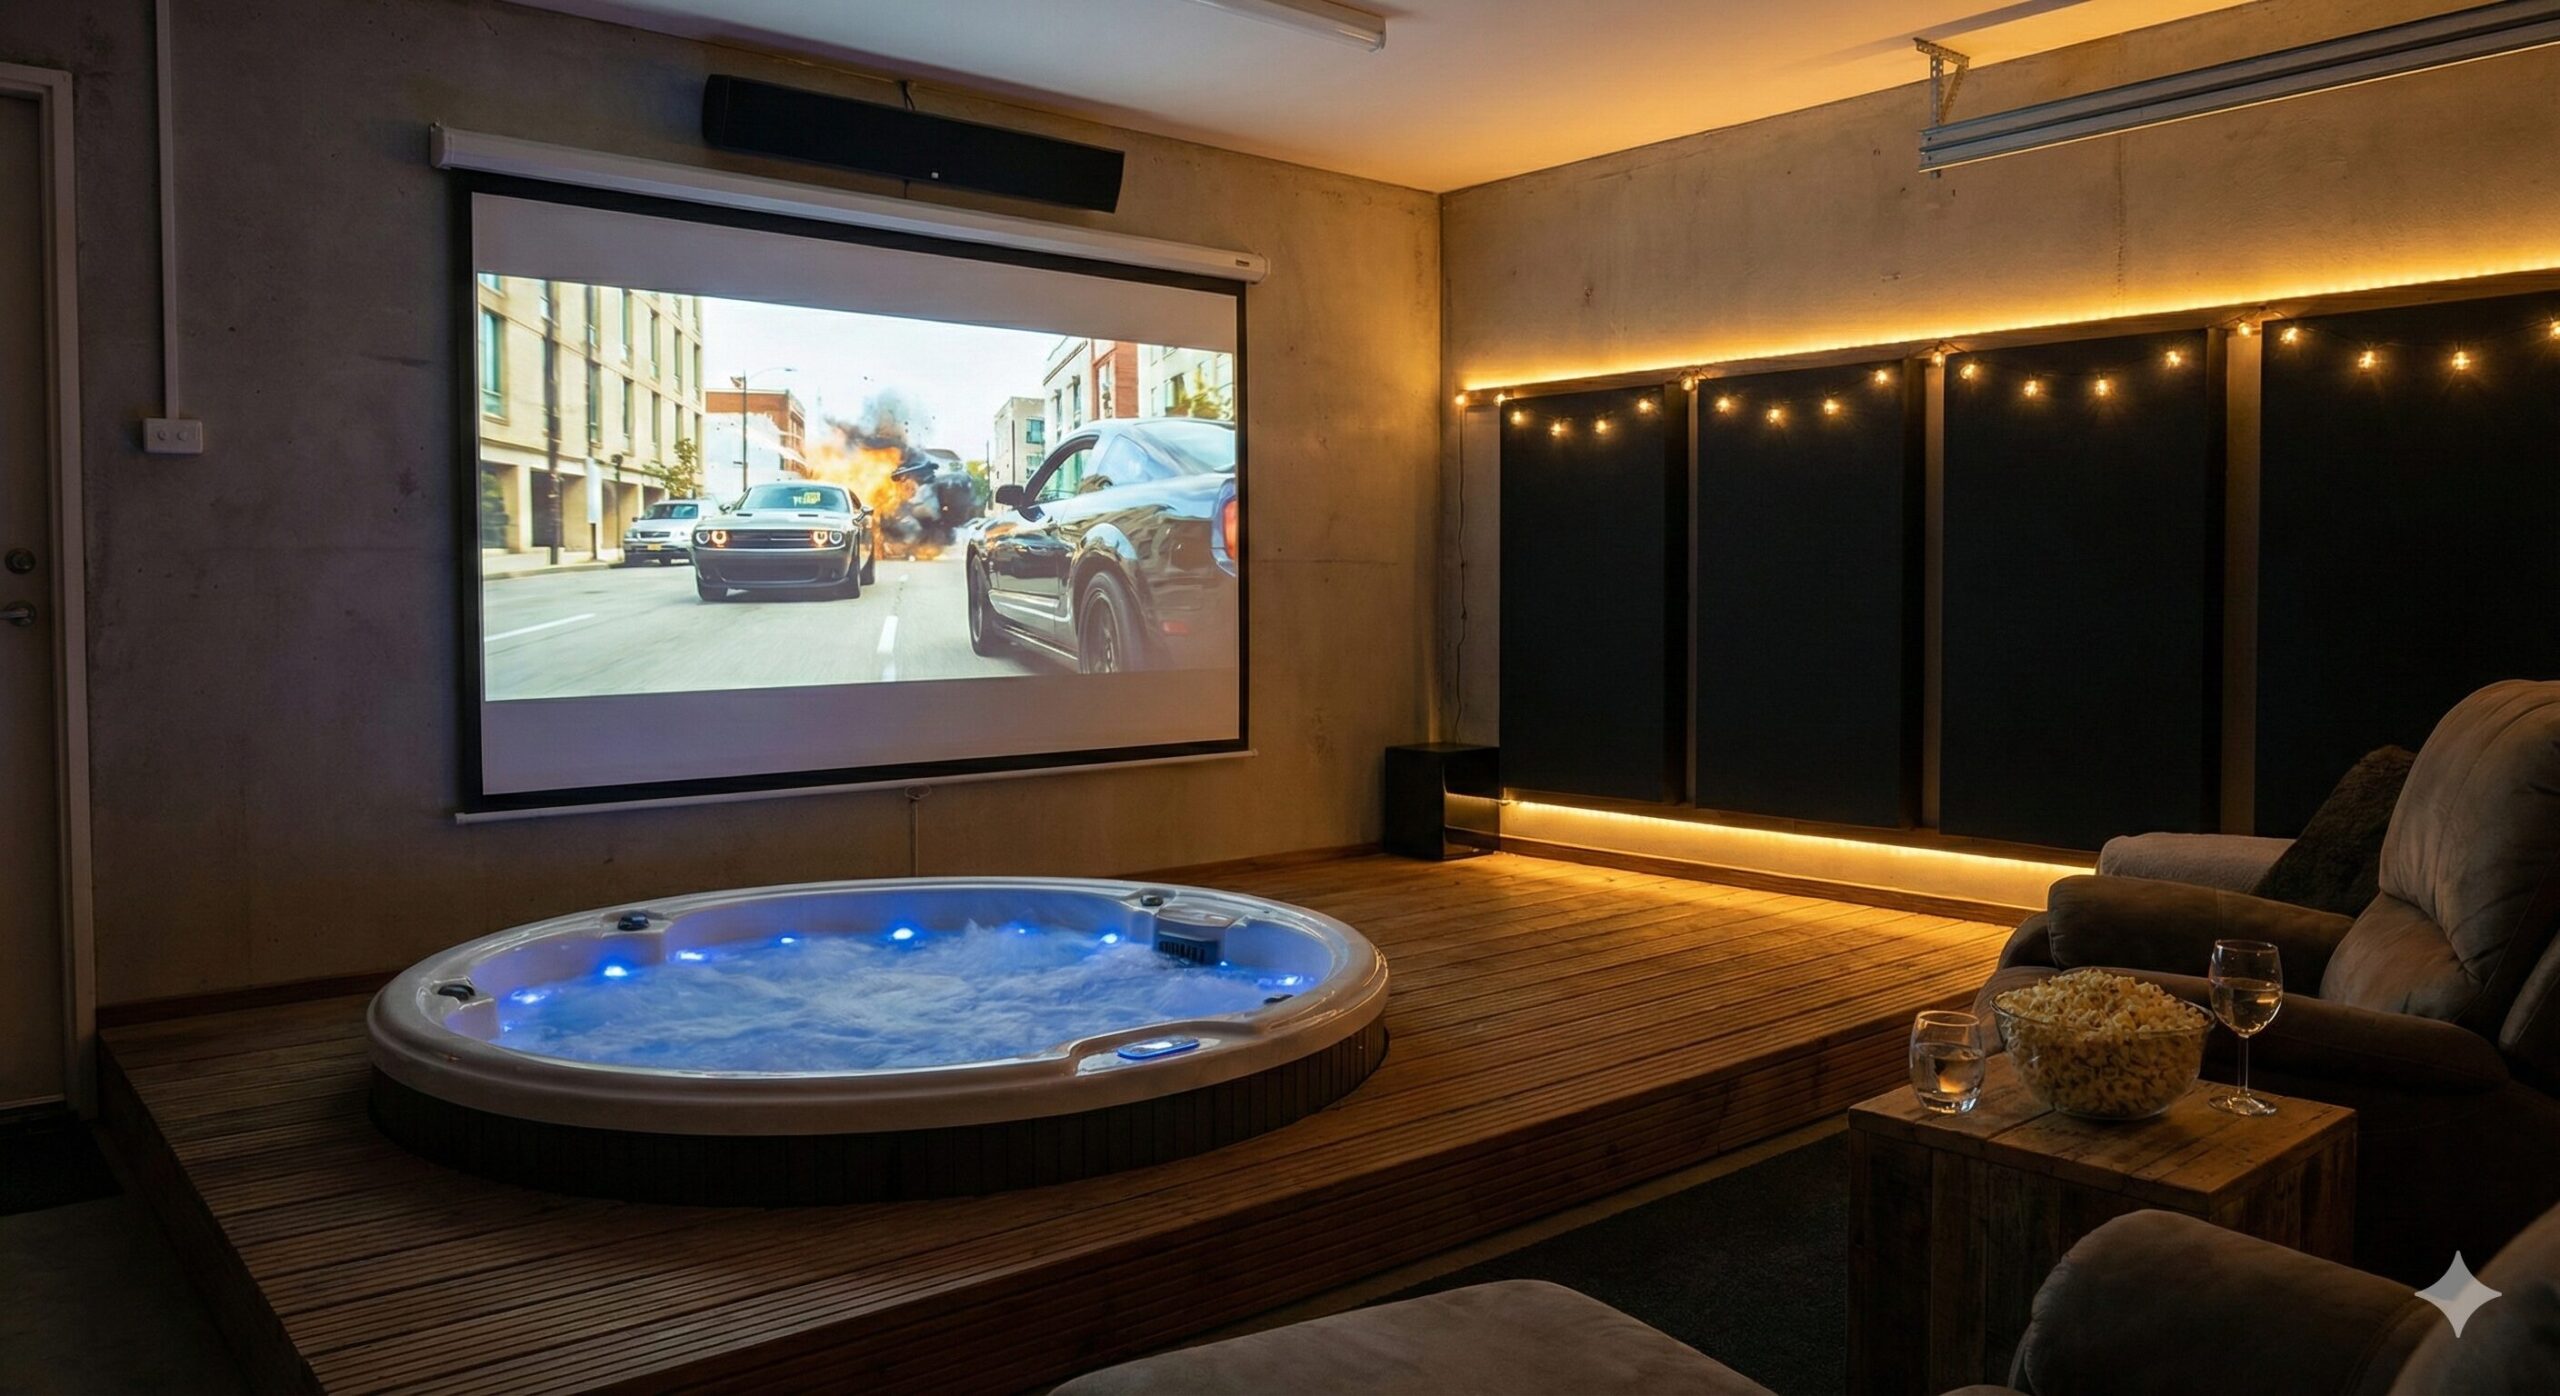
Blank walls in a garage are perfect for projection screens. Mount a projector on the ceiling, hook up a soundbar, and watch your favorite movies while soaking. Just be sure to mount electronics high up to avoid any water damage.
A garage wall provides a massive projection surface that rivals dedicated home theaters. A quality short-throw projector can produce a 100-inch or larger image from just a few feet away, which is perfect for the limited depth of many garage setups. Pair it with a compact soundbar mounted high on the wall and you have a truly immersive movie-watching experience from the comfort of warm water. Consider investing in a waterproof remote control or a voice-activated smart home system so you can pause, play, and adjust volume without leaving the tub. Movie streaming services offer surround sound support that, combined with the acoustics of an enclosed garage, creates surprisingly rich audio.

Missing the beach? Bamboo fencing rolls are cheap and can instantly cover up tool racks. Add some artificial palm trees, a few tiki torches (battery operated, never real fire indoors!), and a mini-fridge for cold drinks.
Transform your garage into a permanent vacation with a full tiki theme. Bamboo paneling on the walls creates an instant tropical feel, and rolled bamboo fencing is inexpensive and easy to install with zip ties or staples. Layer in artificial tropical plants like palm fronds, bird of paradise flowers, and monstera leaves to create lush greenery that requires zero maintenance. A small bar cart stocked with cocktail supplies, paper umbrellas, and coconut cups makes this the ultimate entertaining space. Add a waterproof Bluetooth speaker playing tropical music and you’ll forget you’re in your garage. Battery-operated LED tiki torches provide warm flickering light without any fire risk.

Create a space for meditation. Use room dividers to section off the “spa” area from the rest of the garage. Add river stones around the base of the tub and plenty of humidity-loving plants like ferns or peace lilies.
A Zen-inspired garage spa focuses on tranquility, natural materials, and minimalist design. Smooth river stones bordering the tub create a visual transition from the tub to the surrounding floor. A small indoor water fountain placed nearby adds the soothing sound of flowing water that enhances the meditative atmosphere. Choose a neutral color palette of whites, beiges, and soft greens. Bamboo accessories, including a towel rack, plant stands, and soap dishes, tie the theme together naturally. The humidity from the hot tub actually benefits many Zen-favorite plants like ferns, peace lilies, and bamboo palms, so your greenery will thrive in this environment with minimal extra care.

If your tub is for socializing, go big on lighting. Smart LED bulbs can change color to the beat of the music. Combine this with a waterproof Bluetooth speaker and a floating drink holder for the ultimate Friday night spot.
The Neon Party Zone is designed for those who view their hot tub as social headquarters. Smart LED strip lights lining the ceiling or along the base of the walls can be programmed to cycle through colors, pulse with music, or set to a specific mood using a smartphone app. Neon signs on the walls with fun phrases like “Relax” or “Good Vibes Only” add personality and Instagram-worthy backdrops. A floating LED light set inside the tub itself creates mesmerizing reflections on the ceiling. Waterproof card games and floating drink holders keep the party going without anyone needing to leave the water. For cooler evenings, a patio-style propane heater positioned safely outside the splash zone keeps guests comfortable.
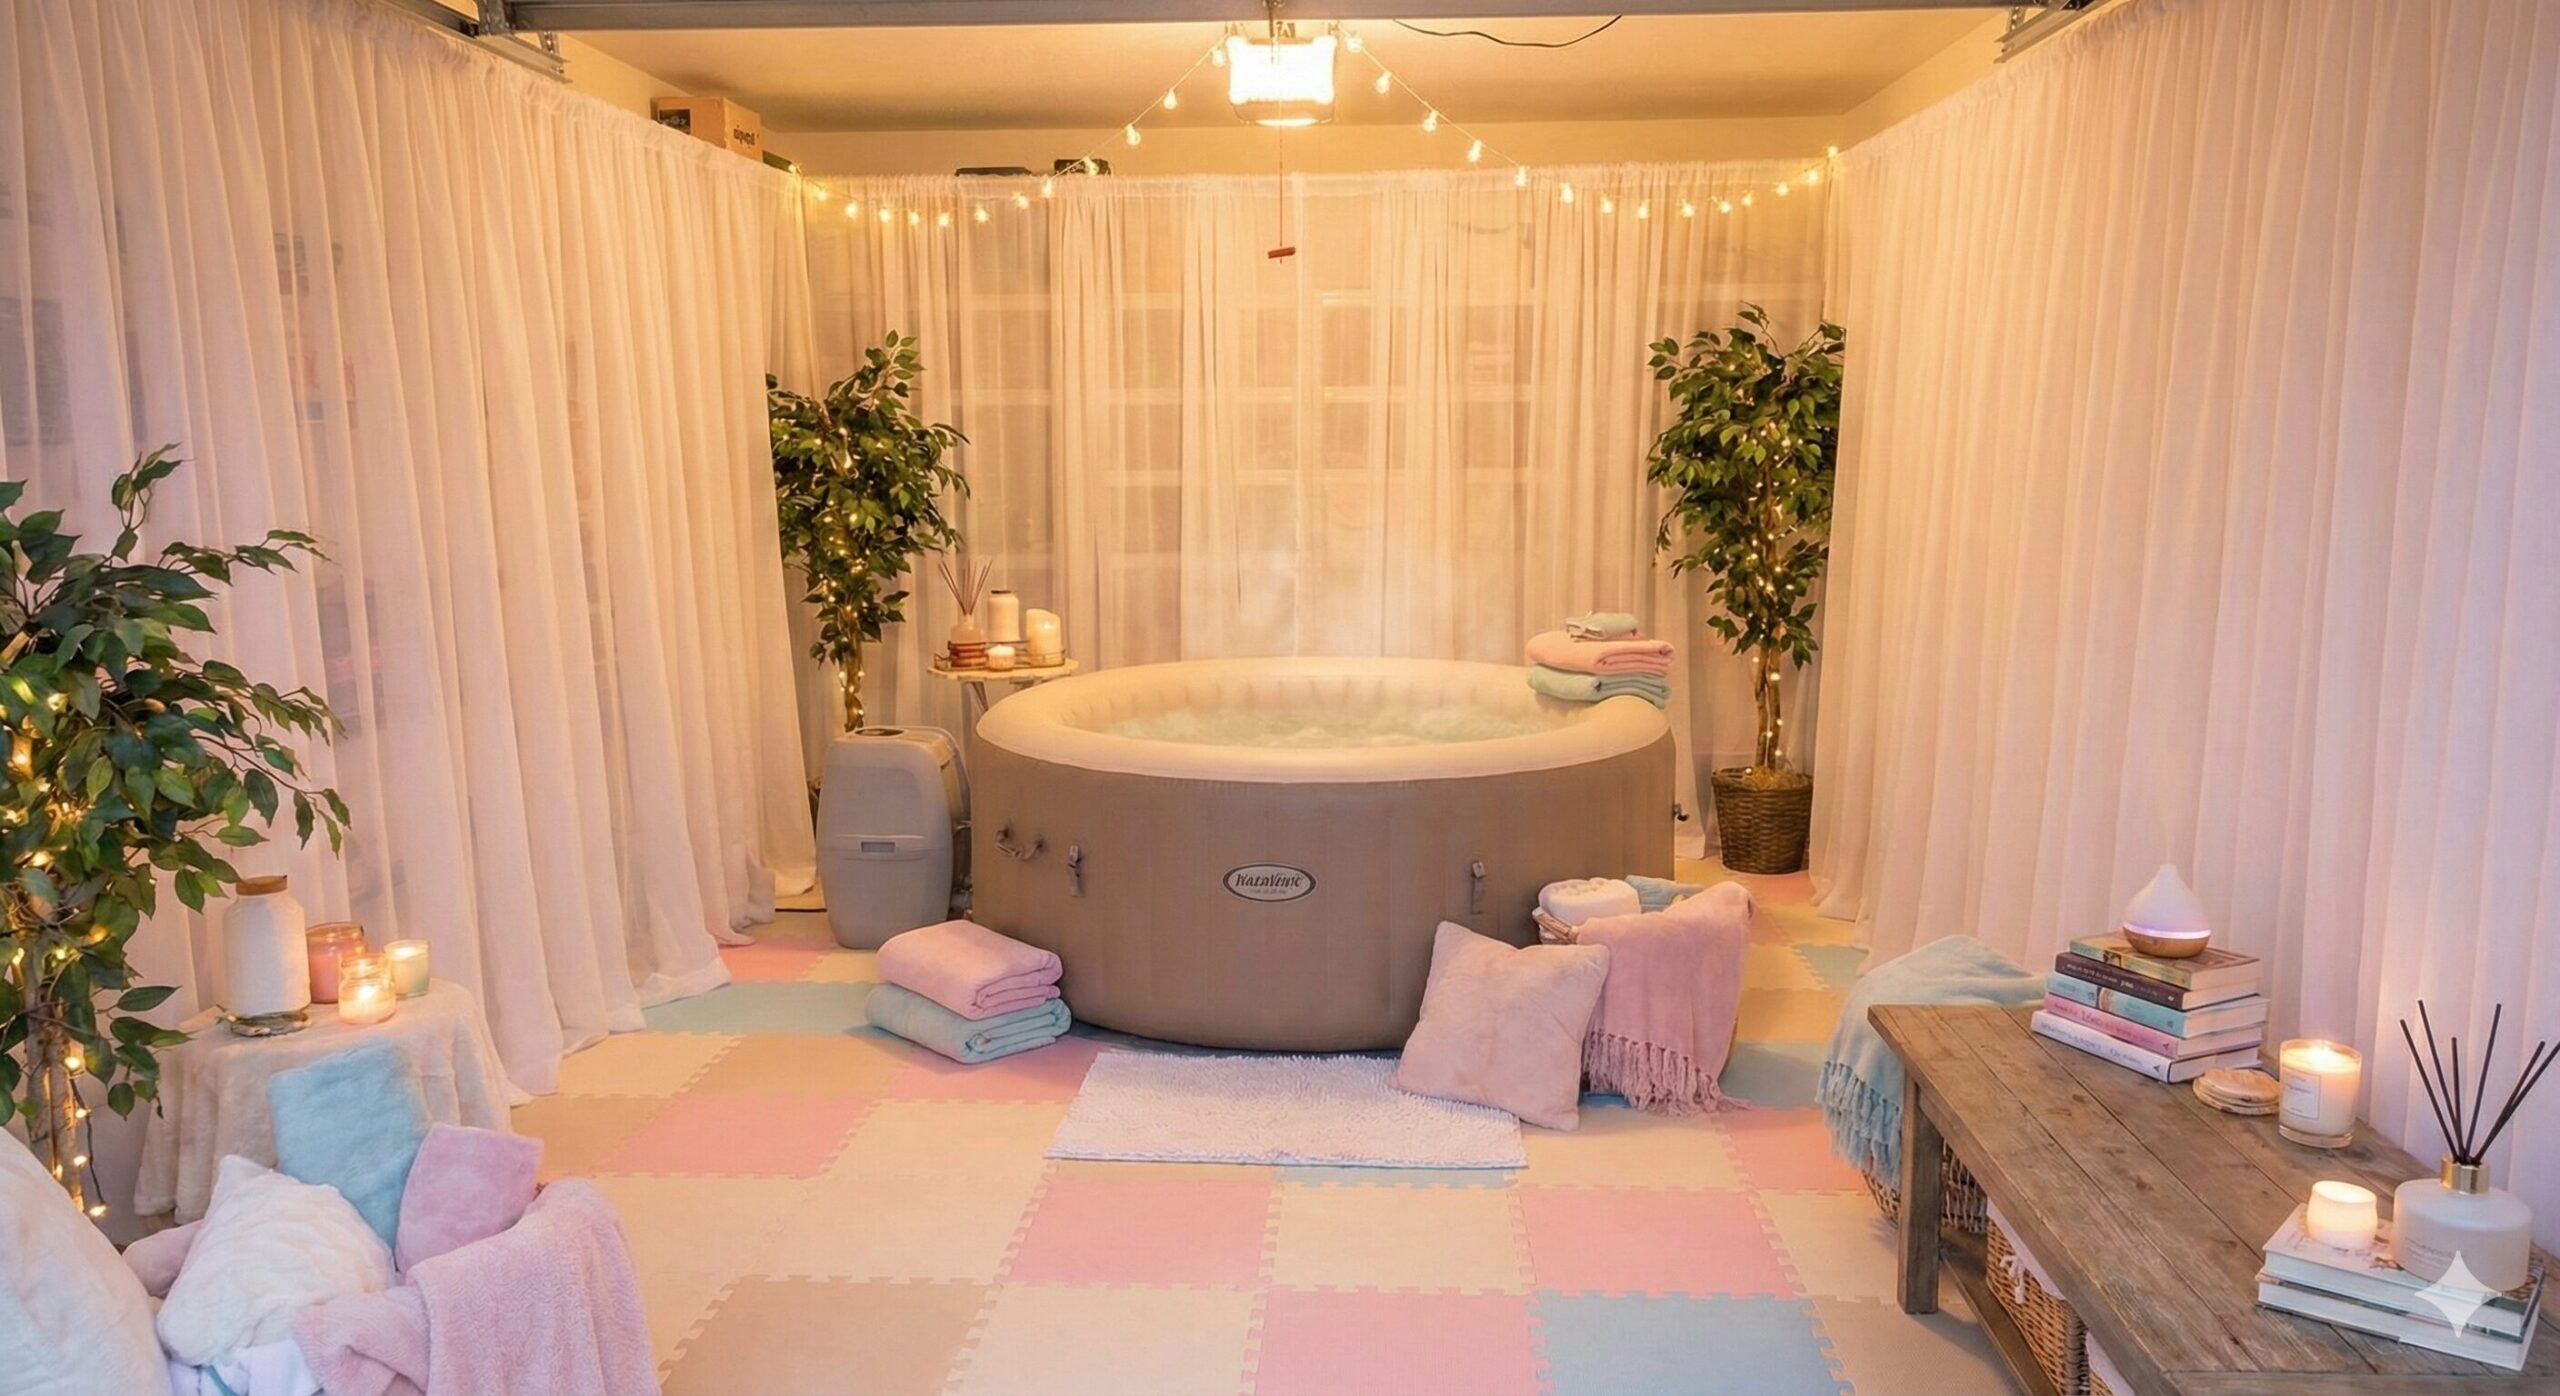
Soften the harsh lines of a garage by hanging ceiling-to-floor curtains (shower curtains work great and are water-resistant). Use interlocking foam tiles to cover the cold floor. To protect that floor further, check out our reviews of the best hot tub pads.
The She-Shed style transforms the industrial feel of a garage into something warm, feminine, and inviting. Floor-to-ceiling curtains in soft pastels or floral patterns soften every hard edge. A plush bath mat beside the tub and decorative throw pillows on nearby seating create a living-room feel. Fairy lights draped along the curtain rods add a magical glow, while a small vanity mirror and hook rack near the door provide practical convenience. This approach works beautifully for anyone who wants their garage spa to feel like an extension of their home’s interior design rather than a utilitarian space. The curtains also serve double duty by hiding storage shelves and garage clutter behind a beautiful fabric wall.
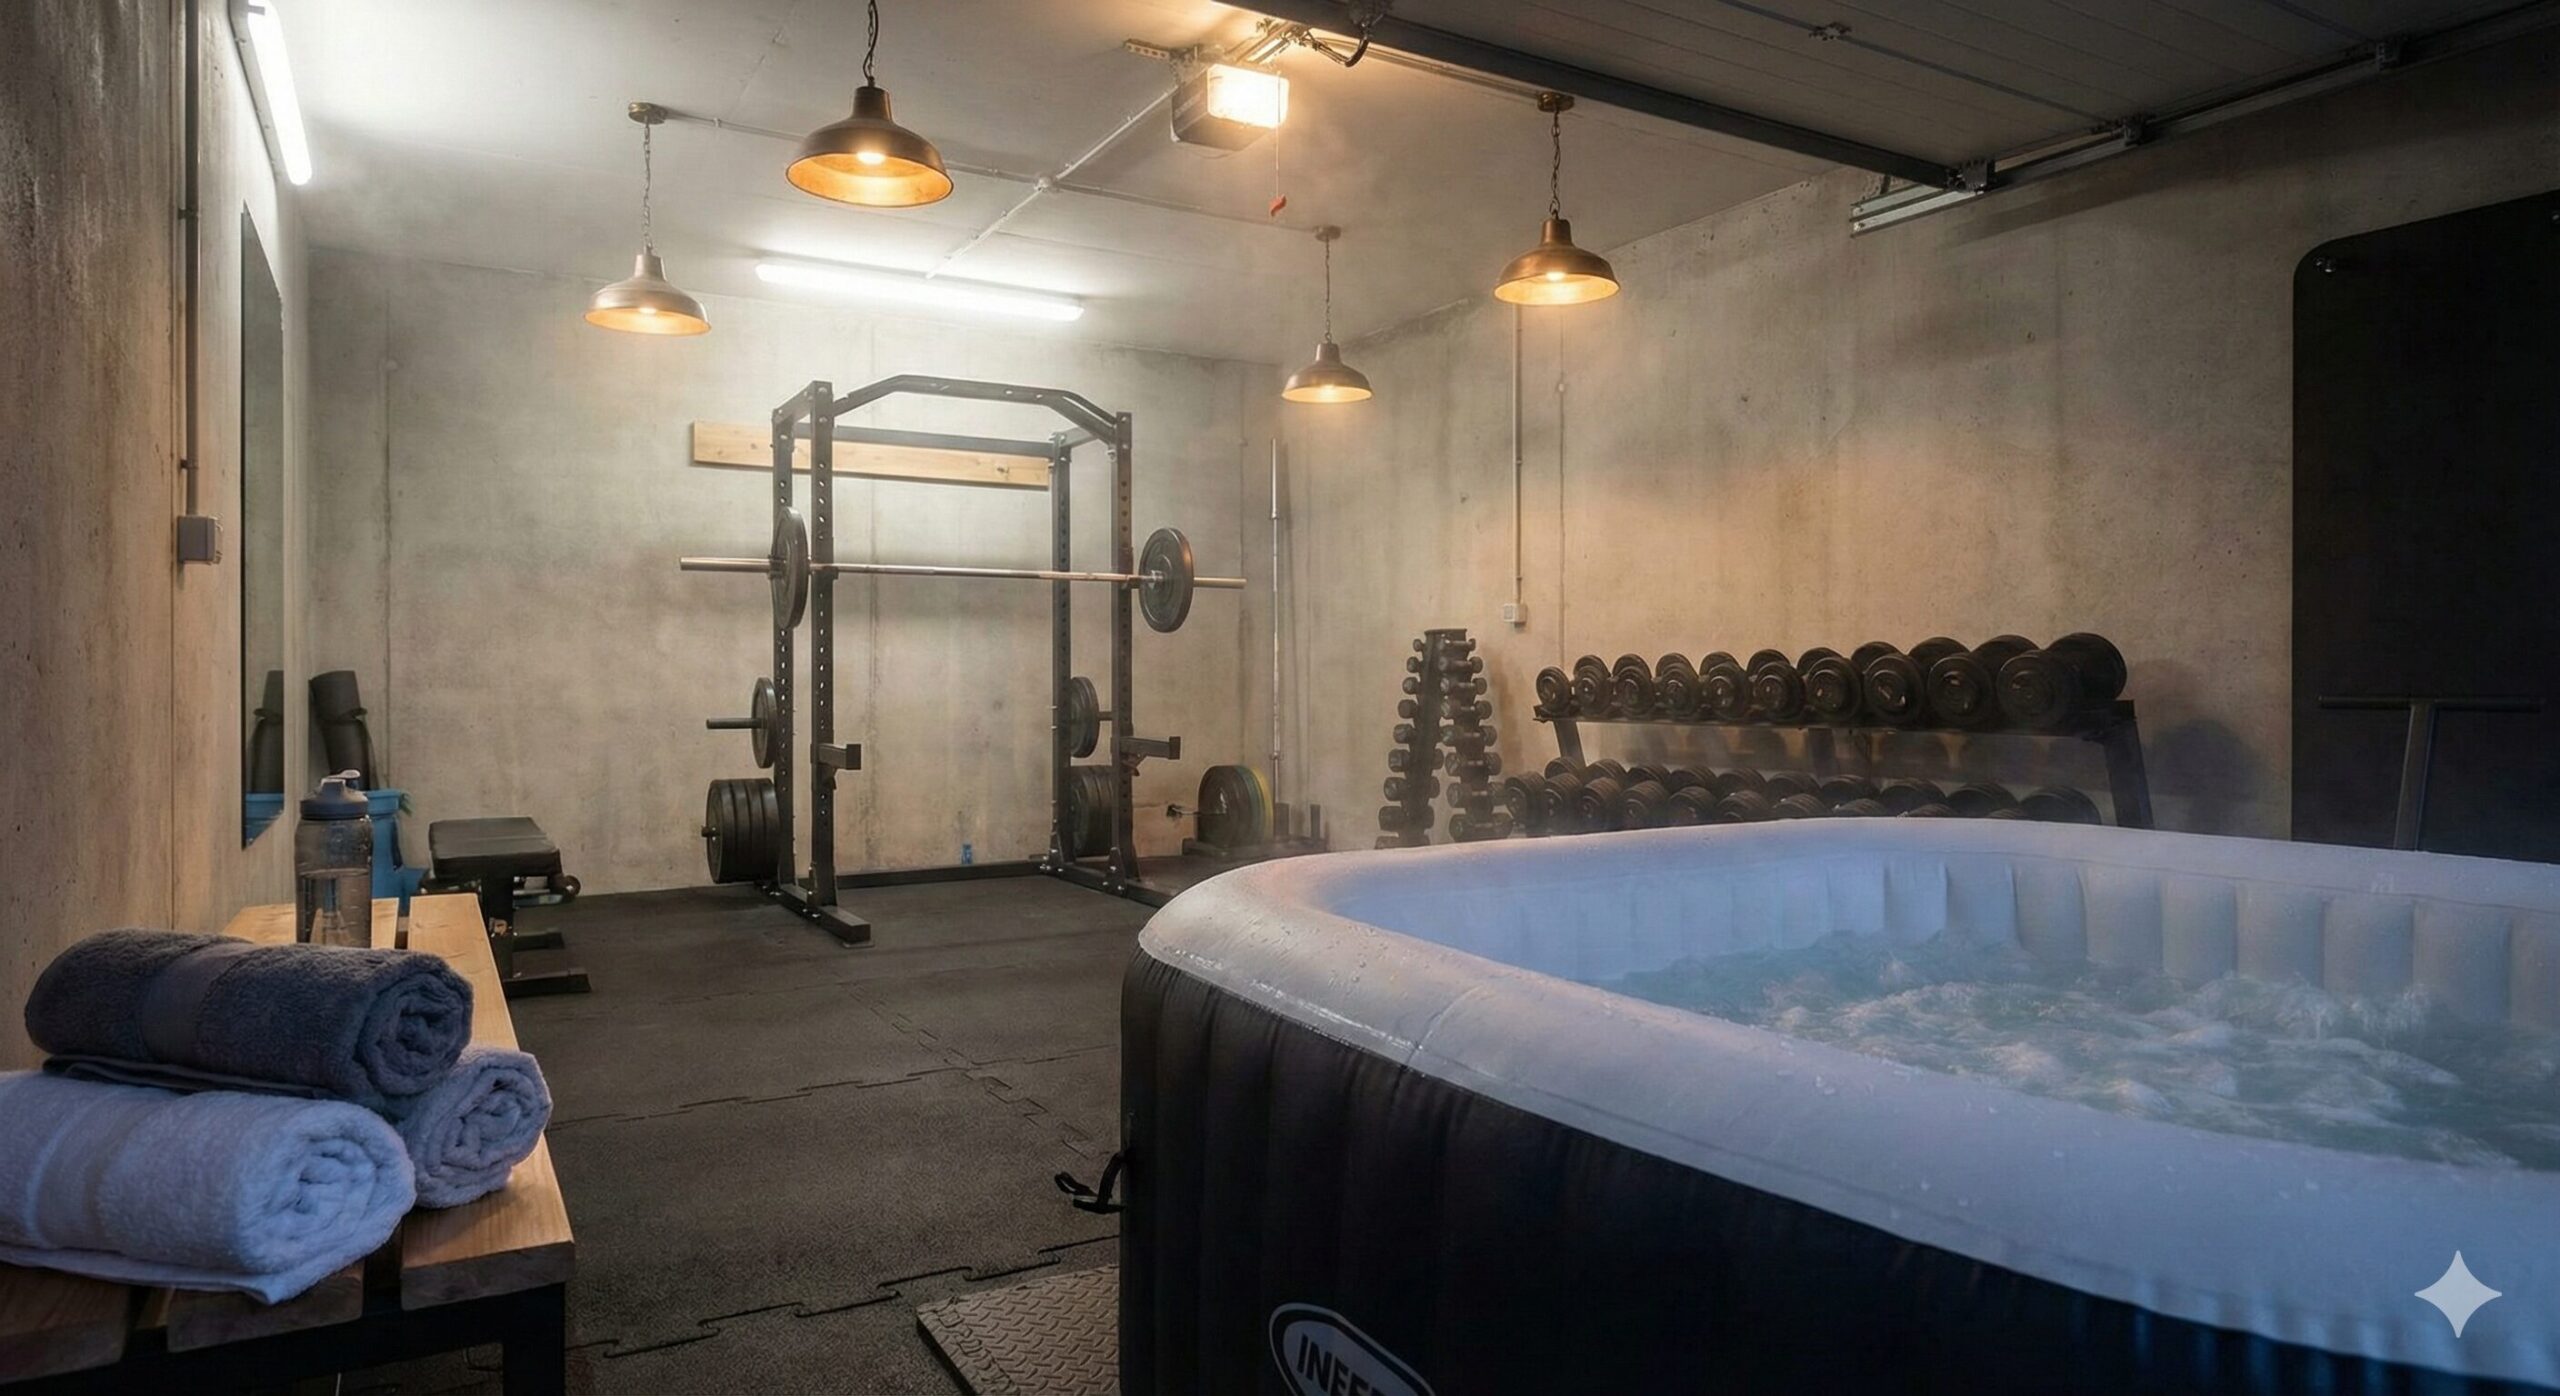
Do you have a home gym in your garage? Place the hot tub next to your squat rack. There is nothing better than hopping immediately into 104°F water after a heavy lift to reduce muscle soreness.
Combining a home gym with a hot tub creates the ultimate recovery station. Athletic performance research consistently shows that alternating between hot water immersion and cold exposure accelerates muscle recovery, reduces inflammation, and improves circulation. Position the tub within easy reach of your workout area so you can transition from your last set to the water in seconds. Keep a towel rack nearby and consider a small shelf for recovery supplements, a foam roller, and a water bottle. Rubber gym flooring around the workout area transitions naturally to the tub’s floor protection, creating a cohesive multi-zone space. Magnetic wall-mounted organizers keep resistance bands, jump ropes, and other accessories tidy. The combination of exercise equipment and hot tub in one space also maximizes your garage’s utility and justifies the investment to a skeptical spouse.

Decorate the walls with jerseys and memorabilia. Install a TV in the corner and a dartboard on the opposite wall. It’s the ultimate “Man Cave” addition, allowing you to catch the game in total relaxation.
The Sports Bar Lounge turns your garage into the best seat in the house for every game day. Framed jerseys, signed baseballs, and vintage sports posters create an authentic bar atmosphere. Mount a flat-screen TV at a comfortable viewing angle from the tub, and install a soundbar or outdoor speakers for clear commentary audio. A mini-fridge stocked with beverages and a small shelf for snacks complete the sports bar experience. Consider a dartboard on a wall far from the tub to avoid any water damage to the board, and add a small chalkboard or whiteboard for keeping score during friendly competitions. For fantasy football enthusiasts, a large wall-mounted screen showing live stats and scores alongside the game broadcast takes the experience to the next level.
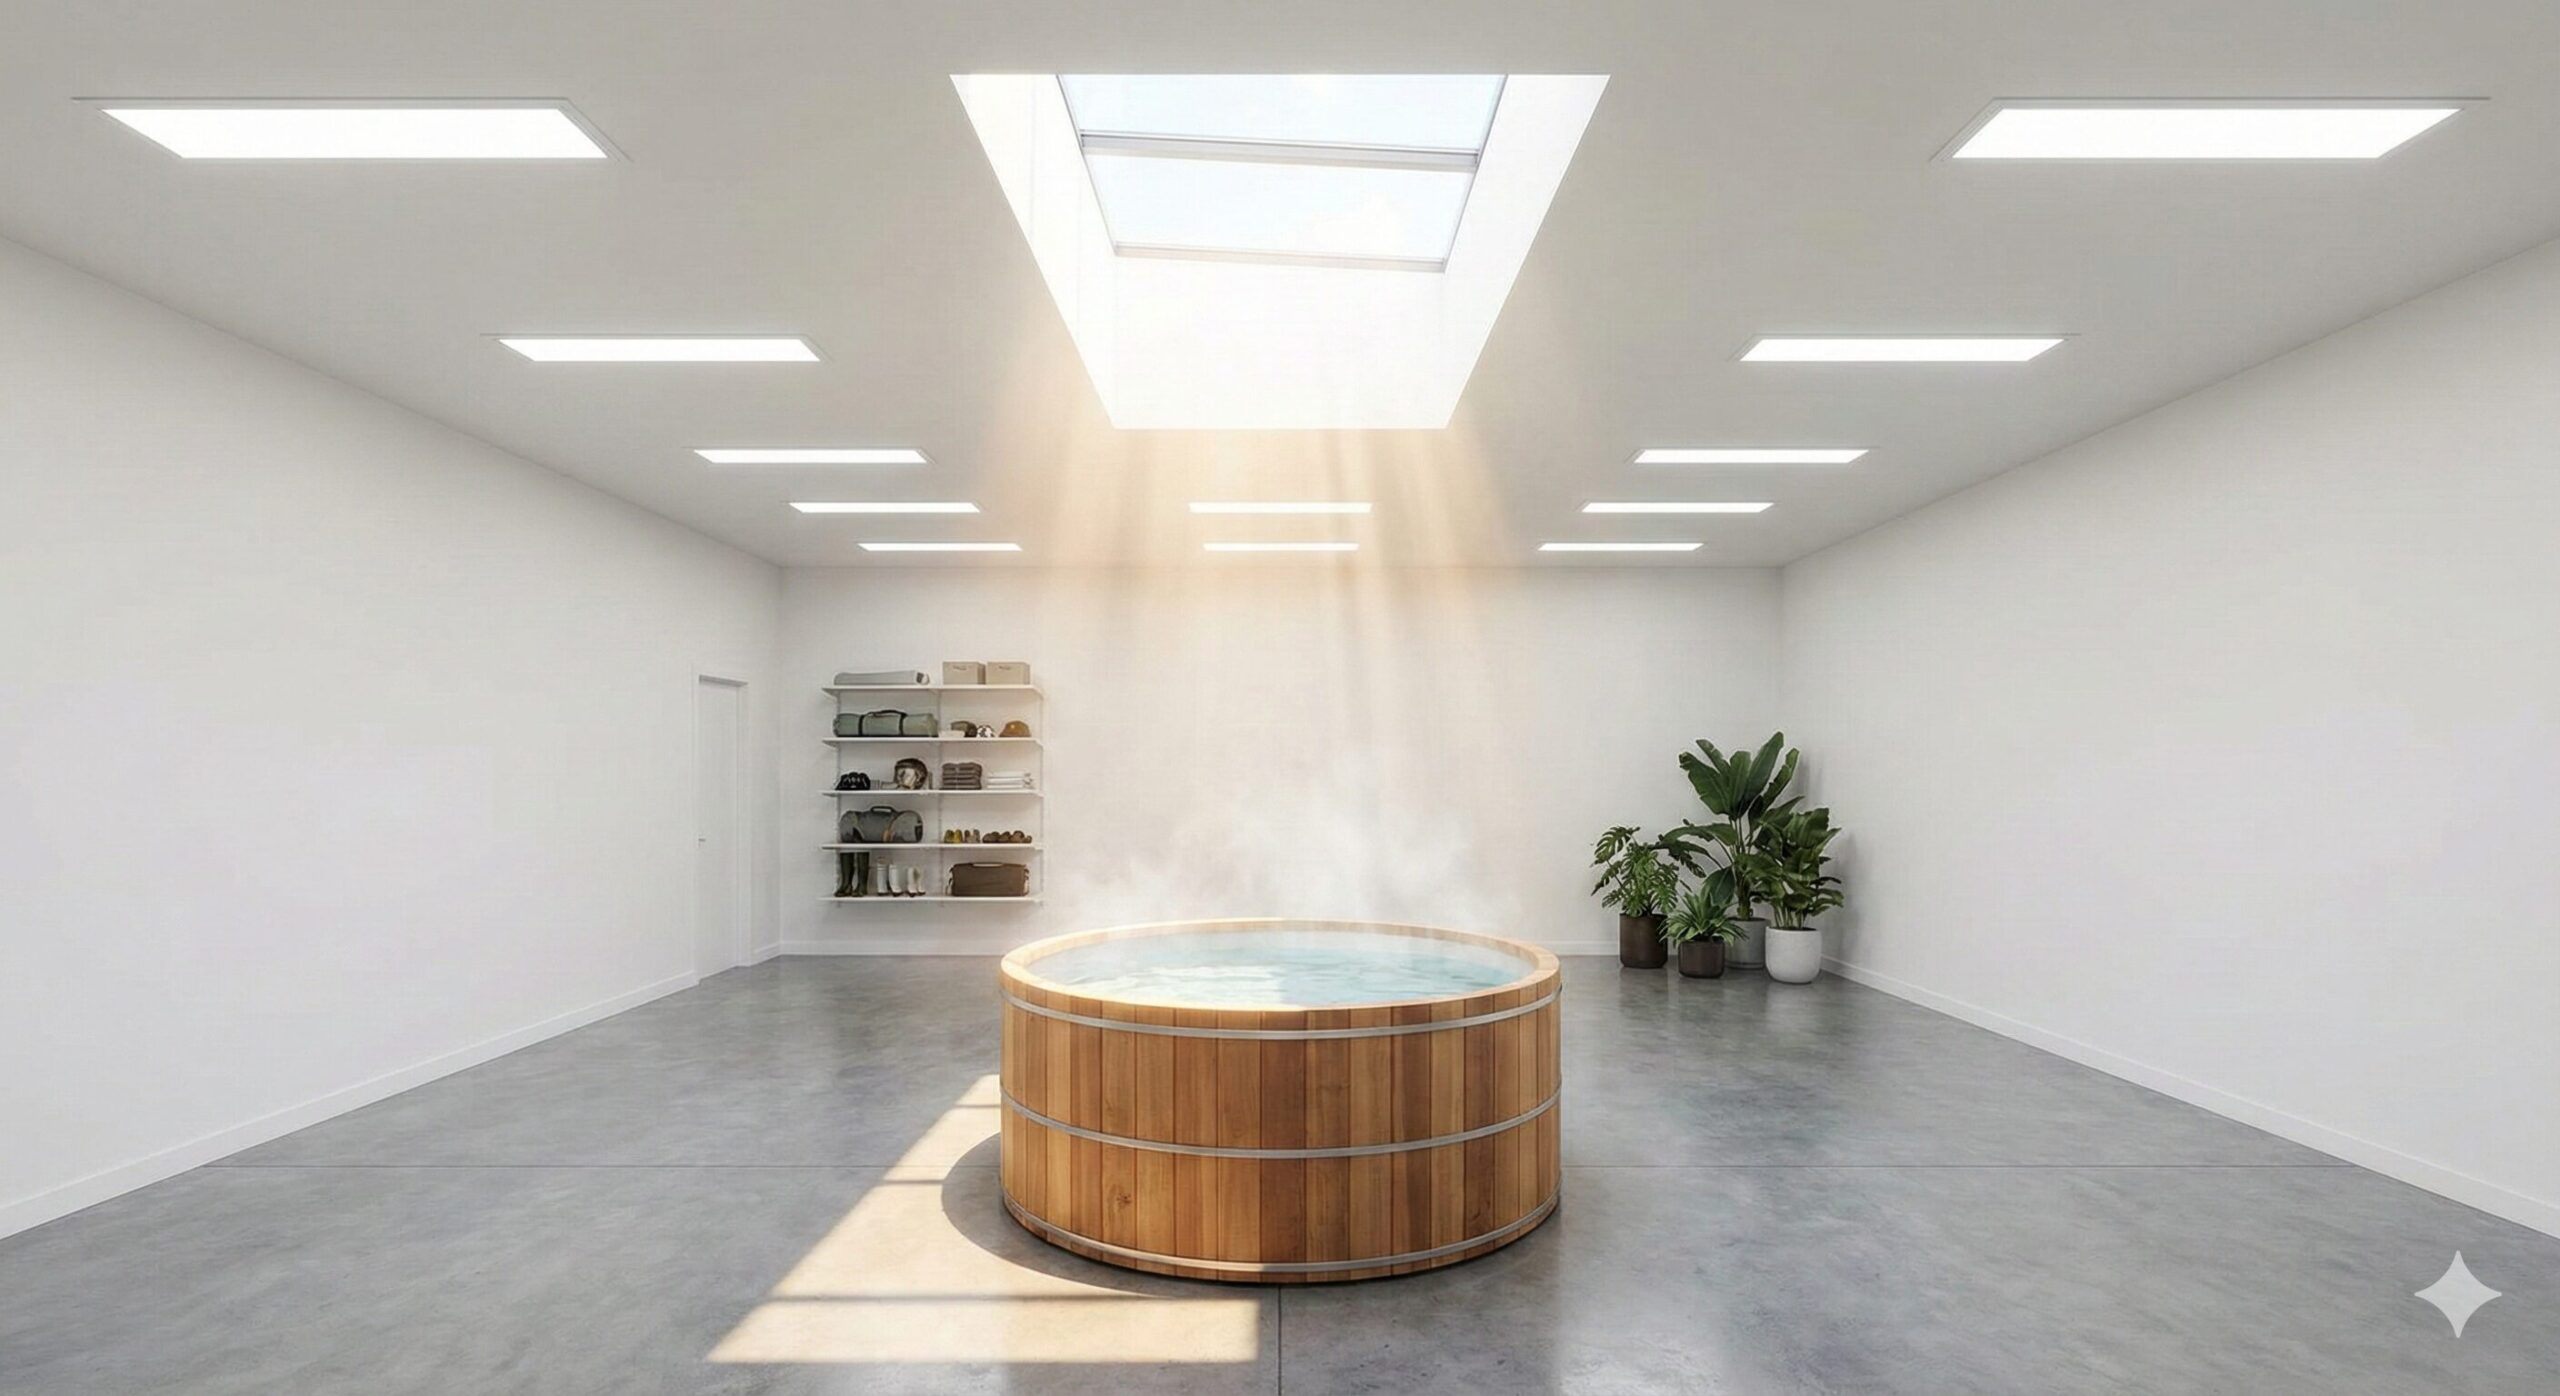
If your garage has windows or skylights, position the tub directly underneath. Natural light makes a small space feel bigger. If you don’t have windows, install “daylight” spectrum LED panels to mimic the sun.
The Skylight Sanctuary leverages natural light to create an airy, open feeling that belies the garage’s utilitarian origins. Positioning the tub beneath a skylight or large window means you soak under the sky during the day and the stars at night. If your garage lacks skylights, daylight-spectrum LED panels mounted on the ceiling replicate natural sunlight and provide excellent illumination without the harshness of standard fluorescent garage lights. White or light-colored walls maximize the reflective quality of available light, making the space feel twice its actual size. Add a few hanging plants near the skylight for a biophilic touch that connects you with nature while soaking. For evening ambiance, replace the daylight LEDs with warm-toned bulbs or add a separate dimmer-controlled circuit for adjustable mood lighting.
Must-Have Accessories for Your Garage Hot Tub
The right accessories elevate your garage hot tub from a basic setup to a full spa experience. Some accessories are essential for safety and maintenance, while others add comfort and convenience that make you actually want to use the tub regularly instead of letting it gather dust.
Essential Accessories
Quality Tub Cover
The most important accessory you own. A well-fitted insulated cover retains heat, keeps debris out, and prevents evaporation. Replace it if it becomes waterlogged or damaged. Budget $50 to $150 for an aftermarket upgrade.
Chemical Test Kit
Maintaining proper water chemistry is critical for health and equipment longevity. A digital test kit or test strips check pH, alkalinity, and sanitizer levels in seconds. Test before every use and adjust chemicals accordingly.
Submersible Sump Pump
Essential for draining the tub in a garage without a drain. A small submersible pump connects to a garden hose and can empty a 4-person tub in 15 to 20 minutes. Keep one dedicated to the tub so it stays clean.
GFCI Extension Cord
If you cannot place the tub near a GFCI outlet, a heavy-duty GFCI extension cord rated for outdoor use provides protection. Choose 10-gauge wire, keep it under 25 feet, and inspect it regularly for damage.
Comfort and Convenience
Floating LED Lights
Waterproof LED lights that float on the surface create beautiful reflections and ambient lighting. They are inexpensive, rechargeable via USB, and completely transform the nighttime soaking experience.
Waterproof Bluetooth Speaker
A portable waterproof speaker lets you enjoy music, podcasts, or audiobooks while soaking. Look for models with suction cups that attach to the tub wall and offer at least 8 hours of battery life.
Floating Drink Holder
These foam caddies clip to the tub wall and hold drinks, snacks, or a phone safely above the water line. A small investment that makes a big difference in comfort and convenience during long soaks.
Towel Warmer
Stepping out of a hot tub into cold garage air is jarring. A small towel warmer positioned near the tub heats towels to a cozy temperature so your post-soak experience is comfortable from start to finish.
Need to manage the humidity?
Don’t let mold ruin your new setup. A high-capacity dehumidifier is non-negotiable for garage spas.
Find Dehumidifiers on AmazonStorage and Organization
Keeping your garage spa area organized prevents clutter from undermining the relaxing atmosphere you have created. Wall-mounted hooks and shelves keep towels, robes, and chemicals off the floor and within easy reach. A waterproof storage bin holds chemical supplies, test kits, and small tools in one convenient location. Magnetic strips mounted on the wall hold metal tools and accessories without taking up shelf space.
Consider a dedicated rolling cart that holds everything you need for a hot tub session: towels, a robe, chemicals, a test kit, your phone, and a drink. Roll it to the tub when you are ready and roll it back to storage when you are done. This simple organizational hack keeps the spa area tidy and makes setup and teardown effortless.
For detailed product recommendations, check our comprehensive guide on inflatable hot tub setup, which covers essential accessories and how to organize them effectively.
Seasonal Tips for Your Garage Hot Tub
Your garage hot tub experience changes with the seasons, and adapting your setup to each one ensures you get the most enjoyment year-round. Each season brings unique challenges and opportunities that, when addressed, make every soak comfortable regardless of the weather outside.
Winter: Maximum Coziness
Winter is when a garage hot tub truly shines. The contrast between cold outdoor air and warm spa water is exhilarating. Insulate your garage walls if you haven’t already, keep the cover locked down when not in use, and consider a space heater to maintain ambient temperature above 55°F. The garage protects your tub from snow and ice, eliminating the frozen-cover headaches that outdoor tub owners face.
Spring: Deep Clean and Rebalance
Spring is the ideal time for a thorough deep clean. Drain the tub, scrub the interior with a non-abrasive cleaner, check all seams and connections for wear, and inspect your ventilation system. Replace the water filter, restock chemicals, and test all electrical connections. A fresh start for the warmer months ahead.
Summer: Ventilation Focus
Summer heat combined with hot tub humidity creates the highest mold risk. Run your dehumidifier on its highest setting, keep the garage door cracked for airflow, and consider using the tub in the evening when ambient temperatures drop. You may also reduce the water temperature a few degrees for a more refreshing summer soak.
Fall: Preparation and Prevention
Fall is preparation season. Clean the gutters around the garage to prevent water intrusion, seal any cracks in the garage floor or walls, and stock up on chemicals before winter demand drives prices up. This is also a good time to inspect your cover for damage and order a replacement if needed before cold weather arrives.
Temperature Management by Season
Your hot tub’s heater works hardest in winter when the temperature differential between the water and the garage air is greatest. To reduce energy consumption, keep the garage as warm as practical and the cover in place at all times when the tub is not in use. In summer, you can lower the target water temperature to 98 or 99 degrees for a more comfortable soak in the warmer ambient conditions, which reduces heater run time and electricity costs.
Monitor your tub’s temperature gauge regularly. If you notice the water temperature dropping faster than usual, check the cover for gaps or damage, inspect the tub walls for any signs of slow leaks, and verify that your insulation is still intact. Early detection of heat loss issues saves energy and prevents small problems from becoming expensive repairs.
Inflatable vs Hard-Side Hot Tub: Which Is Better for a Garage?
Before committing to an inflatable model, it is worth understanding how it compares to a hard-side (rigid) hot tub for garage use. Both have advantages and disadvantages that matter more in a garage setting than they would outdoors. Here is a detailed comparison to help you make the right choice for your situation.
| Feature | Inflatable Hot Tub | Hard-Side Hot Tub |
|---|---|---|
| Price Range | $300 – $800 | $3,000 – $10,000+ |
| Weight (empty) | 50 – 100 lbs | 300 – 800 lbs |
| Setup Time | 15 – 30 minutes | Professional delivery required |
| Portability | Fully portable, can be moved or stored | Permanent placement, extremely difficult to move |
| Insulation | Basic, relies on cover and air jacket | Superior with foam-insulated shell and cabinet |
| Durability | 3 – 5 years with proper care | 10 – 20+ years |
| Seating Comfort | Basic floor seating, no molded seats | Molded seats with adjustable jets |
| Jet Power | Air jets, moderate pressure | Hydro jets, strong targeted massage |
| Garage Floor Impact | Minimal, can be placed on any flat surface | Significant, requires structural assessment |
| Reversibility | Can be deflated and garage returned to original use | Permanent conversion, garage space is committed |
When Inflatable Wins
An inflatable hot tub is the clear winner for garage use when budget, flexibility, and reversibility matter. If you are not sure you want to commit your garage permanently to a spa, an inflatable lets you test the concept for a season before making a larger investment. If you need to move the tub to a different location, store it during summer, or share it between homes, portability is invaluable. And if your garage floor has any structural concerns, the lightweight nature of an inflatable eliminates the need for a costly structural assessment.
When Hard-Side Wins
A hard-side hot tub wins when you are committed to the garage spa as a permanent feature and want the best possible experience. The insulation is superior, the jets are more powerful, and the overall build quality means a longer lifespan. If you plan to use the tub daily for years and want genuine hydrotherapy benefits, the investment in a hard-side model pays dividends over time. Just be prepared for the logistics of delivery, permanent floor space commitment, and higher electricity costs from the additional pumps and features.
For most homeowners exploring a garage hot tub for the first time, starting with an inflatable model is the smart move. You can always upgrade to a hard-side tub later once you know the setup works for your space and lifestyle. For guidance on choosing the right inflatable model, browse our picks for the best inflatable hot tub for winter use.
Maintenance Guide for Your Garage Hot Tub
Regular maintenance keeps your water clean, your tub functioning properly, and your garage environment healthy. A well-maintained inflatable hot tub can last 3 to 5 years or more, while a neglected one might develop problems within months. The good news is that routine maintenance takes just 10 to 15 minutes per week once you establish a rhythm.
Weekly Maintenance Routine
Test the water chemistry. Use test strips or a digital test kit to check pH (target 7.2 to 7.8), alkalinity (target 80 to 120 ppm), and sanitizer level (chlorine 3 to 5 ppm or bromine 4 to 6 ppm). Adjust chemicals as needed using the products recommended by your tub manufacturer. Testing takes less than two minutes and prevents the majority of water quality problems before they start.
Check the water level. Top off the water as needed to maintain the recommended fill line. Evaporation naturally reduces the water level over time, especially in a garage where the heater runs frequently. Use a garden hose with a gentle spray to avoid splashing chemicals or disturbing the water surface.
Skim the surface. Remove any floating debris, hair, or skin cells from the water surface using a small net skimmer. This prevents particles from being drawn into the filter and extending its life. In a garage environment, dust and cobwebs are common additions to the water, so a quick skim before each use is good practice.
Clean the filter. Remove the cartridge filter and rinse it thoroughly with a garden hose. If it shows signs of buildup or discoloration, soak it overnight in a filter cleaning solution designed for hot tub filters. Replace the filter every 3 to 6 months depending on usage. A clean filter maintains water circulation efficiency and reduces the chemical load needed to keep water clean.
Monthly Maintenance
Shock the water. Once a month, or whenever the water looks cloudy or develops an odor, add a shock treatment to oxidize contaminants that regular sanitizer levels cannot handle. Follow the product instructions for dosage based on your tub’s water volume. Shock the water in the evening when the tub is not in use, and wait at least 20 minutes before entering.
Inspect the tub walls and seams. Run your hand along the interior walls and floor of the tub, feeling for soft spots, bubbles, or areas where the material feels thinner than surrounding areas. These can indicate early signs of wear or air leaks. Catching these issues early allows you to patch them with the repair kit that came with your tub before they become larger problems.
Clean the tub interior. Use a non-abrasive cleaner or a solution of white vinegar and water to wipe down the interior walls and floor. Avoid harsh chemicals, abrasive scrubbers, or household cleaners not designed for vinyl surfaces, as these can damage the tub material and void your warranty.
Garage-Specific Maintenance
Check the garage environment. Inspect the walls, ceiling, and floor around the tub for signs of moisture damage, mold, or mildew. Pay special attention to corners and areas behind the tub where air circulation is limited. Address any signs of mold immediately with a vinegar solution or commercial mold remover, and identify the moisture source to prevent recurrence.
Inspect your ventilation equipment. Clean the dehumidifier filter monthly and check the exhaust fan for dust buildup. Both devices work less efficiently when dirty, and in a garage environment where dust is abundant, regular cleaning is essential. Replace the dehumidifier filter annually and have the exhaust fan motor inspected every two years.
Check electrical connections. Visually inspect the GFCI outlet, power cord, and any extension cords for damage, discoloration, or loose connections. Test the GFCI outlet monthly by pressing the test and reset buttons. If the GFCI fails to trip or reset, have it replaced immediately by a licensed electrician.
Draining and Refilling
Drain and refill your hot tub every 3 to 4 months, or sooner if the water chemistry becomes difficult to maintain despite regular testing and adjustment. Use a submersible pump to drain the water through a garden hose routed to an appropriate outlet. Once empty, clean the interior thoroughly, inspect all surfaces, and inflate the tub to the recommended pressure before refilling with fresh water.
When refilling, use a hose filter to remove chlorine, minerals, and sediment from your tap water. This gives you a clean baseline for adding chemicals and reduces the amount of sanitizer needed to reach proper levels. Fill the tub to the recommended level, turn on the heater, and add chemicals according to the manufacturer’s instructions before the first use.
Budget Breakdown: What a Garage Hot Tub Setup Really Costs
Understanding the full cost picture helps you plan realistically and avoid surprises. Here is a detailed breakdown of what you can expect to spend on a complete garage hot tub setup, from the basic budget-friendly approach to the premium experience.
Essential Costs
Recommended Extras
Total Cost Scenarios
Budget Setup ($660 to $1,530): Basic inflatable tub, foam tile flooring, 30-pint dehumidifier, GFCI outlet installation, and essential chemicals. This gets you a functional garage spa that you can enjoy immediately with minimal modifications to the space.
Mid-Range Setup ($1,100 to $2,830): Mid-size inflatable tub with upgraded cover, rubber mat flooring, 50-pint dehumidifier, dedicated electrical circuit, exhaust fan, basic insulation, and a coordinated décor theme. This delivers a comfortable, attractive spa experience with proper moisture management.
Premium Setup ($1,800 to $4,430): Top-of-the-line inflatable tub, epoxy-coated floor, dehumidifier with continuous drain, dedicated circuit, exhaust fan, full wall and ceiling insulation, infrared garage heater, comprehensive décor with room dividers, and a complete accessory package. This creates a genuine spa retreat that rivals permanent installations at a fraction of the cost.
Do the work yourself where possible. Flooring installation, insulation, painting, and décor are all manageable DIY projects that save hundreds in labor costs. Reserve professional help for electrical work, which is not worth the safety risk of attempting as a DIY project. Many home improvement stores offer free workshops on insulation, painting, and epoxy flooring that can build your confidence and skills.
Ongoing Monthly Costs
Plan for $30 to $70 per month in ongoing costs, broken down as follows: electricity for the hot tub heater ($15 to $40 depending on usage and insulation), dehumidifier electricity ($5 to $15), water and sewer charges for filling and refilling ($3 to $8), and chemicals ($5 to $15). These costs are remarkably affordable compared to gym memberships, spa visits, or the operating costs of a permanent hot tub, which typically run $50 to $100 per month in electricity alone.
Frequently Asked Questions
Most inflatable hot tubs are “Plug and Play” (110V), meaning they fit standard outlets. However, ensure no other heavy appliances (like freezers or power tools) are on the same circuit to avoid tripping breakers. For more details, read: Do inflatable hot tubs use a lot of electricity?
You will need a submersible sump pump. Do not try to rely on gravity drainage unless you can route a hose out under the garage door. A sump pump can push the water out through a window or into a utility sink in minutes.
It can if you aren’t careful. Hot water evaporates and increases humidity. Always keep the cover on when not in use, and run a dehumidifier or crack the garage door slightly while soaking to allow moisture to escape.
A filled 4-person tub weighs over 2,000 lbs. Standard concrete garage slabs are perfectly fine for this weight. However, if you have a raised wooden floor garage (rare, but possible), you must reinforce it.
Most inflatable hot tubs take 12 to 24 hours to reach the maximum temperature of 104°F when filled with cold water. A warmer garage significantly reduces heat-up time. Filling with warm water from the tap (if available) can cut the heating time in half. Once at temperature, maintaining it requires far less energy than the initial heat-up.
Absolutely. In fact, year-round use is one of the biggest advantages of a garage setup. The garage protects the tub from rain, snow, and UV damage that degrade outdoor tubs. With proper insulation and heating, you can enjoy comfortable soaking even in the coldest months. Many garage hot tub owners report that winter use is their favorite because the contrast between the cold garage air and warm water is especially invigorating.
Proper ventilation is the key. Run an exhaust fan during and after each use to remove chemical-laden air. Avoid over-chlorinating the water, which creates stronger odors. Bromine is generally less odorous than chlorine for indoor use. Storing chemicals in sealed containers in a separate area also prevents ambient chemical smells from permeating the garage space.
Unprotected walls can develop moisture damage over time, including peeling paint, efflorescence on concrete, and mold growth on drywall. The solution is threefold: maintain humidity below 55 percent with a dehumidifier, apply mold-resistant paint to walls and ceiling, and ensure adequate ventilation during every use. With these precautions, your garage walls will remain in excellent condition.
A 4-person round tub (approximately 71 to 78 inches in diameter) fits comfortably in most garages while leaving room for movement around it. For a two-car garage, you can go up to a 6- or 8-person model (85 inches or larger) without sacrificing storage space. Measure your garage carefully and allow 24 inches of clearance around the tub for access and airflow. Remember that inflated dimensions are larger than the stated capacity suggests.
One of the greatest advantages of an inflatable hot tub is full reversibility. Simply drain the water, deflate the tub, fold it up, and store it in a closet or shed. Remove the floor protection and the garage is ready for your vehicle again. This flexibility is impossible with a permanent hard-side tub, making the inflatable option ideal for homeowners who want the spa experience without permanently committing their garage space.
The warm water can attract insects, particularly during summer months. Keep the cover on when the tub is not in use, and consider installing a screen on the garage door opening if you plan to soak with the door open. Mosquito dunks (BTI-based larvicide) placed in the tub water are safe for humans and pets but prevent mosquitoes from breeding in standing water. Spiders may also find the warm, humid environment appealing, so regular cleaning of cobwebs and corners helps keep them at bay.
Yes, ceiling insulation is highly recommended. Heat rises, and an uninsulated garage ceiling allows warmth to escape into the attic or roof space, making it harder to maintain ambient temperature. Ceiling insulation traps warm air in the garage, reduces the strain on your space heater, and improves the effectiveness of your hot tub’s cover. If your garage ceiling is open to the attic, insulation is especially important because attic temperatures can be extreme in both summer and winter.
Condensation forms when warm, moist air contacts cooler surfaces. To prevent it: run your dehumidifier and exhaust fan during every use, insulate cold walls and windows to bring their surface temperature closer to the air temperature, keep the garage door closed while soaking to prevent cold air from cooling interior surfaces, and use a ceiling fan to keep air circulating. If condensation persists despite these measures, it indicates your ventilation capacity needs to be upgraded.
While you can fill the tub with softened water, it is generally not recommended. Softened water has elevated sodium levels that can cause excessive foaming and may reduce the effectiveness of chlorine-based sanitizers. If you have extremely hard water, filling through a hose filter is a better compromise that removes minerals without adding sodium. Hard water scaling on the tub’s heating element can be managed with regular descaling treatments instead.