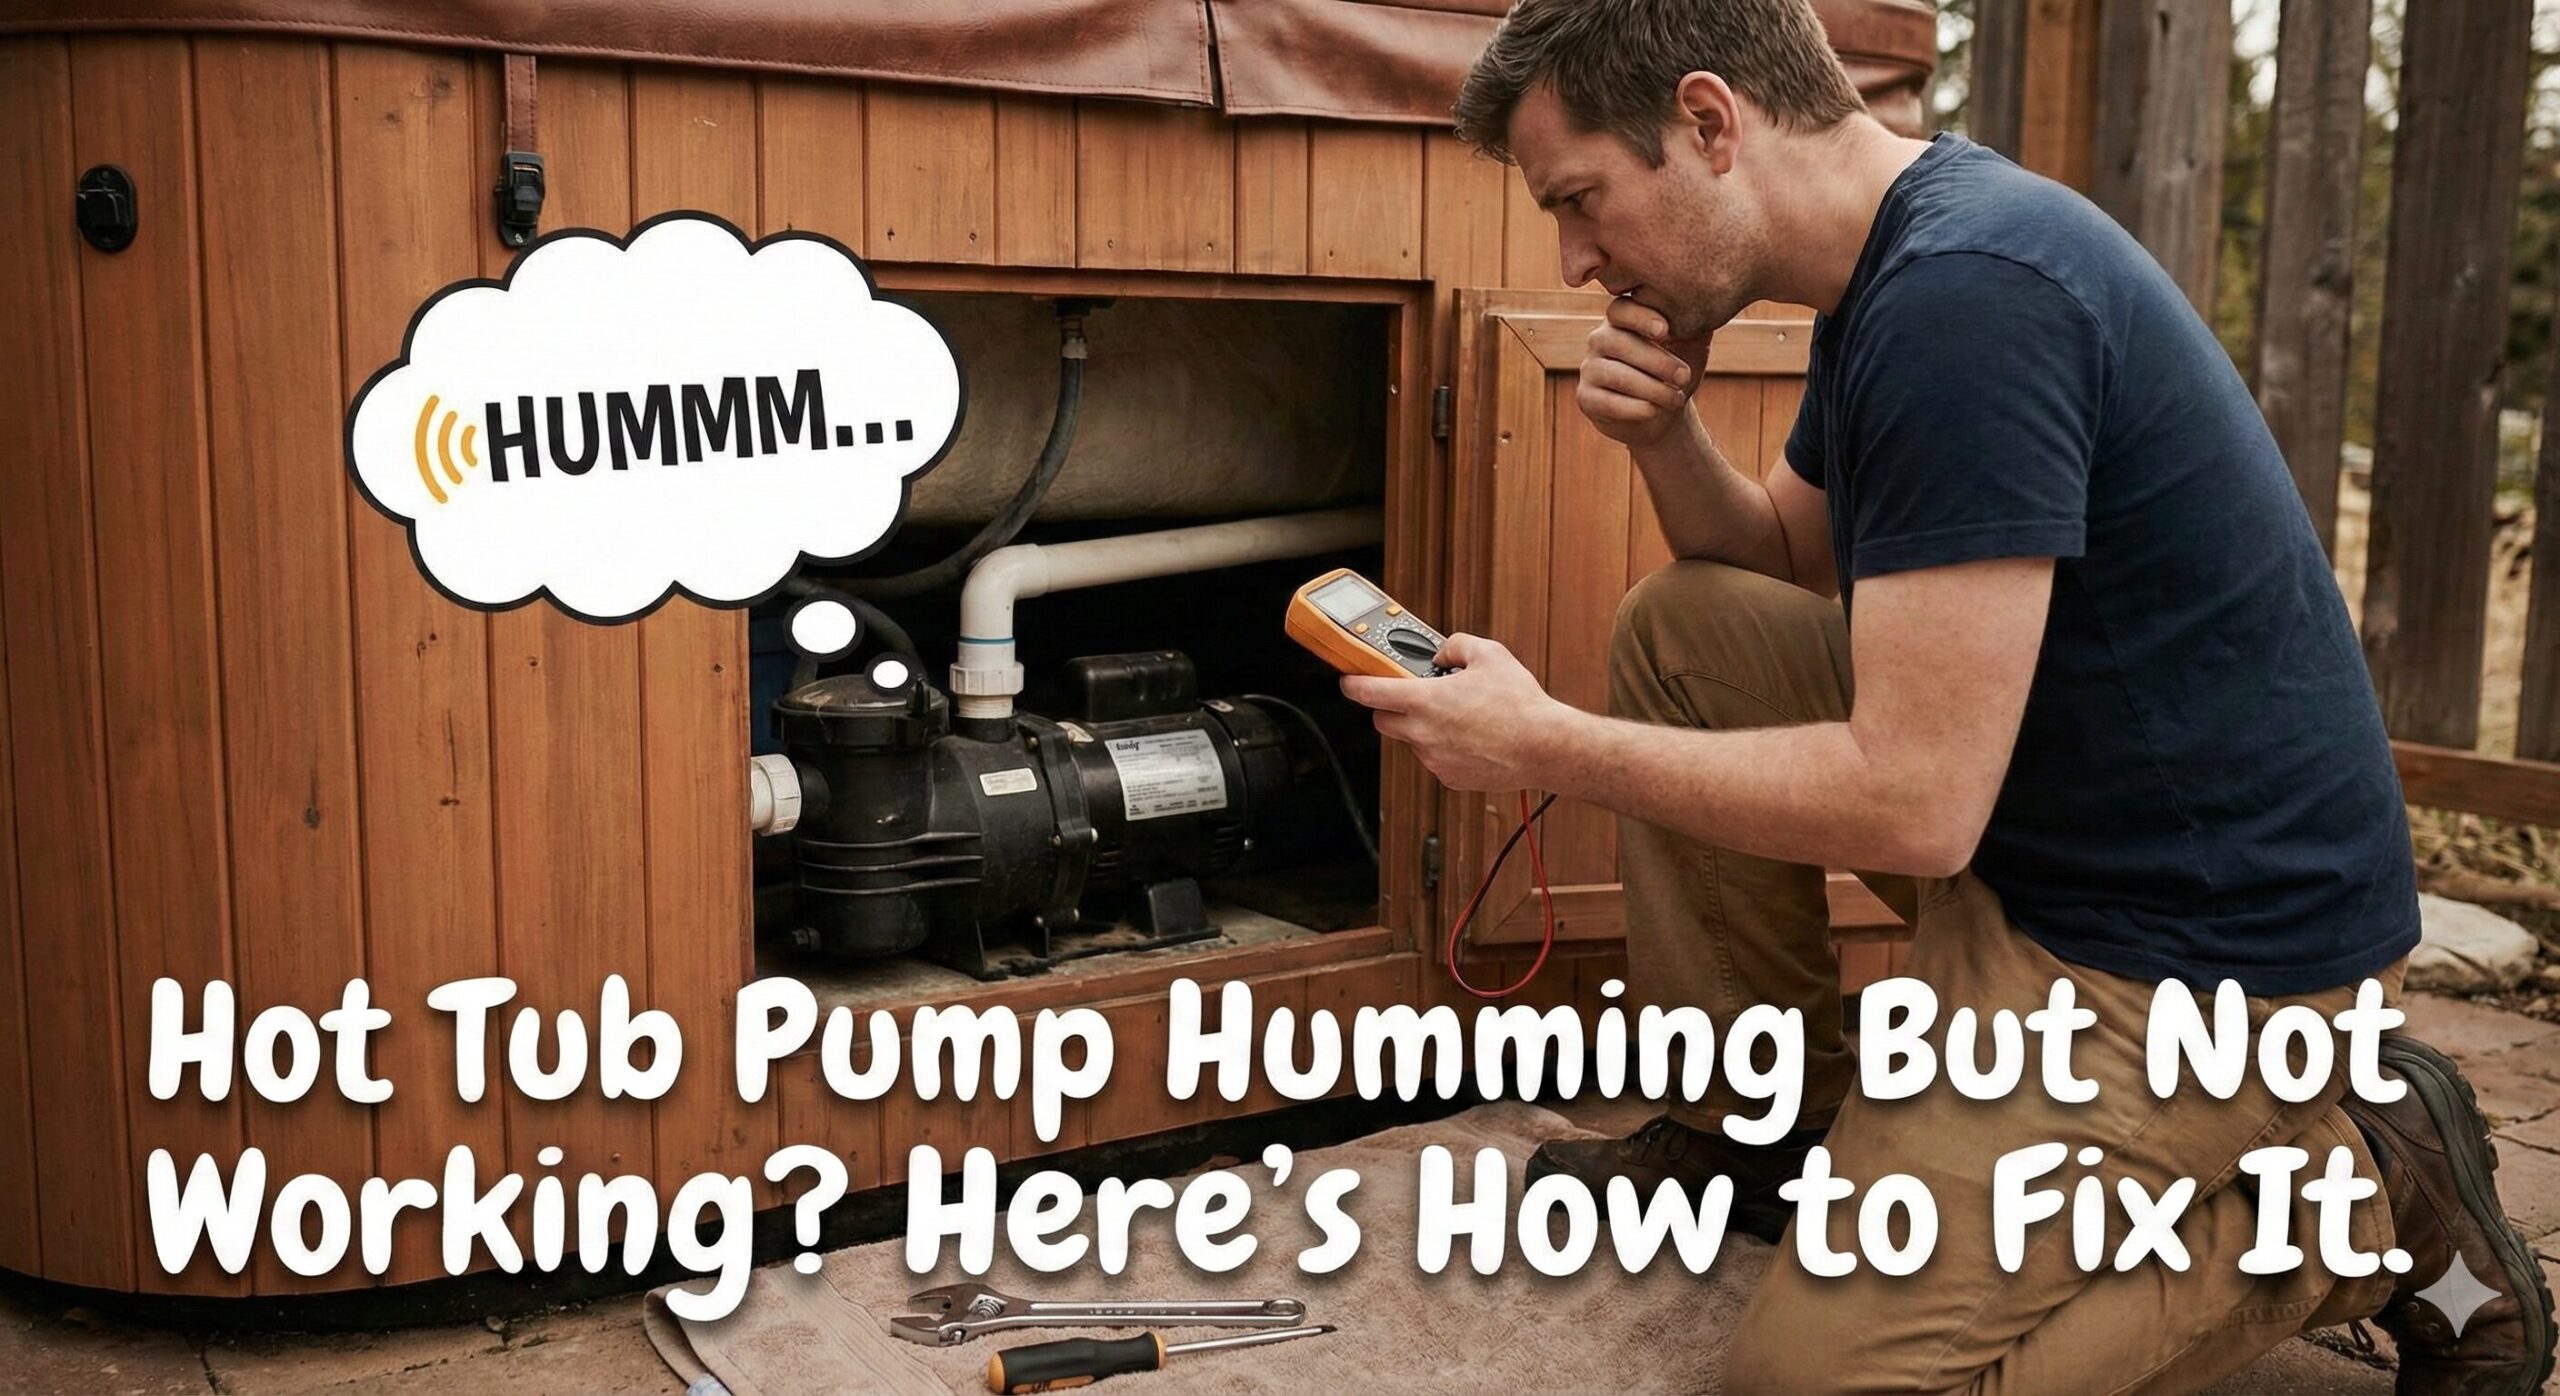
Hot Tub Pump Humming But Not Working? Here’s How to Fix It
There are few things more frustrating for a hot tub owner. You are ready for a soak, you turn on the jets, and instead of the soothing rush of water, you hear it: a low, menacing humming sound.
No water is moving. The jets are dead. But the motor is clearly trying to do something.
When a hot tub pump hums but won’t pump water, it usually means the motor is receiving power but cannot rotate. This is rarely a fatal error for the machine. In fact, in 90% of cases, it comes down to one of three issues: trapped air (an air lock), a jammed impeller, or a bad start capacitor.
Before you spend hundreds of dollars on a replacement pump or call a technician, follow this step-by-step troubleshooting guide. We will start with the easiest fixes and work our way up.
This guide has grown into one of the most complete pump-humming resources on the web, because the truth is that “the pump is humming” can mean five or six different things depending on your tub, your pump type, and how long the tub has been sitting. Below, we cover not just the three classic causes, but also GFCI and breaker behavior, priming cycles, control panel error codes, cavitation from low water, bearing wear, wet end repairs, brand-specific quirks for inflatable and hard-shell spas, the tools you actually need, a full repair-versus-replace cost breakdown, how to measure your existing pump so you order the right replacement, freeze protection, the mistakes that turn a $20 fix into a $300 one, and when it genuinely makes sense to stop DIY-ing and call a pro.
The Diagnostic Matrix: What’s Wrong?
Use this table to quickly identify the likely culprit based on when the problem started.
| Scenario | Likely Cause | Difficulty to Fix |
|---|---|---|
| Just refilled the tub | Air Lock (Trapped Air) | Easy (No tools) |
| Tub sat unused for months | Seized Impeller/Bearings | Medium (Screwdriver needed) |
| Sudden failure / Old Pump | Start Capacitor Failure | Hard (Electrical work) |
| Loud grinding + Humming | Bad Bearings | Hard (Replace pump) |
| Water level low or filter filthy | Cavitation / Starved Suction | Easy (No tools) |
| Breaker trips immediately on power-up | GFCI Fault or Short in Motor Windings | Hard (Electrical work) |
| Hums, then a burning smell | Motor Winding Failure | Hard (Replace pump) |
How Your Hot Tub Pump Actually Works
Before you start unscrewing anything, it helps to understand what’s actually inside the plastic housing bolted to your equipment pack. A spa pump is really two separate assemblies joined at a shared shaft: the wet end and the dry end.
Wet End vs. Dry End
The wet end is the part that touches water. It contains the impeller (a spinning fan-like disc that flings water outward through centrifugal force), the volute (the snail-shell-shaped housing that channels that flung water toward the outlet), the mechanical seal (which keeps water from leaking backward into the motor), and the unions that connect the whole assembly to your plumbing.
The dry end is the electric motor itself. It never touches pool water directly. Inside is a stator with copper windings, a rotor on the shaft, bearings that let the shaft spin freely, and — on single-speed and two-speed AC induction motors — a start capacitor that gives the rotor its initial push.
When people say “the pump is humming,” the noise is almost always coming from the dry end (the motor trying and failing to spin), while the underlying blockage is often in the wet end (impeller) or the plumbing (air lock).
Single-Speed, Two-Speed, and Variable-Speed Motors
Not all spa pumps behave the same way when they fail, because there are three common motor architectures:
- Single-speed pumps run at one fixed RPM. They’re simple, cheap to replace, and almost always use a start capacitor. This is the most common type on inflatable and mid-range hard-shell spas.
- Two-speed pumps have a low setting (for filtration and quiet circulation) and a high setting (for jets). They use a dual-voltage or dual-winding motor and typically still rely on a start capacitor for the high-speed winding. If your pump hums only on high speed but runs fine on low, the capacitor is almost always the culprit.
- Variable-speed pumps use an electronically commutated motor (ECM) or a permanent magnet motor controlled by a circuit board rather than a capacitor. These rarely “hum and fail to start” in the classic sense — if a variable-speed pump won’t spin, the issue is more likely a failed control board, a bad hall-effect sensor, or a firmware fault, and troubleshooting shifts toward the electronics rather than a physical capacitor swap.
Knowing which type you have changes your troubleshooting path. If you’re not sure, look for a black canister roughly the size of a D battery mounted on top of the motor — if you see one, you almost certainly have a single-speed or two-speed pump with a start capacitor.
GFCI & Breaker Issues vs. a Genuine Humming Motor
Before diving into pump repair, rule out the electrical supply itself. A shockingly large number of “dead pump” service calls turn out to be a tripped Ground Fault Circuit Interrupter (GFCI) or main breaker — not a pump problem at all.
How to Tell the Difference
If your hot tub shows absolutely no signs of life — no display, no hum, nothing — start at the breaker panel and the GFCI outlet or spa disconnect box, not at the pump. A tripped GFCI produces silence, not humming. A pump that hums is, by definition, receiving power; the fault has already moved past the breaker and into the motor or its immediate wiring.
That said, GFCI trips and pump failures are related. A short inside a failing motor’s windings is one of the most common reasons a GFCI trips repeatedly. If you reset the GFCI, the tub powers up, the pump hums for a second, and the GFCI trips again — that pattern points strongly to a motor winding short rather than a simple capacitor or air lock issue.
| Symptom | Most Likely Cause |
|---|---|
| No display, no sound, nothing happens | Tripped GFCI/breaker, blown fuse, or no incoming power |
| Display is on, but pump hums when activated | Locked rotor: air lock, seized impeller, bad capacitor |
| GFCI trips the instant the pump is commanded on | Shorted motor winding or moisture inside the motor |
| Pump runs fine, then trips breaker after 10–20 minutes | Overheating motor, often from a seized bearing or restricted flow |
Solution 1: Fixing an Air Lock (Most Common)
If you recently drained and refilled your hot tub, or if the water level dropped too low, you almost certainly have an air lock. This happens when a bubble of air gets trapped in the plumbing near the pump. The pump’s impeller spins in the air pocket, unable to grab onto water to push it through.
The motor hums because it is spinning freely without resistance, or straining to prime.
How to Bleed the Air
- Turn off the breaker: Never work on the pump while it is running.
- Locate the Union Nut: Find the large plastic nut connecting the plumbing to the intake side of the pump.
- Loosen slightly: Slowly loosen this nut until you hear a hissing sound (air escaping) and see a trickle of water.
- Tighten and Test: Once water flows steadily, hand-tighten the nut and turn the power back on.
If loosening the union doesn’t produce a hiss or a trickle within a few seconds, the air pocket may be located further upstream — often at the highest point of plumbing between the filter housing and the pump inlet. On some cabinet-style hard-side spas, there is a dedicated bleeder valve (a small thumb-screw fitting, sometimes labeled) on top of the pump volute specifically for this purpose, separate from the main union. Turn it counter-clockwise a quarter turn, wait for the hiss and trickle, then snug it back down by hand — never with a wrench, since these small valves crack easily if over-tightened.
Understanding the Priming Cycle
“Priming” is the process of purging all trapped air from the plumbing so the pump can grab a solid column of water. Every time you refill a hot tub, it needs to reprime, and most modern control systems automatically enter a Priming Mode for the first several minutes after power-up.
The Two-Minute Rule
During priming mode, most systems run the pump on high speed for about two minutes at a time. By the end of that window, water should be flowing steadily — not surging or sputtering — from every jet. If it isn’t, turn the pump off, let the water settle for a minute, and run the two-minute cycle again. It’s common to need two or three attempts before every jet line is fully purged, especially on tubs with multiple pumps or long, looping plumbing runs.
If Priming Fails After Several Attempts
- Power down at the GFCI.
- Make sure any slice or gate valves are fully open (up position).
- Center any diverter valves so water can flow evenly through all zones.
- Open every jet on the tub so no line is dead-ended.
- Pull the filter cartridge and check the basket and suction covers for debris.
- Restore power and repeat the priming cycle with all pumps on high.
If the pump still won’t prime after a third attempt, stop trying to force it. Repeatedly running a pump dry — spinning with no water for cooling and lubrication — is one of the fastest ways to burn out a mechanical seal or overheat the motor.

Reading Your Topside Control Panel Error Codes
Most hard-side spas (and many inflatables) display a short alphanumeric code on the topside panel when something is wrong. These codes vary by manufacturer, but several patterns show up across nearly every brand.
| Common Code Pattern | Typical Meaning |
|---|---|
| Flashing “PR” or “Pr” | Spa is in Priming Mode — normal, wait it out |
| “FLO,” “FL,” or “dr” | Flow sensor isn’t detecting water movement — often an air lock or clogged filter |
| “HL” or “HTR” | Heater-related sensor fault, sometimes triggered indirectly by low flow |
| “OH” or “OHH” | Overheat — power off immediately and leave the cover open |
| “E02,” “SN1,” or similar (inflatables) | Model-specific fault, frequently air lock or sensor-related on inflatable spas |
| Blank display, no code | No power reaching the control system — check GFCI first |
Because exact codes differ so much between brands like Intex, Bestway, Jacuzzi, Hot Spring, Sundance, and Coleman, always keep your owner’s manual (or a photo of it) handy. If you’ve lost the paper manual, most manufacturers host a PDF version on their support pages that you can search for using your model number, usually printed on a sticker inside the equipment bay or on the pump’s motor label.
Solution 2: Unjamming a Seized Impeller
If your hot tub hasn’t been used in a while, calcium buildup or debris may have “glued” the impeller in place. The humming sound you hear is the magnetic coils inside the motor trying to force the shaft to turn, but it physically can’t.
This is also common if you have neglected water chemistry, leading to scale deposits. Regular care is vital—read our inflatable hot tub maintenance guide to stop buildup before it starts.
The Flathead Screwdriver Trick
Most hot tub pumps have an access point at the rear of the motor specifically for this problem.
- Cut the Power: Ensure the hot tub is completely unplugged or the breaker is off.
- Locate the Rear Shaft: Look at the back center of the motor. You should see a small opening or a plastic cap that can be popped off.
- Insert Screwdriver: Insert a flathead screwdriver into the slot on the end of the motor shaft.
- Spin Manually: Try to turn the shaft. It might be stiff at first. Wiggle it back and forth until it spins freely.
If the shaft spins freely by hand and you don’t have an air lock, the issue is likely the start capacitor.
If the Shaft Won’t Budge at All
Sometimes penetrating oil applied at the shaft seal (a few drops, left to soak for 10–15 minutes) will loosen scale enough to free the shaft with gentle back-and-forth pressure. Never force it violently with pliers directly on the shaft tip — you can bend the rotor shaft, which turns a simple cleaning job into a full motor replacement. If the shaft remains completely rigid after soaking and careful wiggling, the bearings themselves may have corroded solid, and the more realistic fix is a wet end or motor swap rather than continued manual freeing.
Low Water Level and Pump Cavitation
Not every “won’t start” complaint is a locked rotor. Sometimes the pump spins just fine but sounds rough, rattly, or intermittently loud — this is often cavitation, not a seized motor.
Cavitation happens when the pump doesn’t have enough water at its intake to fill the impeller chamber completely. Tiny vapor bubbles form and collapse violently inside the pump, producing a sound often described as gravel or marbles being tumbled inside the housing. Left unaddressed, cavitation pits and erodes the impeller over months of use.
Common Causes of Cavitation
- Water level below the recommended line — it should sit at least 1–2 inches above the highest jet, roughly mid-skimmer height.
- A clogged or collapsed filter cartridge starving the intake.
- Partially closed suction valves or a suction cover that’s cracked and drawing air instead of water.
- Ice or debris blocking an outdoor skimmer opening.
The fix is usually simple: top off the water level, pull and rinse (or replace) the filter, and make sure every suction fitting is fully seated and valve handles are in the correct open position. If the noise persists after these checks, inspect the impeller for chipped vanes — cavitation damage is one of the few impeller problems cleaning alone won’t fix.
Solution 3: The Start Capacitor
If the shaft spins freely by hand and you don’t have an air lock, the issue is likely the start capacitor. This is a small black cylinder battery-looking component sitting on top of the motor (usually under a metal hump/cover).
The capacitor acts like a battery that gives the motor a jolt of torque to get it moving. If it fails, the motor doesn’t have the strength to start spinning, so it just sits there and hums.
Signs of a Bad Capacitor:
- The motor hums but doesn’t spin.
- You can manually “jump start” the motor by spinning the shaft with a screwdriver while power is on (DANGER: Do not attempt this unless you are experienced).
- The capacitor looks swollen, bulged, or leaks oil.
Capacitors are cheap ($15–$30) and easy to replace if you are handy with basic tools. However, ensure you discharge the old capacitor before touching the terminals.
Matching the Replacement Capacitor Exactly
Capacitors are rated in two numbers printed on the side: microfarads (µF or MFD) and voltage (VAC). Both need to match your original part, or be within the manufacturer’s stated tolerance range (often ±5–10% on microfarads). A capacitor with too low a rating won’t deliver enough starting torque and the motor will hum again; one with too high a rating can overheat and shorten motor life. Always write down or photograph the two numbers on the old capacitor before you take it out, since the sticker can be hard to read once it’s off the motor and you no longer have the original for reference.
Understanding Locked Rotor Amps (Why Humming Is Dangerous)
To understand why a humming pump needs quick attention, it helps to know what “locked rotor amps” (LRA) actually means. Every AC motor is rated for two current draws: its normal running amps (the current it draws once spinning at operating speed) and its locked rotor amps — the current it draws in the split second before it starts moving, or continuously if it never manages to start at all.
LRA is always several times higher than running amps, often 4 to 6 times as much. A motor is engineered to tolerate that surge for a second or two during a normal start, when the windings briefly heat up before the rotor spins away the resistance and current drops back to a normal running level. The trouble starts when the rotor can’t spin — because of an air lock, a jammed impeller, or a failed capacitor. In that state, the motor keeps drawing locked-rotor-level current indefinitely instead of for a fraction of a second, and that current is entirely converted into heat inside the windings.
This is the electrical reason behind the advice you’ll see repeated throughout this guide: never let a humming pump run for more than a few minutes. The copper windings can reach temperatures high enough to melt their insulation within just a handful of minutes of sustained locked-rotor current, at which point the motor suffers a permanent winding short — turning what might have been a $20 capacitor swap into a full pump replacement.
Many spa packs include their own protection against this exact scenario, in the form of a thermal overload switch built into the motor that trips and cuts power if the windings get too hot. If your pump hums for 20–30 seconds and then goes silent on its own, that’s usually the thermal overload doing its job — not a new, separate fault. Give the motor time to cool (typically 15–30 minutes) before testing it again.
Testing a Start Capacitor with a Multimeter
Rather than guessing, you can confirm a suspect capacitor with an inexpensive multimeter that has a capacitance (F) setting.
- With power off and the capacitor discharged, remove the two wire leads, noting or photographing which wire went where.
- Set your multimeter to the capacitance (µF) setting.
- Touch a probe to each terminal.
- Compare the reading to the microfarad value printed on the capacitor’s label. A healthy capacitor reads within roughly 10% of its rated value.
- A reading of zero, a wildly low number, or “OL” (open loop) on the display indicates a failed capacitor that needs replacement.
If you don’t own a capacitance-testing multimeter, a simpler (though less precise) check is visual: unhook the capacitor and look for bulging at the top, cracks in the casing, or any oily residue seeping from the seams. Any of these is enough evidence to replace it — capacitors are cheap enough that testing “in doubt, swap it out” rarely costs you more than the price of a multimeter would have.
Replacing the Capacitor Step-by-Step
Once you’ve confirmed the capacitor is bad, swapping it is one of the more approachable electrical repairs on a hot tub, provided you respect the discharge and matching steps above.
- Kill power at the breaker or GFCI and confirm with a non-contact voltage tester at the motor before touching anything.
- Locate the capacitor — usually a black cylindrical canister under a metal or plastic hump on top of the motor, held by a strap or bracket.
- Discharge the capacitor by bridging its two terminals briefly with an insulated-handle screwdriver, even if you believe the tub has been unpowered for a while.
- Photograph the wiring before disconnecting anything. Note which color wire attaches to which terminal — most capacitors have two or three spade terminals, and getting them crossed can prevent the motor from starting correctly.
- Remove the mounting strap or bracket and slide the old capacitor free.
- Compare the microfarad (µF) and voltage rating of your new capacitor against the old one — they should match exactly, or fall within the tolerance printed on the label.
- Mount the new capacitor in the same bracket and reconnect the wire leads exactly as photographed.
- Restore power and test on a short cycle first, listening for a clean start rather than a hum.
Bearing Failure: What the Sounds Mean
If cleaning the impeller and replacing the capacitor doesn’t fix a humming or noisy pump, worn motor bearings are a common next suspect — especially on pumps that are five years old or older.
| Sound | Likely Meaning |
|---|---|
| Steady, high-pitched hum, motor doesn’t turn | Locked rotor: capacitor, air lock, or seized impeller |
| Loud, continuous grinding while running | Worn or dry motor bearings |
| Rattling or marble-like tumbling | Cavitation from low water/restricted flow, or debris inside volute |
| Squealing that rises and falls with speed | Bearing wear on a two-speed or variable-speed unit |
| Clicking followed by a burning smell | Motor winding damage — stop running the pump immediately |
One point of confusion worth clearing up: loose ball bearings found at the bottom of a hot tub are usually not from the pump motor at all. Many spinning jet inserts contain small ball bearings of their own, and those casings wear out over years of use, releasing the balls into the tub. If you find bearings in the water but the pump itself sounds fine, check your jets before assuming the pump motor is failing.
True motor bearing wear generally isn’t something you repair at home — by the time bearings are audibly grinding, the shaft has usually developed enough play that reseating them properly requires the specialized tools of a motor rebuild shop. For most residential pumps in this price range, a grinding motor is one of the clearer “replace the pump” signals rather than a “repair the pump” one.
Wet End Repair Basics: Seals, O-Rings, and Impellers
If your pump spins freely, the capacitor tests fine, but you notice water seeping from around the shaft where it enters the wet end, the mechanical seal has likely failed. This is a wear item on every pump and, unlike the motor itself, is designed to be replaced.
General Wet End Service Steps
- Cut power and drain water below the pump level, or close and cap the suction/return valves if your plumbing allows it.
- Disconnect the unions on both sides of the pump and remove it from the equipment bay.
- Separate the wet end (volute and impeller housing) from the dry end (motor) — typically four bolts running through the assembly.
- Unscrew the impeller from the motor shaft (often reverse-threaded — check your model’s direction before forcing it).
- Inspect and replace the mechanical seal, which sits directly behind the impeller.
- Replace any cracked or flattened O-rings on the volute face at the same time, since they’re inexpensive and you’re already in there.
- Reassemble in reverse order, hand-tightening unions to avoid cracking the plastic threads.
How Long Do Hot Tub Pumps Last?
With reasonable water chemistry and regular filter care, most residential spa pumps last somewhere in the range of five to eight years before the motor itself needs replacement, though individual components inside that window — capacitors, seals, O-rings — often need attention well before then.
Several factors shorten that lifespan noticeably:
- Chronic scaling from consistently high pH or alkalinity, which accelerates wear on the impeller and seal.
- Frequent dry-run events from repeated air locks that aren’t addressed quickly, each of which stresses the mechanical seal.
- Heavy year-round use in commercial or rental settings, which simply accumulates run-hours faster than an occasional-use residential tub.
- Poor filter maintenance, which forces the motor to work harder against restricted flow on every cycle.
Conversely, tubs with consistent chemistry, clean filters, and prompt attention to small issues (an air lock bled the same day it appears, rather than run for weeks) regularly get eight to ten years or more out of a single pump. Tracking roughly when your current pump was installed — even a rough guess based on when you bought the tub — is useful context the next time it develops a new noise, since a five-year-old pump humming for the first time is a very different diagnostic starting point than a six-month-old one.
Brand-Specific Notes
While the core troubleshooting logic is universal, a few brand-level differences are worth knowing before you start.
Inflatable Spas (Intex, Bestway/SaluSpa, Coleman)
These typically integrate the pump, heater, and filtration into a single sealed unit rather than separate bolt-on components. Air locks are extremely common after refilling because the plumbing runs are short and full of tight bends. Many models have a dedicated air-purge button or valve rather than a union you loosen by hand — check your specific model’s manual before assuming the same union-loosening steps apply. Because these integrated units are harder to service piece by piece, once the motor itself fails, whole-unit replacement is often more practical than component repair.
Hard-Side Spas (Jacuzzi, Hot Spring, Sundance, Bullfrog, and similar)
These use modular, separately replaceable pumps — commonly built by third-party manufacturers like Waterway, Balboa/Gecko, or Aqua-Flo, even when sold under the spa brand’s name. This is good news for DIY repair, since capacitors, seals, and even entire wet ends are widely available and not proprietary to the spa manufacturer. When shopping for a replacement pump, well-regarded industry names to look for include Waterway and Aqua-Flo for general reliability, alongside newer high-efficiency options built around ECM motors.
Two-Pump Systems
Larger hot tubs often run two separate pumps — one dedicated to jets (higher horsepower, runs only when jets are commanded) and one dedicated to circulation and filtration (lower horsepower, may run continuously or on a timer). If only your jet pump hums and fails, but quiet filtration continues normally, that confirms the fault is isolated to the jet pump rather than a shared power or control board issue.
Choosing a Replacement Pump Brand
If you’ve decided the pump is beyond repair, the aftermarket for spa pumps is dominated by a handful of manufacturers, most of which supply original equipment to multiple spa brands under license. Buying “the same brand as my hot tub” is often less important than buying a pump built to the same frame size, horsepower, and plumbing dimensions — because in many cases, the OEM part was manufactured by one of these companies anyway.
| Manufacturer | Reputation | Common In |
|---|---|---|
| Waterway | Widely regarded as a durable, easy-to-source industry standard | Many hard-side spa brands, aftermarket replacements |
| Aqua-Flo (Gecko) | Reliable, broad compatibility with common frame sizes | Both OEM and aftermarket use across multiple brands |
| Balboa | Frequently paired with Balboa control systems and spa packs | Mid-range hard-side spas |
| HydroMaster | Positioned as a durable, budget-friendly alternative to legacy brands | Aftermarket replacement market |
| OEM Integrated Units (Intex, Bestway) | Not sold as standalone motors; integrated with heater and filtration | Inflatable spas |
Whichever brand you choose, the deciding factors should always be frame size, shaft dimensions, horsepower, voltage, and plumbing fitting size — matching those correctly matters far more than matching the logo on the housing.
Understanding Your Spa Pack’s Role in Pump Problems
Not every “pump won’t start” issue lives inside the pump itself. The spa pack — the control box containing the circuit board, relays, and topside display wiring — sits between your GFCI and the pump, and a fault there can produce symptoms that look identical to a bad capacitor or seized motor.
A relay that has welded itself closed or open, a corroded connection at the pump’s power terminal block, or a failing control board can all prevent a perfectly healthy pump from receiving clean power. This is more common on tubs that have experienced water intrusion into the equipment bay, or on units left exposed to extreme humidity for years without a service inspection.
A useful diagnostic if you own a multimeter: with power on and the pump commanded to run, check for correct voltage directly at the pump’s terminal block (115V or 230V depending on your model). If voltage is present and correct but the motor still only hums, the fault is almost certainly in the pump itself. If voltage is missing, low, or fluctuating, the spa pack or its wiring — not the pump — is the more likely culprit, and that’s a job better suited to a technician familiar with your specific control system.
Jet Pumps vs. Circulation Pumps: Key Differences
On tubs equipped with two or more pumps, it’s worth understanding how the jet pump and the circulation pump differ, since their failure patterns and urgency are not identical.
Jet Pumps
Jet pumps are typically higher horsepower (often 2–4.5 HP) and designed for short, high-flow bursts rather than continuous duty. They only run when jets are actively commanded on, so their motors experience frequent start-stop cycling — which is exactly the kind of duty cycle that puts the most stress on a start capacitor. If your jet pump hums specifically when you press the jets button but the tub otherwise seems fine, the capacitor theory in this guide is especially likely to apply.
Circulation Pumps
Circulation pumps are smaller (often 1/15 to 1/4 HP), designed for continuous or near-continuous duty, and handle the slow, steady filtration and heating flow that keeps water clean and the heater safe between soaks. Because they run so many more cumulative hours than a jet pump, their most common failure mode tends to be bearing wear or seal wear from accumulated run-time rather than capacitor failure from start-stop cycling — though some circulation pumps do use capacitors as well, particularly two-speed models.
If your circulation pump fails, you may not notice immediately from the jets, but you’ll typically see filtration and heating symptoms first: cloudy or slowly-warming water, or a “flow” related error code on the topside display even though the jets work normally.
A Complete Diagnostic Walkthrough: Real-World Example
To tie everything in this guide together, here’s how a typical troubleshooting session actually unfolds in practice, following the logic laid out above from start to finish.
The scenario: An owner drains and refills their hot tub after a quarterly water change. On power-up, the display shows a flashing priming code, then settles into a normal-looking startup screen. When the jets are turned on, the pump hums loudly but no water reaches the jets.
Step one: Because the display is showing normally and the pump is audibly humming, power is clearly reaching the motor — so the first stop is not the breaker panel, but the plumbing. Since the tub was just refilled, an air lock is the leading suspect before anything else is touched.
Step two: With the breaker off, the owner locates the union nut on the pump’s intake side and loosens it slightly. A hiss of escaping air confirms the diagnosis. After a trickle of water appears, the union is hand-tightened and power restored.
Step three: The pump primes normally this time, running quietly with steady flow from every jet. Problem solved — total time invested, under ten minutes, zero dollars in parts.
A different outcome: Now imagine the same steps are followed, but loosening the union produces no hiss and no change in the humming. That rules out an air lock. With power off again, the owner checks the rear access point on the motor and finds the shaft is stiff but eventually spins freely after some gentle back-and-forth pressure. Because the shaft moves freely and there was no air lock, attention shifts to the start capacitor — which, on inspection, is visibly bulged at the top. A replacement capacitor matching the exact microfarad and voltage rating is installed, and the pump starts cleanly on the next test.
This walkthrough illustrates the core principle behind everything in this guide: work through the diagnostic matrix in order of likelihood and ease, confirm or rule out each cause with a quick physical check, and only move to the next (more invasive, more expensive) possibility once the simpler ones are eliminated.
Complete DIY Tool Checklist
Most of the fixes in this guide require nothing more than what’s already in a basic home toolbox. Here’s what to have on hand before you start:
- Flathead and Phillips screwdrivers (including a stubby one for tight equipment bays)
- Channel-lock pliers or adjustable pliers, for loosening plastic union nuts without over-torquing them
- A multimeter with capacitance (µF) measurement capability
- Insulated-handle screwdriver, for safely discharging capacitors
- Replacement O-ring kit sized to your pump model
- Silicone-based (not petroleum-based) lubricant for union O-rings
- A shop towel or two — wet ends hold more residual water than you expect
- A shallow container or bucket to catch drips when disconnecting unions
- Your pump’s model and serial number, photographed from the motor label, before you disassemble anything
Repair vs. Replace: A Cost Breakdown
Once you know what’s actually wrong, the next question is whether it’s worth fixing or worth replacing outright.
| Fix | Typical Parts Cost | DIY Difficulty |
|---|---|---|
| Bleeding an air lock | $0 | Very Easy |
| Freeing a seized impeller | $0–$15 (penetrating oil) | Easy |
| Start capacitor replacement | $15–$30 | Moderate |
| Mechanical seal / O-ring kit | $10–$25 | Moderate |
| Full wet end replacement | $60–$150 | Moderate–Hard |
| Complete pump replacement (pump + motor) | $150–$400+ | Moderate (mostly bolt-in) |
| Professional installation labor | $100–$200 | N/A |
As a rule of thumb: if your pump is under five years old and the fault is electrical (capacitor) or an air/debris obstruction, repair almost always makes financial sense. If the motor itself is grinding, has a shorted winding, or the pump is already seven-plus years old, the labor and part cost of a deep repair often approaches half the price of a brand-new pump — at which point replacement is usually the better value, since you also reset the reliability clock.
Measuring Your Pump for an Exact Replacement
If you do decide to replace the whole unit, ordering the correct frame size and horsepower matters more than the brand name on the housing. Spa pump motors are built around standardized “frame sizes,” most commonly 48-frame and 56-frame, which refer to the physical mounting dimensions rather than power output.
- Measure center-to-center bolt spacing on the mounting feet — this is the single most important number for frame compatibility.
- Check the shaft diameter and length where the impeller attaches, since 48-frame and 56-frame motors use different shaft dimensions.
- Note the horsepower and voltage stamped on the motor label (commonly 1.5–4.5 HP, and either 115V or 230V).
- Confirm the plumbing size at the unions — most residential spa pumps use 1.5″ or 2″ fittings, with some larger jet pumps stepping up to 2.5″ suction.
- Photograph the full motor label before removal, since matching an unlabeled used pump from memory is far harder than matching one from a clear photo.
If you’re ever unsure whether a specific replacement will bolt up to your existing wet end or plumbing, most spa parts suppliers are happy to confirm compatibility over email if you send them a photo of your current motor’s label and the wet end’s plumbing fittings.
Freeze Protection and Seasonal Pump Care
Cold weather introduces its own category of pump problems that can look identical to an air lock or seized impeller but have a different root cause: ice.
If a tub loses power during a cold snap — from a breaker trip, an outage, or simply being unplugged for a move — water sitting in the pump housing and plumbing can freeze solid. A frozen impeller won’t turn, and a motor commanded to start against solid ice will hum exactly like a seized or air-locked pump. Forcing it in this state risks cracking the housing or bending the shaft.
Most modern spa packs include a freeze-protection mode that automatically runs the pump periodically when internal temperature sensors detect near-freezing conditions, even if the tub is otherwise powered off standby. This only works, however, if the tub remains connected to power. If you suspect a frozen pump:
- Do not force the motor or repeatedly cycle power, which can damage the shaft or overheat the motor as it struggles against solid ice.
- Gently warm the equipment bay (a portable space heater kept a safe distance away, or simply time and ambient heat) rather than applying direct flame or boiling water to plastic components.
- Once thawed, inspect unions and fittings closely for hairline cracks before restoring full power — a crack that leaks slowly once thawed is a common aftermath of a hard freeze.
If you’re closing a tub for winter storage entirely rather than running it through freeze-protect mode, blow out the lines with a shop vacuum and follow your manufacturer’s specific winterization steps — an improperly winterized pump is one of the most common causes of cracked housings discovered the following spring.
Common DIY Mistakes That Make Things Worse
- Repeatedly cycling a locked-rotor pump. Flipping the breaker on and off hoping it will “catch” just stresses the windings further and increases the odds of a winding short.
- Over-tightening union nuts. Plastic threads strip or crack under too much torque — hand-tight plus a small final nudge with pliers is enough; a full wrench swing is not.
- Skipping the O-rings during a seal job. Reusing a flattened old O-ring “just this once” is the single most common reason for a leak reappearing within weeks of a repair.
- Forcing a seized shaft with metal pliers directly on the shaft tip. This risks bending the shaft, which turns a simple unseizing job into a full motor replacement.
- Running the pump dry to “test it.” Even a few seconds without water can damage the mechanical seal, which relies on a thin film of water for lubrication.
- Guessing at a capacitor’s rating instead of matching the label exactly. An incorrect microfarad rating can cause immediate re-failure or shortened motor life.
- Ignoring a tripping GFCI by swapping in a standard breaker. This removes a critical safety protection around water and electricity.
Warranty Considerations Before You DIY
Before opening up your pump, check whether your spa or pump is still under manufacturer or dealer warranty. Many warranties are voided by unauthorized disassembly, even for a simple capacitor swap, and some require an authorized technician to perform any electrical work to keep coverage intact.
A quick way to check: locate your spa’s purchase date and model/serial number, then contact the dealer or manufacturer’s support line before doing anything beyond the truly non-invasive steps (checking water level, resetting the GFCI, cleaning the filter). If the pump is out of warranty — which is common once a tub is more than two or three years old — the DIY repairs in this guide are generally safe territory for a reasonably handy owner.
Preventing Future Pump Failures
Once you get your hot tub running again, the goal is to keep it that way. Most pump failures are caused by strain on the motor.
1. Clean Your Filters: A clogged filter restricts water flow, causing the pump to work harder. If the pump struggles to pull water, it can overheat or develop air pockets. Learn how often to replace hot tub filters to keep the flow smooth.
2. Balance Your Water: High pH and alkalinity lead to calcium scaling. This scale coats the inside of your pump and heater, eventually seizing the impeller. You should know how often to shock a hot tub to keep organic matter from gumming up the works.
3. Maintain Correct Water Level: Check the waterline weekly, especially after use (splash-out lowers levels faster than evaporation) and top off before it drops below mid-skimmer height, which starves the pump and invites cavitation.
4. Run the Pump Periodically, Even in the Off-Season: A pump that sits completely idle for months is far more likely to develop scale-seized bearings than one that circulates regularly, even briefly, on a maintenance timer.
5. Follow a Simple Maintenance Schedule:
| Task | Frequency |
|---|---|
| Check water level | Weekly |
| Rinse filter cartridge | Every 2–4 weeks |
| Deep clean / soak filter | Every 1–3 months |
| Test and balance water chemistry | 1–2 times per week |
| Full drain and refill | Every 3–4 months |
| Inspect unions and visible plumbing for leaks | Every drain/refill cycle |

When to Call a Professional
Most of the fixes in this guide are approachable for an owner comfortable with basic tools. That said, a few situations are worth handing to a licensed spa technician or electrician rather than pushing through solo:
- Your GFCI trips repeatedly and you’ve confirmed it’s not user error — this points to a genuine short and involves working with line-voltage wiring.
- You smell burning or see scorch marks on the motor or wiring.
- The pump or spa is still under manufacturer warranty.
- You’ve replaced the capacitor and confirmed the shaft spins freely, but the motor still won’t run — this suggests a winding fault that requires motor-specific diagnostics.
- You’re not fully confident identifying or safely discharging a capacitor before handling it.
- The spa pack’s control board itself appears to be at fault (common on variable-speed pumps), since these require specialized programming or replacement.
There’s no shame in calling a pro at this point — spa technicians have the meters, replacement stock, and experience to turn a multi-hour guessing game into a 30-minute fix, and for anything touching line-voltage wiring, the cost of a service call is worth the safety margin.
Glossary of Spa Pump Terms
A quick reference for the vocabulary that comes up throughout this guide and in most manufacturer manuals.
| Term | Meaning |
|---|---|
| Wet End | The water-facing part of the pump: impeller, volute, seal, and unions. |
| Dry End | The electric motor assembly, including windings, bearings, and (usually) a start capacitor. |
| Impeller | The spinning disc inside the wet end that flings water outward toward the outlet. |
| Volute | The curved housing surrounding the impeller that channels flow toward the discharge port. |
| Union | The large plastic nut connecting pump plumbing to the rest of the spa, designed for tool-free disconnection. |
| Air Lock | A trapped pocket of air in the plumbing that prevents the impeller from grabbing water. |
| Priming | The process of purging trapped air so the pump can establish steady water flow. |
| Locked Rotor | A state where the motor is powered but the shaft cannot turn, drawing high current and producing a hum. |
| Start Capacitor | A component that stores a charge and delivers a burst of torque to get the motor spinning. |
| Cavitation | Vapor bubbles forming and collapsing inside the pump due to insufficient water at the intake, producing a gravel-like sound. |
| Frame Size | A standardized motor mounting dimension (commonly 48-frame or 56-frame) used to match replacement pumps. |
| GFCI | Ground Fault Circuit Interrupter — a safety device that cuts power when it detects current leaking to ground, common on spa circuits. |
| ECM | Electronically Commutated Motor, used in variable-speed pumps and controlled by a circuit board rather than a capacitor. |
Final Troubleshooting Checklist
If you’d rather work through this guide as a single punch list rather than section by section, run through these steps in order and stop as soon as one resolves the problem:
- Confirm the GFCI/breaker hasn’t tripped and the control panel is displaying normally.
- Check the water level — top off if it’s below mid-skimmer height.
- Pull and inspect the filter cartridge; rinse or replace if dirty.
- Listen carefully: a flat hum with no water movement points to a locked rotor; a rattling or gravel sound points to cavitation; a grinding sound points to bearings.
- If you just refilled the tub, bleed the air lock at the union nut.
- With power off, check whether the motor shaft spins freely by hand at the rear access point.
- If the shaft is stiff or seized, free it gently and recheck water chemistry to prevent recurrence.
- If the shaft spins freely and there’s no air lock, test or visually inspect the start capacitor.
- Replace the capacitor if it fails testing or shows physical damage, matching the microfarad and voltage rating exactly.
- If the motor still hums after a confirmed-good capacitor and free-spinning shaft, suspect a winding fault and consult a professional.
- If the pump runs but leaks, inspect and replace the mechanical seal and O-rings.
- If bearings are audibly grinding, plan for a wet end or full pump replacement rather than continued repair attempts.
Frequently Asked Questions
No. If the pump is humming, it is drawing high amperage (locked rotor amps). This causes the motor windings to heat up rapidly. If left humming for more than a few minutes, you could permanently burn out the motor or trip your breaker.
A new circulation pump typically costs between $150 and $400 depending on the horsepower. If you hire a professional for installation, expect to pay an additional $100–$200 in labor.
This is the classic symptom of an air lock. When you refilled the tub, air got trapped in the intake hose. Try bleeding the air from the union nut on the pump.
Yes. If the filter is extremely dirty, the pump may starve for water, causing cavitation (which sounds like loud rumbling or gravel) or causing the pump to overheat and seize.
A GFCI that trips as soon as the pump is commanded on usually points to a shorted motor winding or moisture inside the motor housing, rather than a simple capacitor or air lock issue. This is an electrical fault and is best diagnosed by a technician or qualified electrician rather than repeatedly resetting the breaker.
Check the motor label for the horsepower and wiring information. If your controls only offer “on” and “off” for the pump, it’s likely single-speed. If you have “low” and “high” jet settings, it’s likely two-speed and uses a start capacitor. Variable-speed pumps are typically controlled by a digital display with multiple percentage or RPM settings and are electronically commutated rather than capacitor-started.
Some gurgling and sputtering is normal during the first minute or two of priming as trapped air works its way out. However, a continuous flat hum with no water movement at all is not part of normal priming and indicates a locked rotor rather than an air pocket clearing on its own.
Not necessarily. Loose ball bearings in the water are usually from a worn spinning jet insert rather than the pump motor itself. Check your jets for a bearing casing that has worn through before assuming the pump motor is the source.
Yes. If water inside the pump or plumbing has frozen, the motor will hum against the solid ice just as it would against a seized impeller. Avoid forcing it — gently warm the equipment area and allow the ice to thaw before restoring full power, then check fittings for cracks before running the pump normally.
If the pump is under about five years old and the issue is electrical (capacitor) or an obstruction (air lock, debris, low water), repair is usually the more economical choice. If the motor bearings are audibly grinding, the windings have shorted, or the pump is already seven or more years old, the combined cost of parts and labor for a deep repair often approaches the price of a new pump, making replacement the better value.
Less than you’d think. Matching frame size, shaft dimensions, horsepower, voltage, and plumbing fitting size matters far more than matching the logo on the original pump, since well-known industry manufacturers like Waterway and Aqua-Flo supply pumps used across many different spa brands.
Yes. A failing relay, corroded terminal connection, or faulty control board in the spa pack can prevent the pump from receiving proper voltage, producing symptoms similar to a bad capacitor or seized motor. Checking voltage directly at the pump’s terminal block while it’s commanded on can help distinguish a spa pack issue from a pump issue.
This is often the motor’s built-in thermal overload protection cutting power before the windings overheat. It’s a safety feature responding to an underlying locked-rotor condition, not a separate problem — the original air lock, seized impeller, or bad capacitor still needs to be addressed, and the motor should be allowed to cool for 15–30 minutes before retesting.